BRF+ Customization
BRF+ Customization
General Information
- This page provides step-by-step instructions on how to configure the BRF+ table to manage default values of characteristics.
- Follow these steps to define rules for maintaining the default values based on business requirements.
How to maintain BRF+ rules
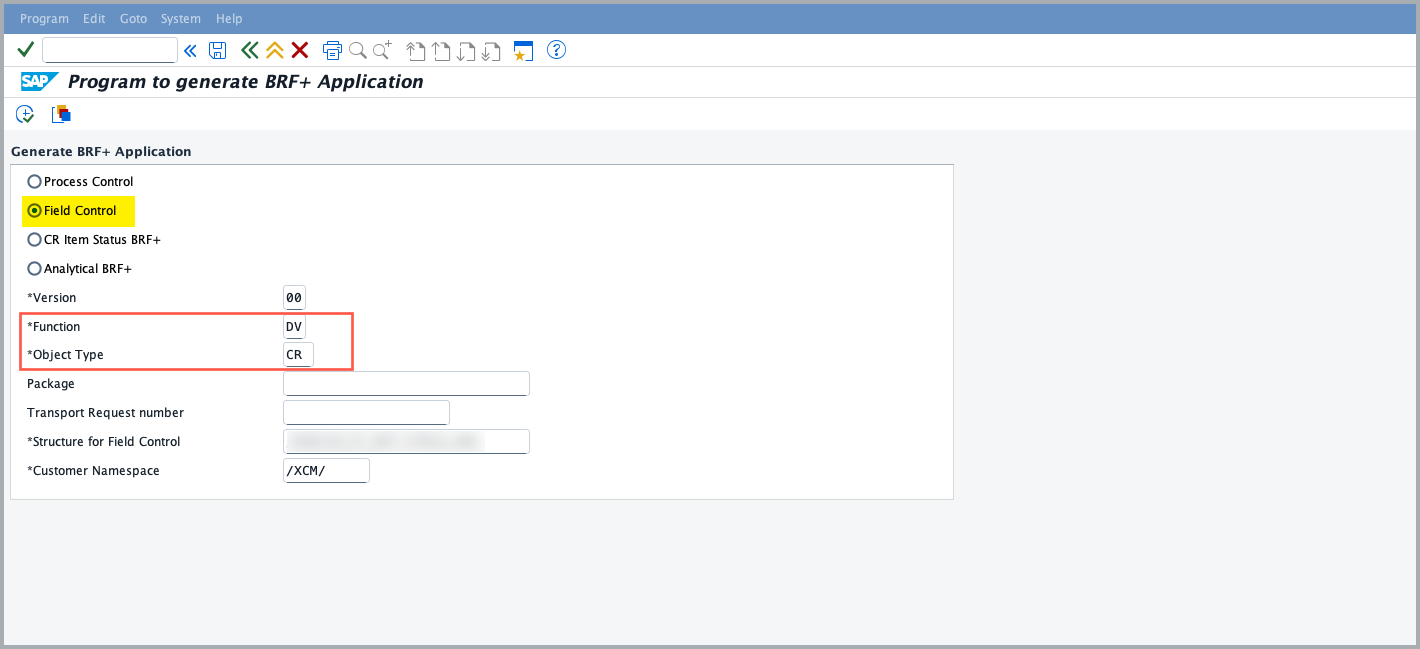
- To Generate the BRF+ Application for field control, run report program -
/XCM/BRF_GENERATE - Select the Field Control button and make sure that, for maintaining the default Characteristic, the Function is set to DV (Default Value) and the Object Type is set to CR. Then, enter the remaining details to generate the BRF+ decision table.
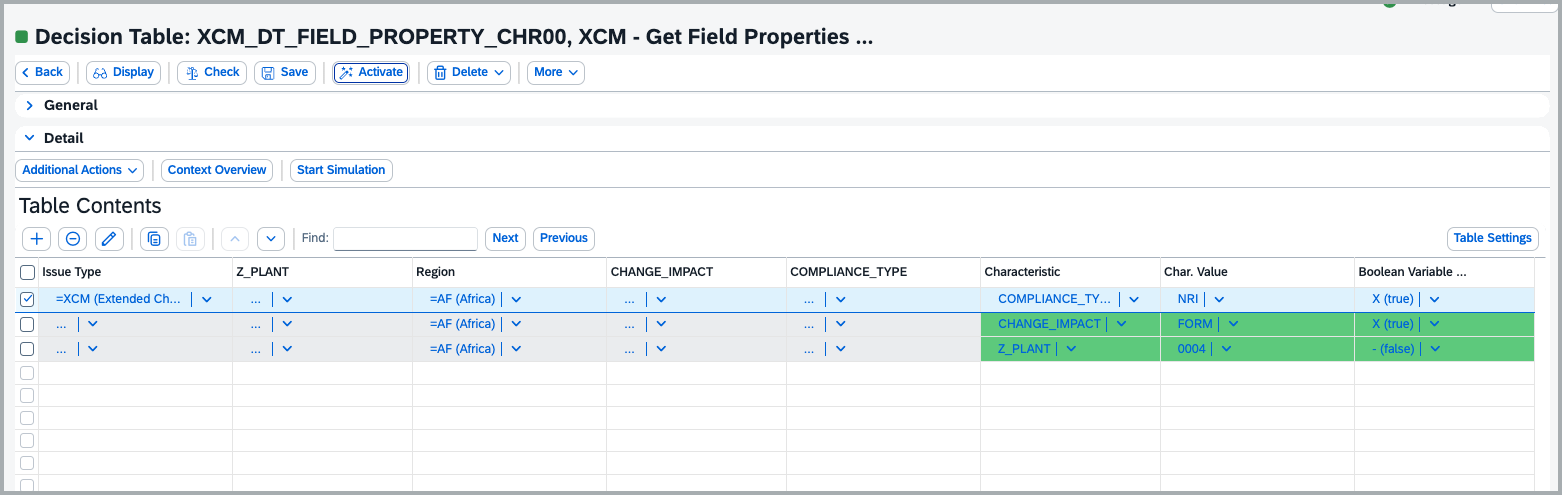
- Below is an example rule: once the BRF+ decision table is generated, maintain the required default values for classification.
- Row 1 takes Issue Type = XCM and Region = AF (Africa) as input. When these values are set on the Classification tab, the characteristic COMPLIANCE_TYPE is automatically populated with the char value NRI
- If a characteristic’s value was entered manually, and the user then changes the input values on the Classification tab to match a condition maintained in BRF+, the manually entered value is overwritten and replaced with the value from BRF+.
- The image below serves as a reference, illustrating how BRF+ customization populates Characteristic values:
- All 3 rows in the decision table had Region = Africa as input, each maintaining a different characteristic as output. This is how the default values appear once you select Africa in the Region field — Compliance Type is set to “No Regulatory Impact,” and the other characteristics from the matching rows are populated the same way.

See Also
Set default characteristic values and restrict maintenance by authorization
Keywords
default characteristics values, BRF+
Prerequisites
- the BRF+ function must be activated to ensure the rules are applied correctly.