Overview List Fields, Standard Columns and Filters
Overview List Fields
If you’re not satisfied with the default PPP customizing and want to add or hide fields in the Project (Project Version), Task, Checklist-Item or Item Overview, you can customize it using BRF+.
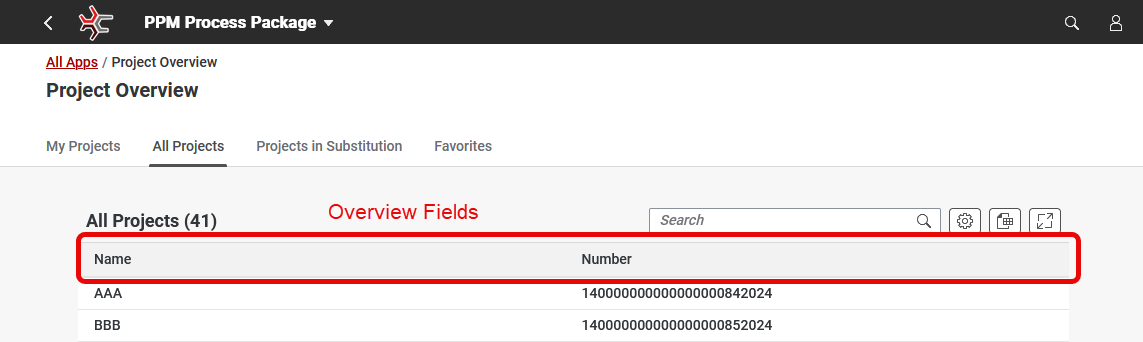
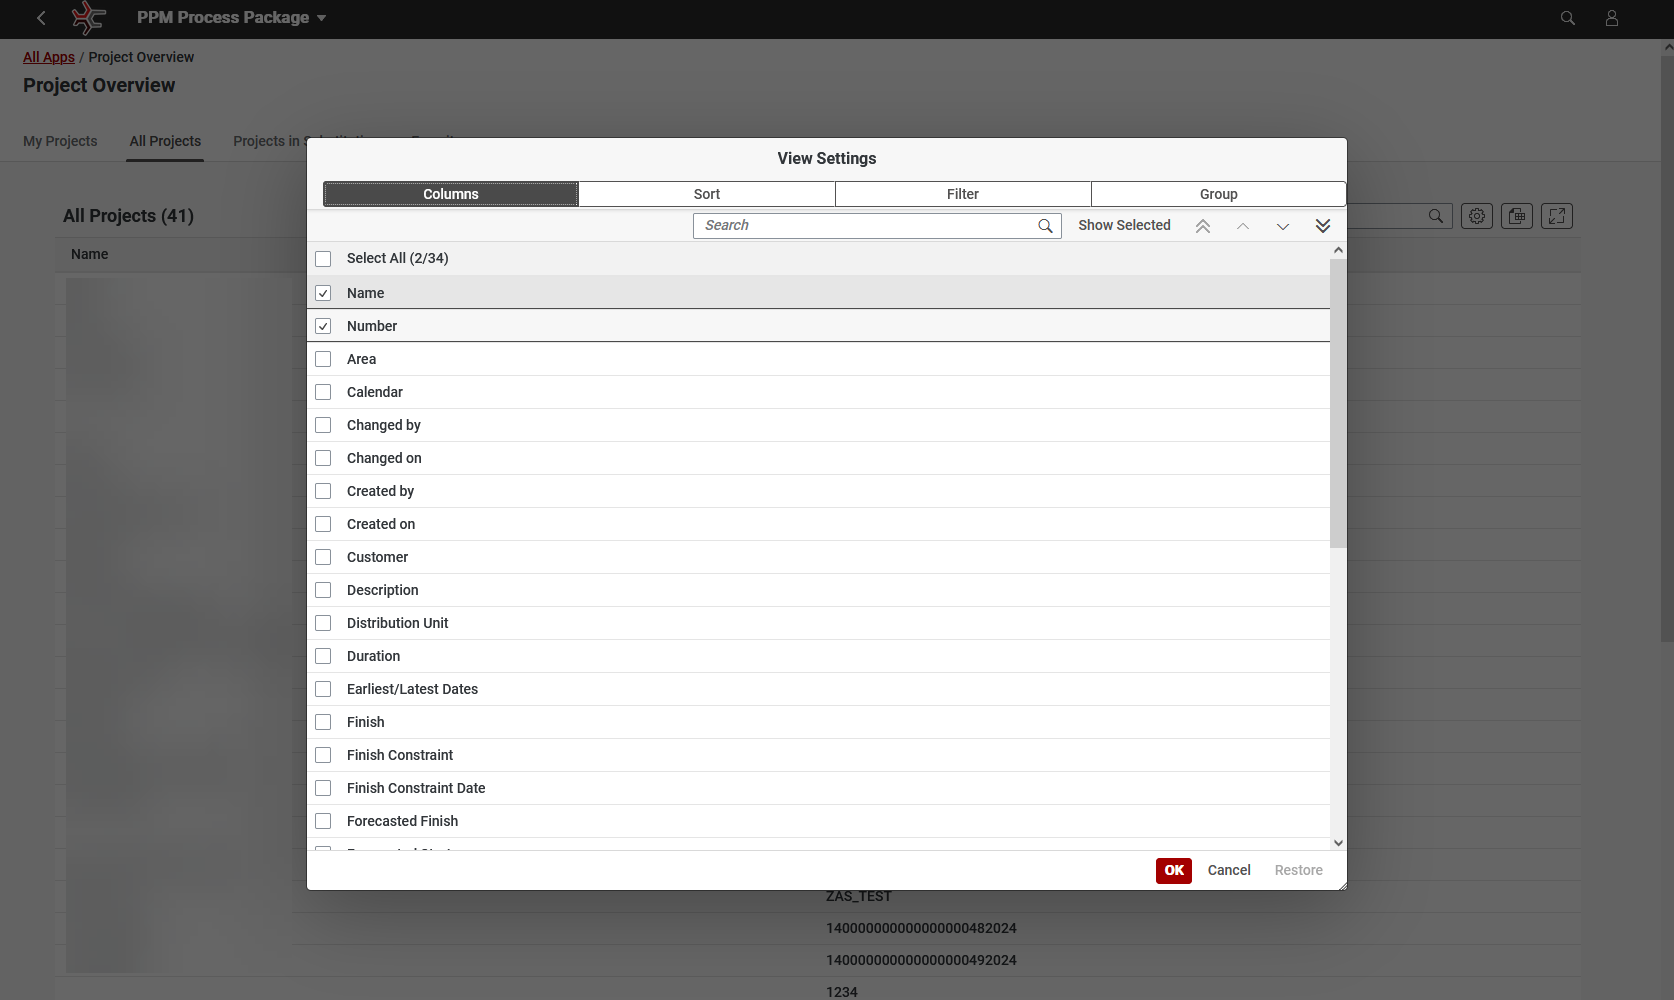
The general list of fields is available in the View Settings located in the top right corner of the overview table. By customizing the Overview List Fields, you can modify the view settings and fields available to a user, or you can add new fields that are not set by default but are needed for the Overview of your Items and Projects.
There are two main approaches to customizing Overview Fields:
- Use Existing Fields
Add or hide fields already available in the system. - Create New Fields
Define and configure entirely new custom fields.
Customizing Existing Overview Fields
You can use the Standard Application as a reference for the fields, but the customizing must be done in the Customer application.
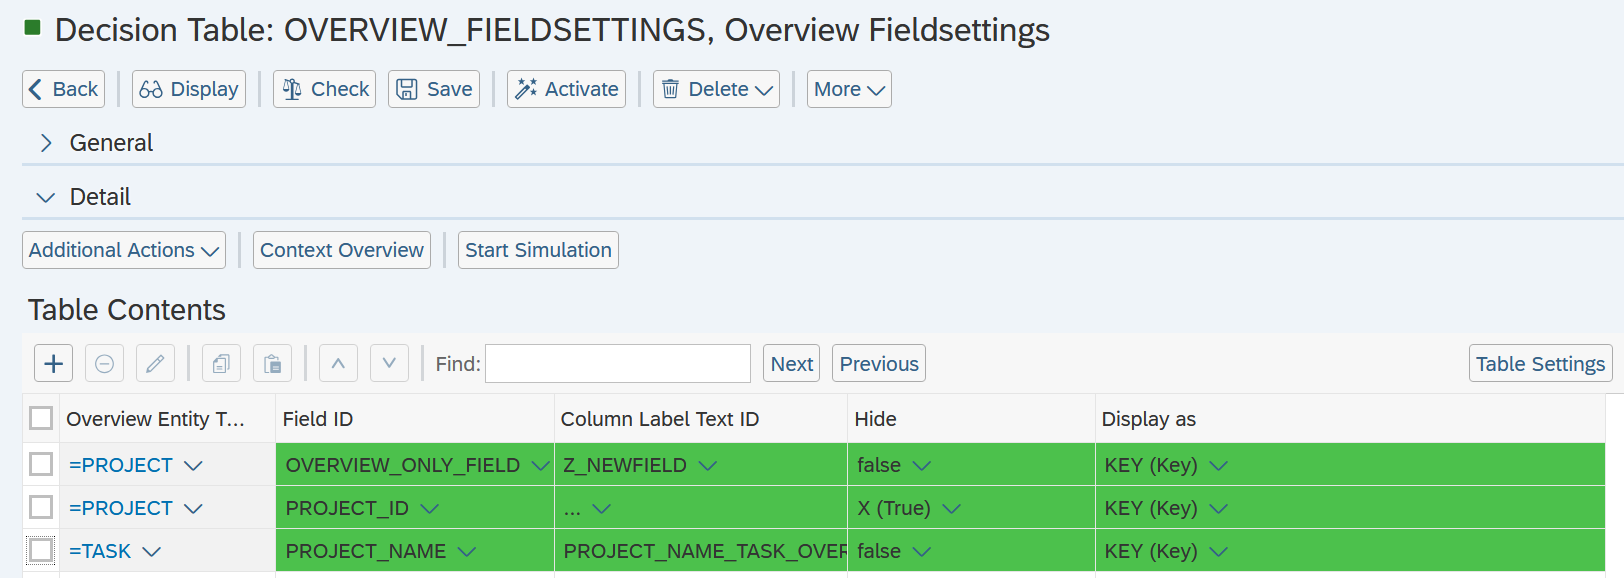
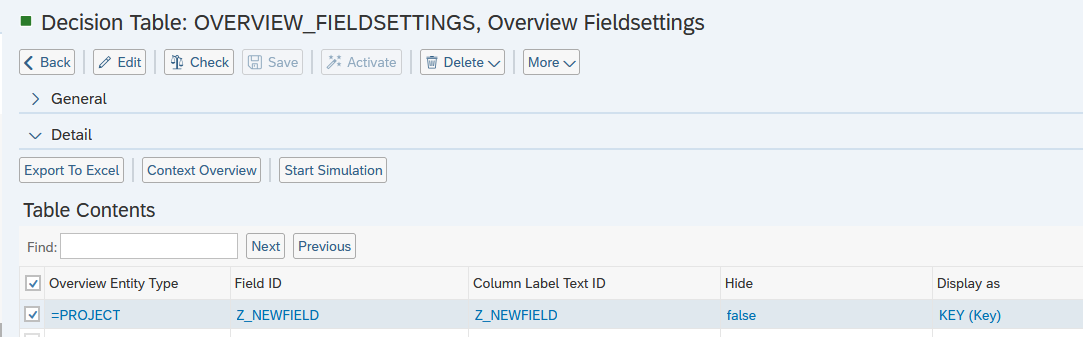
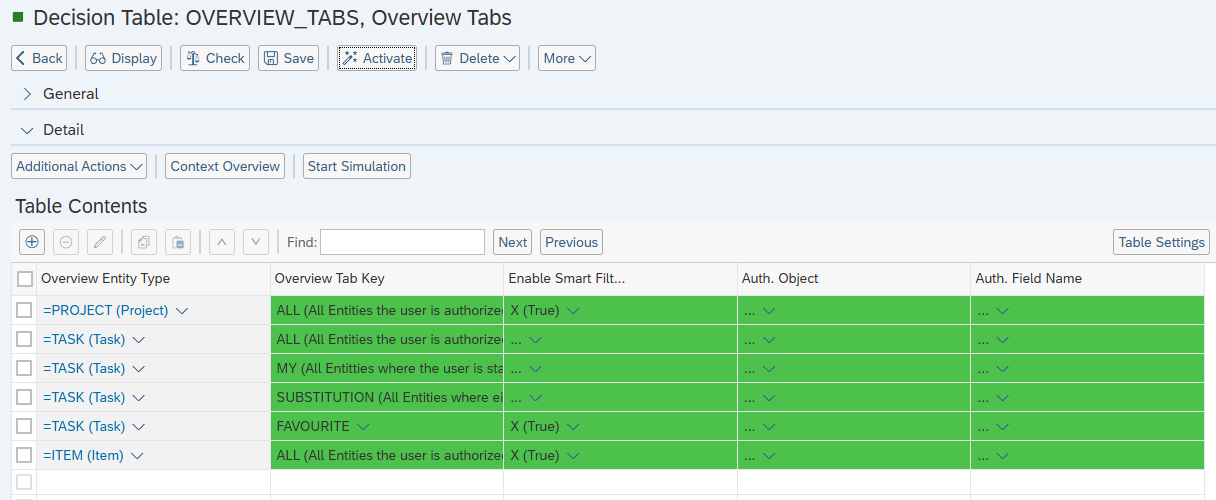
Open your BRF+ Application and navigate to the expression table “Overview Fieldsettings” (Technical Name: OVERVIEW_TABS).
- Overview Entity Type: Choose which Overview List the new setting is for. Valid types are provided through the F4 Help (ITEM; PROJECT; PROJECT_VE [Versions]; TASK; CHECKLIST_ITEM).
- Field Id: Enter any Field Id from the Basic Field Config (added by a user) or Standard Application (default fields). This field will then be either shown or hidden for the given Overview Entity Type.
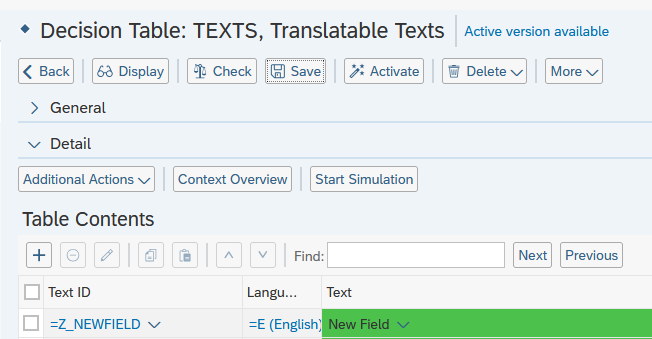
- Column Label Text ID: The text of the Text ID will be used in the Overview. This allows different texts for the same field in different Overviews. Enter the Text ID used in “Translatable Texts” or refer to the Standard Application.
- Hide: If set to true, the field will not be shown in the overview.
- Display as: The way to display a Field. Key display means displaying just a value of a Field; Description display allows to transform a value when displaying it to a user (e.g. username → name).
Example of Customizing
- The first entry adds a new field to the Project Overview, which is not part of the Project Form Controls.
- The second entry hides the field PROJECT_ID from the Project Overview.
- The third entry changes the name of the field PROJECT_NAME in the Task Overview.
Creation of a New Overview Field
If you want to create your own Overview Field, follow these steps:
-
Create a New Basic Field:
- Add the new field to the Basic Field Configuration.
-
Add the Field to Overview Fieldsetting:
- Open your BRF+ Application and navigate to the expression table “Overview Fieldsettings” (Technical Name: OVERVIEW_TABS).
- Choose the appropriate Overview Entity Type and enter the Field Id for the new Basic Field.
- Specify the Column Label Text ID and whether the field should be hidden.
-
Display Field
-
Description (Calculated) Fields is a column in the OverviewFieldSetting BRF+ Table, holding two possible states: KEY and DESCRIPTION.
- Key: The key values are shown without any transformation.
- Description: The key values (stored in the database) are transformed to related and better readable texts. This requires a value help for the field. For example, it can change the Text of the Business Partner ID to the Business Partner Name (00012 → “Phillip Bauer”) when displaying it
-
If you do not have this column in your Customer Application, copy it from the standard Application. Otherwise, a mistake may occur while customizing Decision Table: OVERVIEW_FIELDSETTINGS, Overview Fieldsettings.
-
-
Add Text ID to Translatable Texts:
- Go to the “Translatable Texts” decision table and add the Text ID corresponding to the new field.
-
Activate the Configuration:
- After making these changes, activate the configuration.
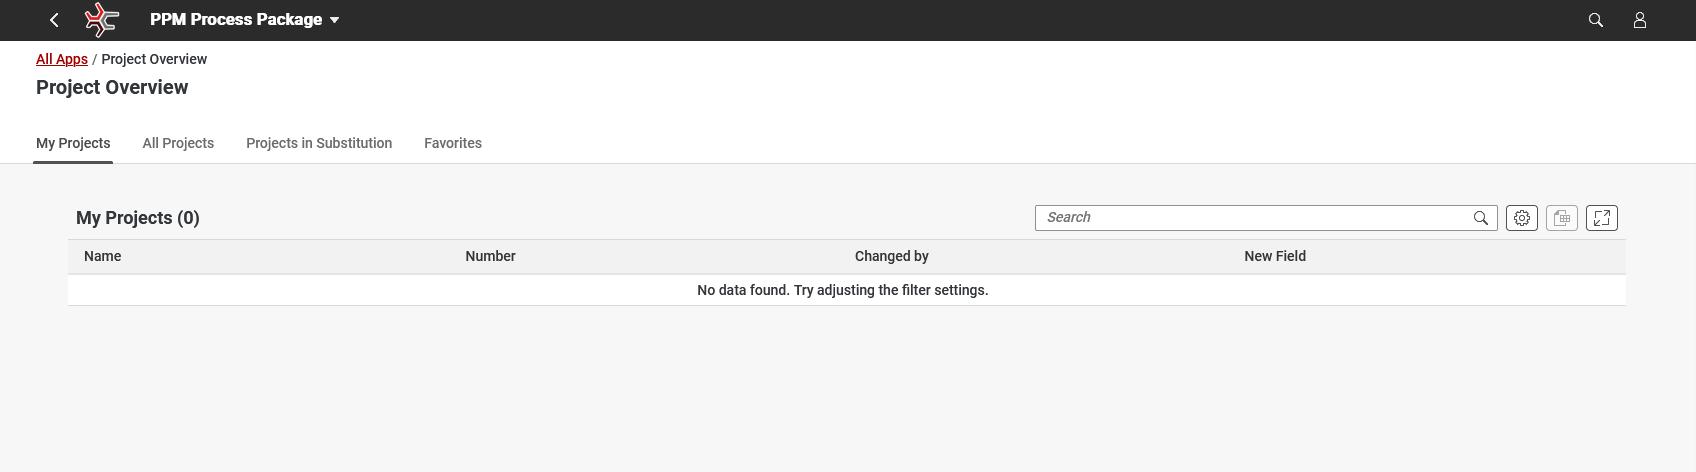
- The new field will be added to the Overview list and can be selected for display.

Enable Smart Filter Bar
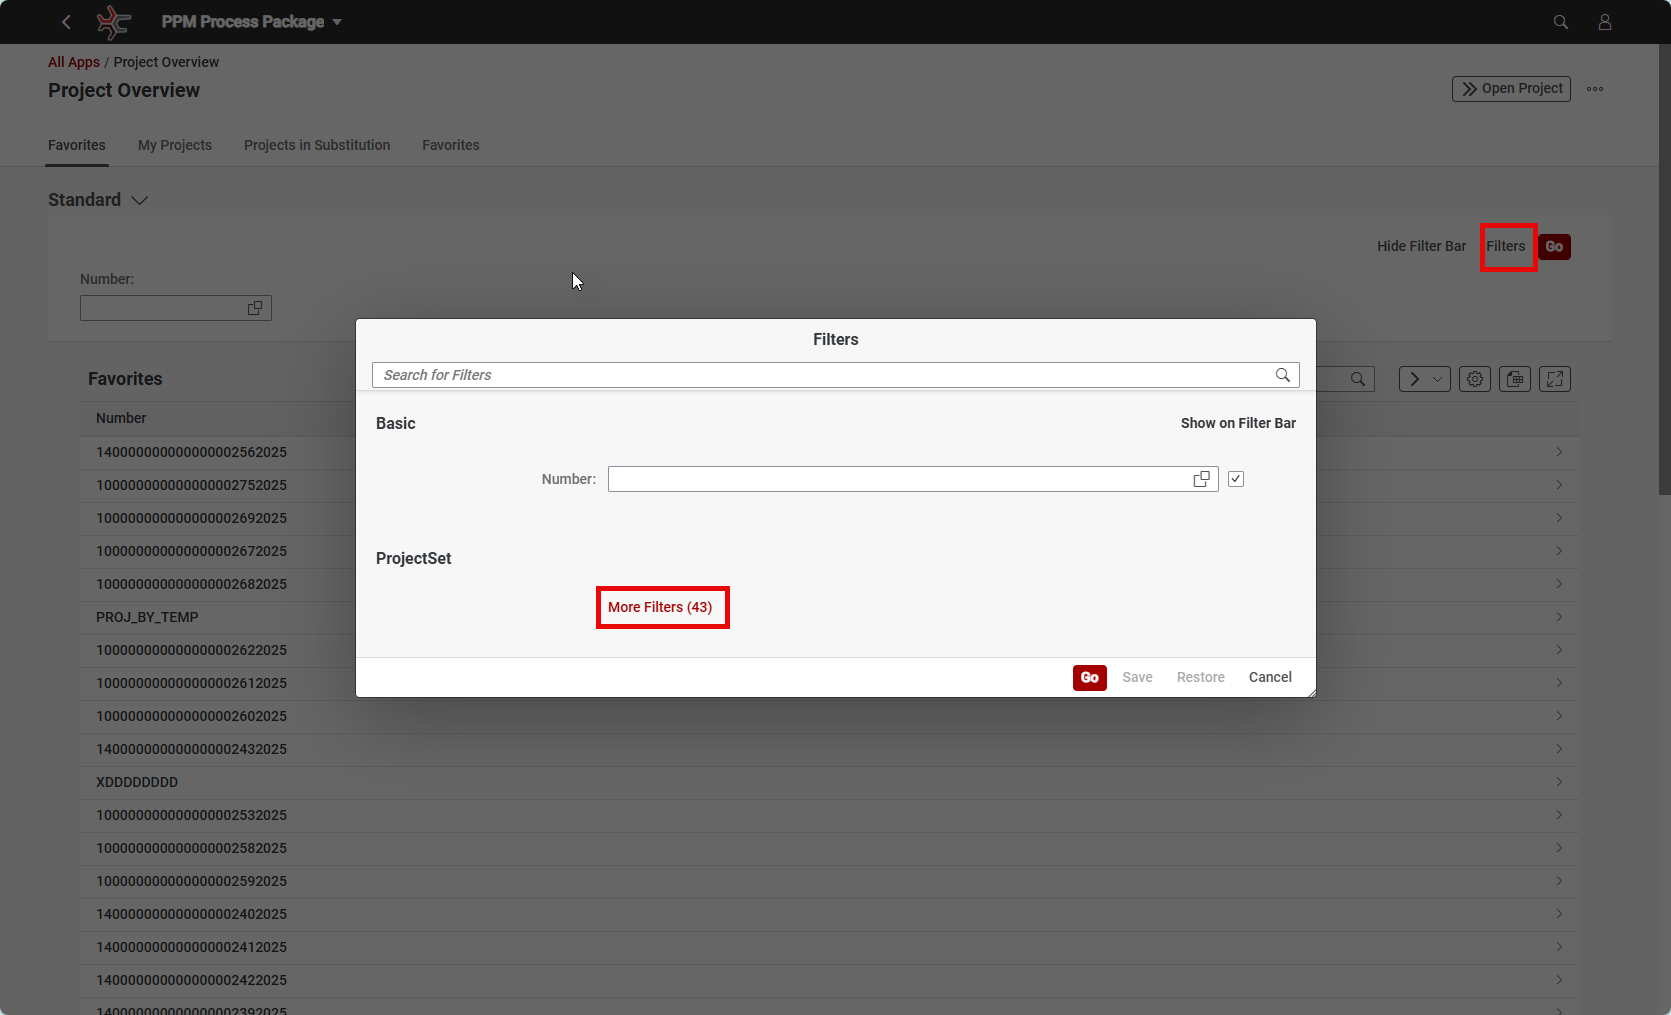
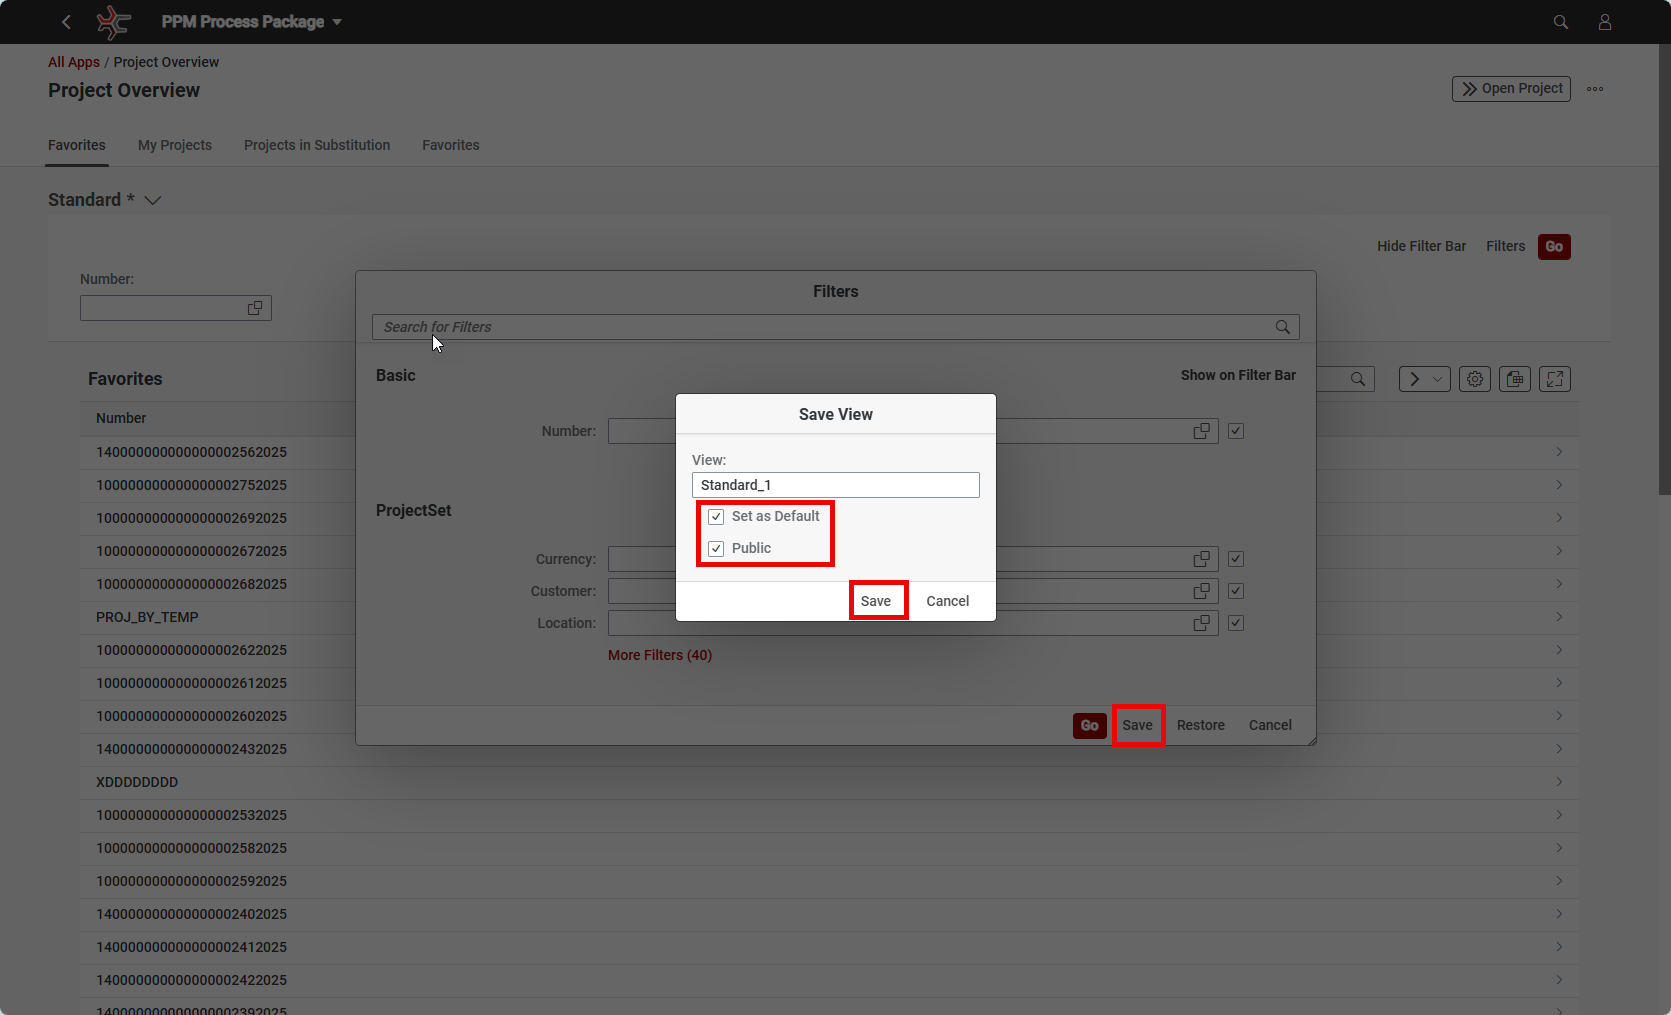
Filter Bars support advanced filter logic and value helps. When combined with View Management, filters can be saved as named Views - making recurring searches easier than ever.
- To enable Smart Filter Bar navigate to Decision Table: Overview Tabs (OVERVIEW_TABS).
- Set Enable Smart Filter Bar =
true.
Standard Columns and Filters
How to add new Standard Columns or Standard Filters
-
To display the column within the filter bar by default (without a preset value) navigate to Decision Table: OVERVIEW_FIELDSETTINGS, Overview Fieldsettings
-
For columns:
- Set Include in Default Variant =
true.
- Set Include in Default Variant =
-
For filters:
- Set Include in Default Filter =
true(creates filter with no preset value).
- Set Include in Default Filter =
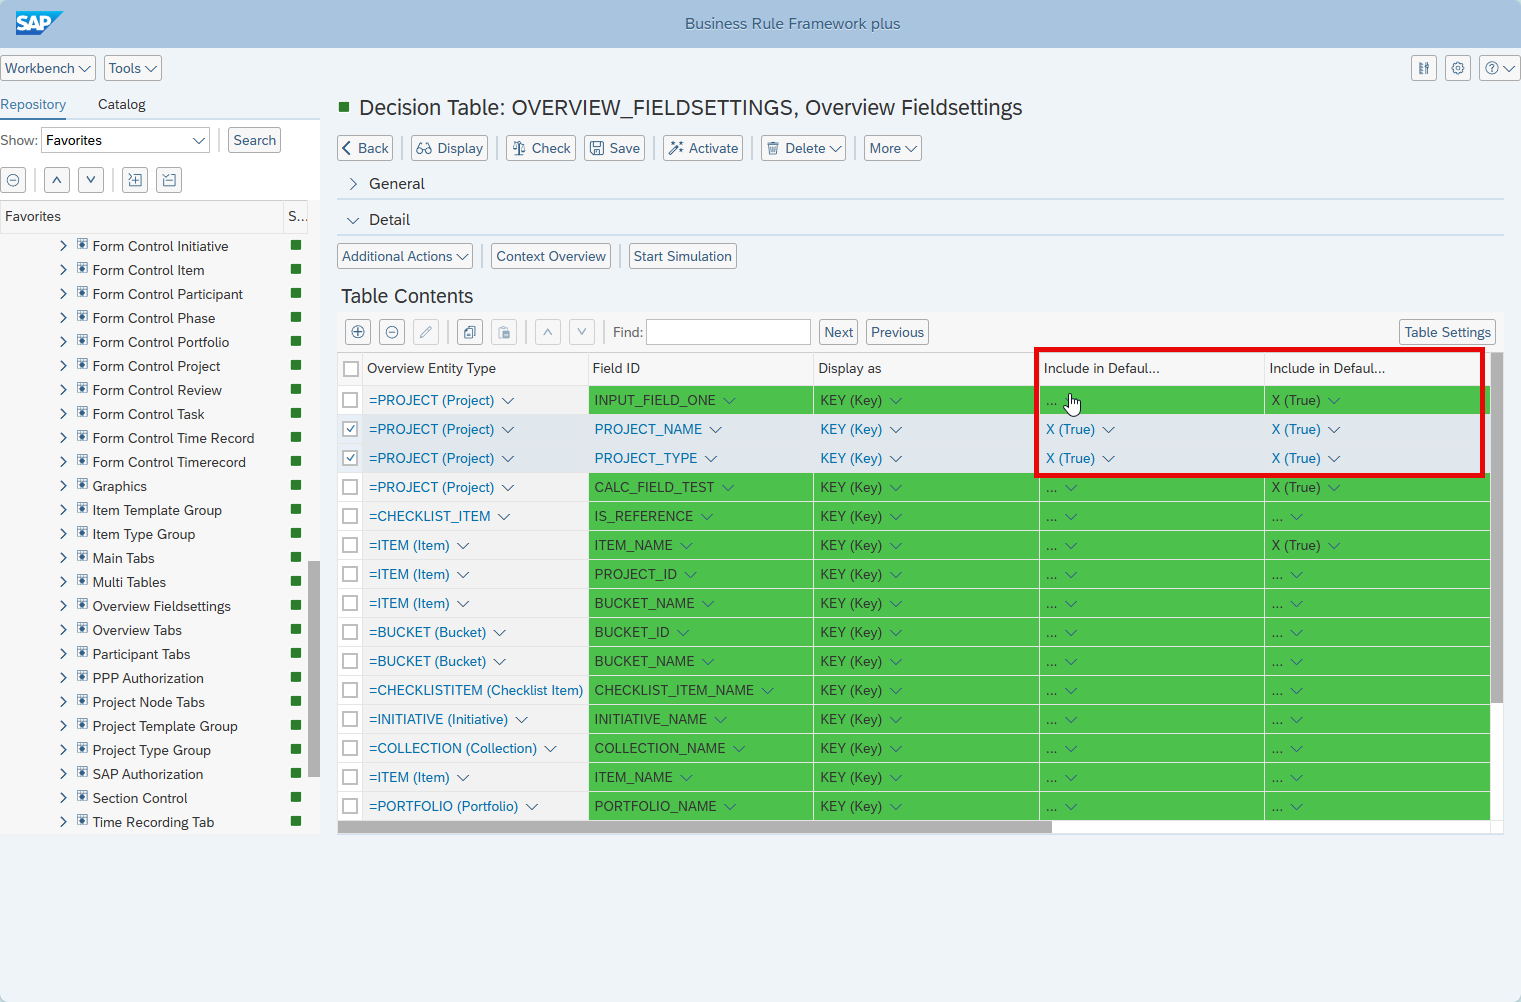
New View
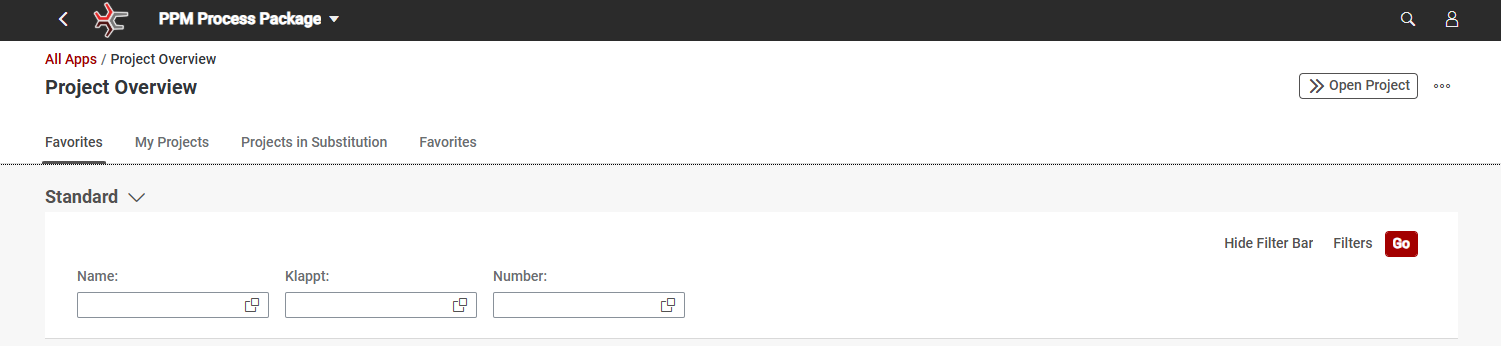
When combined with View Management, Settings for shown Filters, Columns, Sort and Group can be saved as named Views - making recurring searches easier than ever. A user can also create a new View, make it public and set it as default.
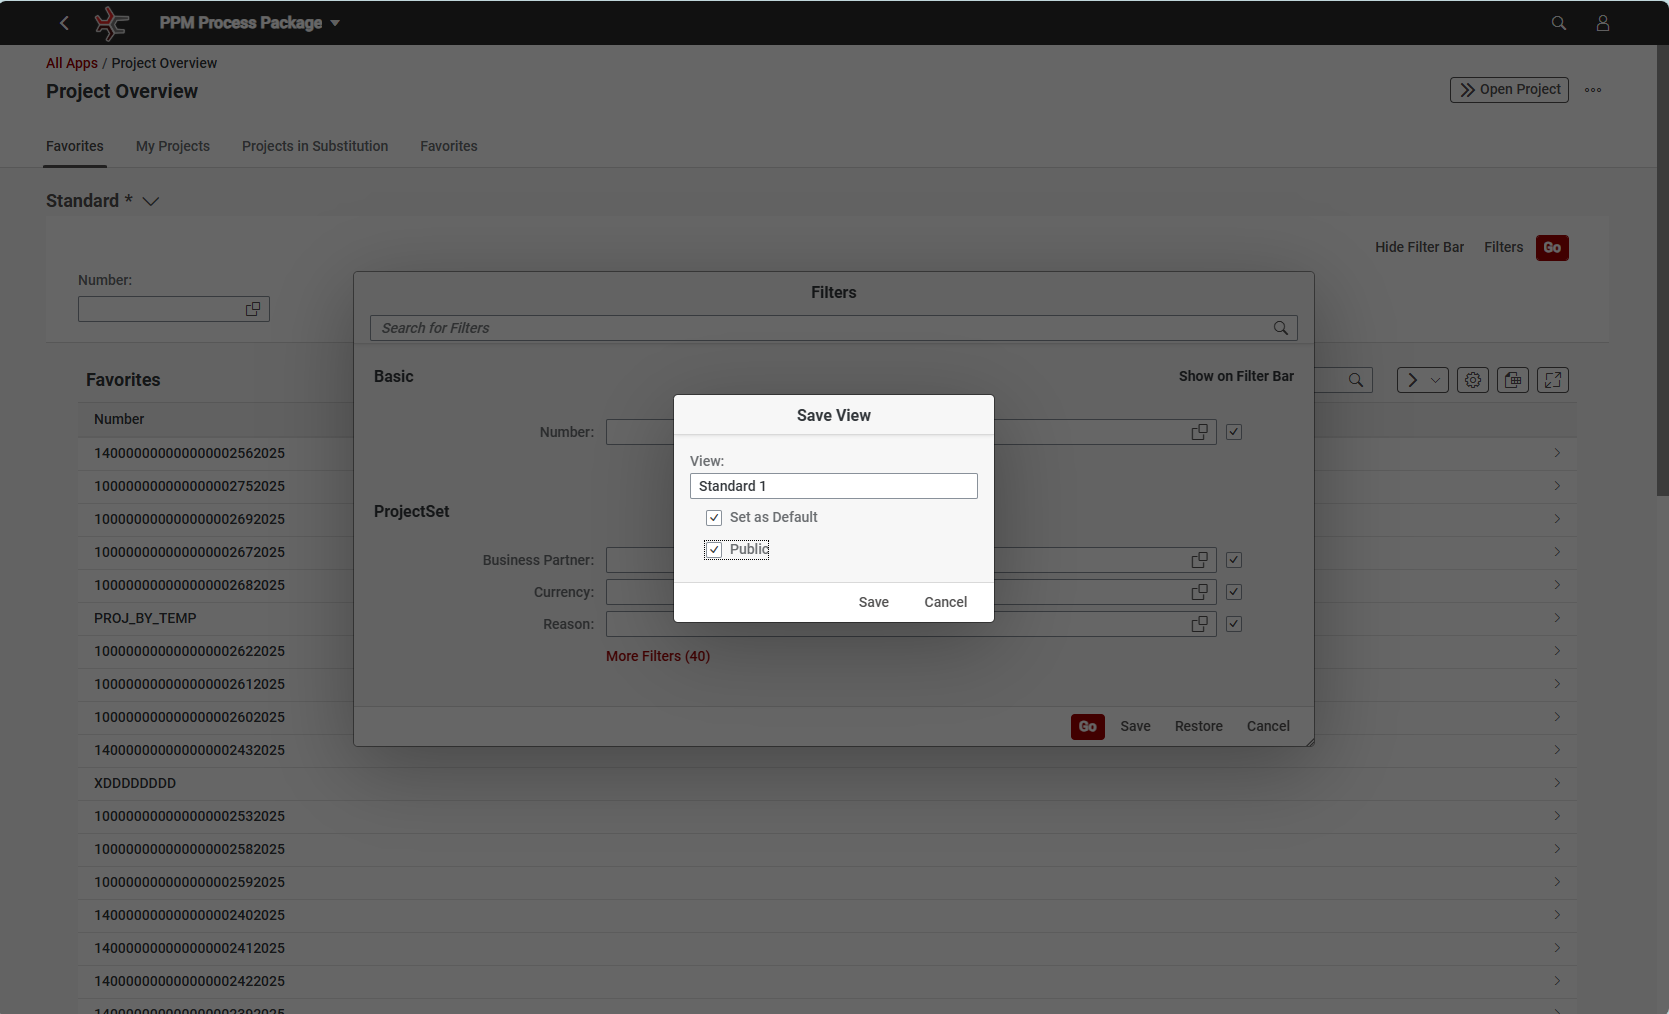
- Open Filters and select the necessary filters
- Click on ‘Save’ and save as a new View (it is not possible to save it as Standard). Make it public and sat as default so other users can also use it and set as default
See Also
Keywords
brf+, add, overview, fields, project, custom fields, filters, views