Text
Create new Translatable Texts
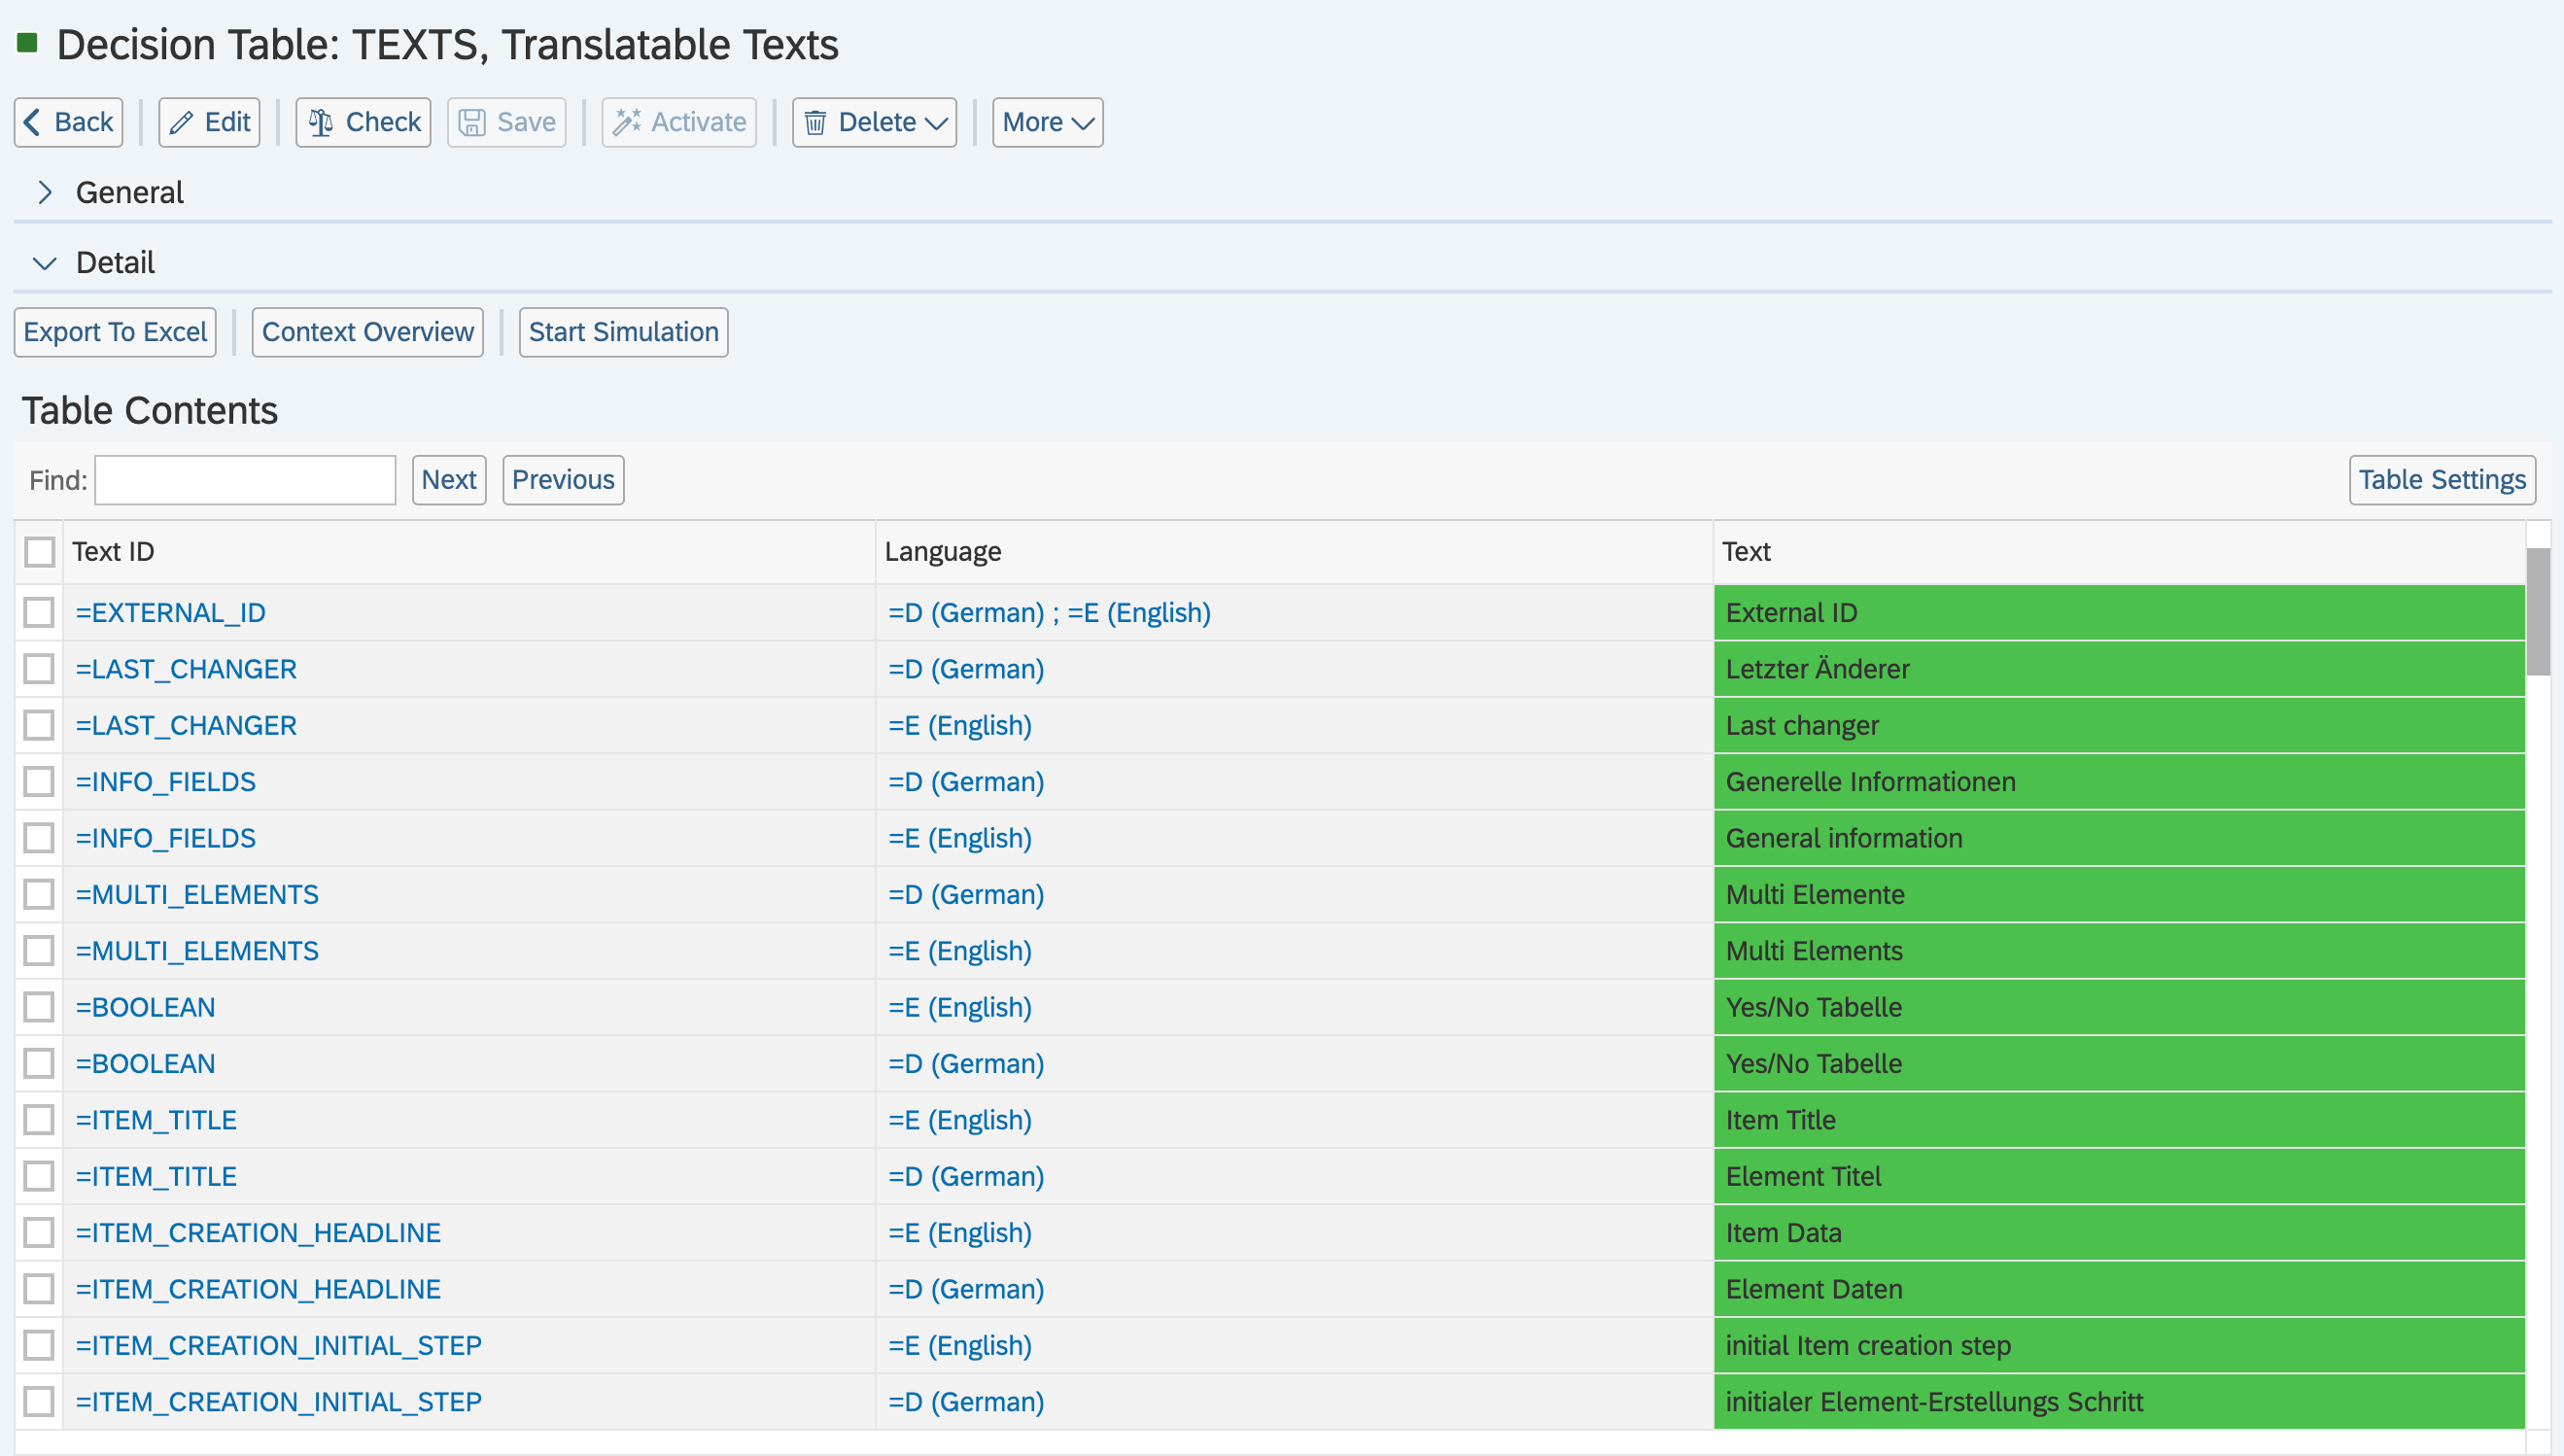
Before you can modify texts for Sections, Tabs, etc., the corresponding translatable texts must first be created. To do this, open your BRF+ Application and navigate to the decision table “Translatable Texts” (Technical Name: TEXTS).
- Text ID: Enter a Text ID of your choice. This ID will be used in other Decision Tables to make the corresponding entry translatable and/or overwrite the text of the underlying data element. Although this is not the Field ID, it might be convenient to use the same Text ID and Field ID for specific customizing. Standard elements’ Text IDs can be found in the Standard Application but should only be changed in Custom Applications.
- Language: Select a Language Key using F4 Help. This sets the text for the specific language configured in PPP. To add another text for an additional language, create a separate entry. If you want the text change to apply to all languages, leave this column empty.
- Text: Enter the desired text. This text will be used for all entries where the Text ID has been used and will be displayed accordingly in the UI.
Example of Translatable Texts:
Rename Fields
If you have created a new field or you are customizing a default one and would like to change its name in the PPP application, follow these steps:

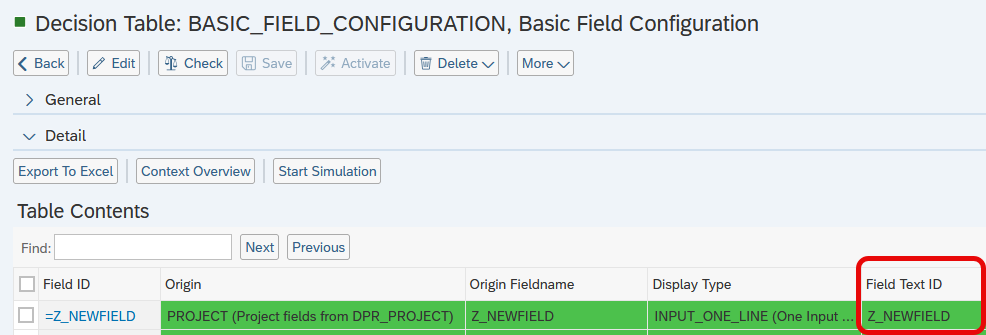
- Go to the decision table “BASIC_FIELD_CONFIGURATION” and check if you have already set the Field Text ID of a needed Field. For default Fields you can check Field Text ID in a Standard Application.
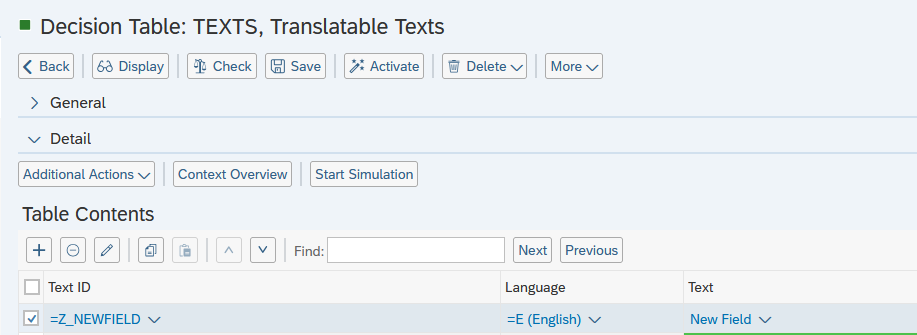
- Navigate to the Customer Application decision table “Translatable Texts” (Technical Name: TEXTS) and enter edit mode.
- Add the Text ID (Field Text ID from BASIC_FIELD_CONFIGURATION), the language of your application, and the new text you would like to display. Save and activate your changes.
- Clear up your browser cache and metadata to see the changes.

Rename Sections
If you want to rename Sections (like General, Dates, Status etc.), you need to know the Section Headline Text ID.
- Identify the Section Headline Text ID for the section you want to rename. Sections are part of the Forms. Depending on the customized section, you can consult different Form Control Decision Tables.
- Depending on the customized Section, you can consult different Form Control Decision Tables. Navigate to one of the following expression tables, depending on which entity the form belongs to. Navigate to one of the following expression tables, depending on which entity the form belongs to:
| Entity Type | Expression Table | Technical Name |
| Item | Form Control Item | FORM_CONTROL_ITEM |
| Decision Point | Form Control DP | FORM_CONTROL_DECISION_POINT |
| Project | Form Control Project | FORM_CONTROL_PROJECT |
| Phase | Form Control Phase | FORM_CONTROL_PHASE |
| Task | Form Control Task | FORM_CONTROL_TASK |
| Checklist | Form Control Checklist | FORM_CONTROL_CHECKLIST |
| Checklist Item | Form Control Checklist Item | FORM_CONTROL_CHECKLIST_ITEM |
| Role | Form Control Role | FORM_CONTROL_ROLE |
For instance, if you want to modify default Section ‘Dates’ in the Project, you can find Section Headline Text ID in the Standard Application Decision Table: FORM_CONTROL_PROJECT, Form Control Project.
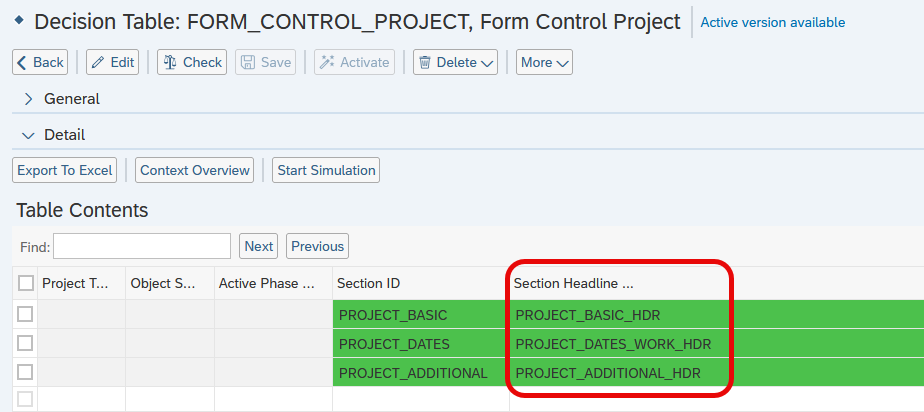 Use this Section Headline Text ID in your Custom Application in Decision Table: TEXTS, Translatable Texts.
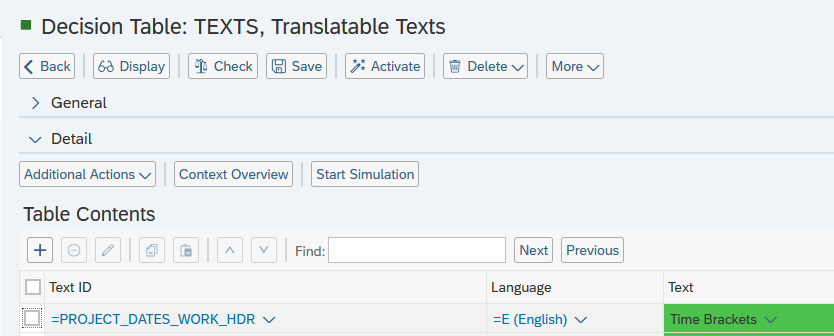 Here Section’s Text was changed from ‘Dates’ to ‘Time Brackets’.
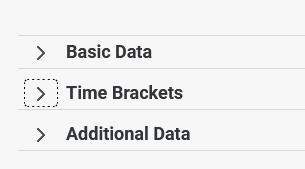
Customer Sections
If you want to create a new Section and adjust Text for it:
- Follow the instructions to create a new section - Forms, Sections and FieldGroups.
- Use the Section Headline Text ID (mentioned in the corresponding Form Control Decision Table) in the decision table: “TEXTS”, Translatable Texts.
Rename Tabs
If you create a new tab and want to modify its text:
- Use the Tab Name Text ID in the corresponding decision table (e.g., MAIN_TABS, PROJECT_NODE_TABS, OVERVIEW_TABS, PARTICIPANT_TABS).
- If it is a default tab, look up the Tab Name Text ID in the corresponding standard application decision table.
- In your custom application, go to the decision table: “TEXTS”, Translatable Texts, and use the Tab Name Text ID in the Text ID column to adjust it.
Translate Field Name
If you already have a created new Field/Tab/Section and Text for it, you might need to adjust the Text to different languages.
To add a translation, navigate to the decision table “Translatable Texts” (Technical Name: TEXTS) and enter the edit mode.
Add a new line with the same Text ID and another language and another translation. You can add several languages in ‘Language’ column. Save and activate your changes.
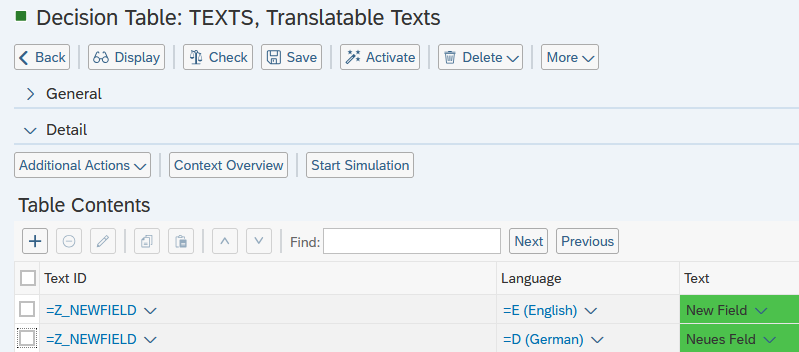 Update metadata and go o to PPP and either change the language in your settings to one you just used in the decision table “Translatable Texts” or change the language in your URL. You can see the new field with a new name. If you have not added text for your Field in a new language, the field will be displayed by its Field ID.

See Also
- Create a BRF+ App
- Forms, Sections and FieldGroups
- Creation of Customer BRF+ Application
- Texts
- Customizing Fields - Forms, Sections and FieldGroups
Keywords
brf+, translation, translate, texts, Text ID