
Process Builder
Overview
Process Builder provides the user with a complete preview of all process steps that will be executed during the lifecycle of a Change Record before the Workflow is actually started. It also allows the Change Responsible and/or Administrators to customize the process for a specific Change Record at any time during its approval lifecycle. They can:
- Add new sequential or parallel tasks
- Assign additional agents
- Deactivate existing tasks
- Generate a new process simulation to reflect tasks based on the updated business parameters
This acts as a simulation tool, enabling the Change Responsible to plan, monitor, and control the approval process more effectively, ensuring that the workflow is executed with better coordination and visibility.
Steps to generate Process Builder
-
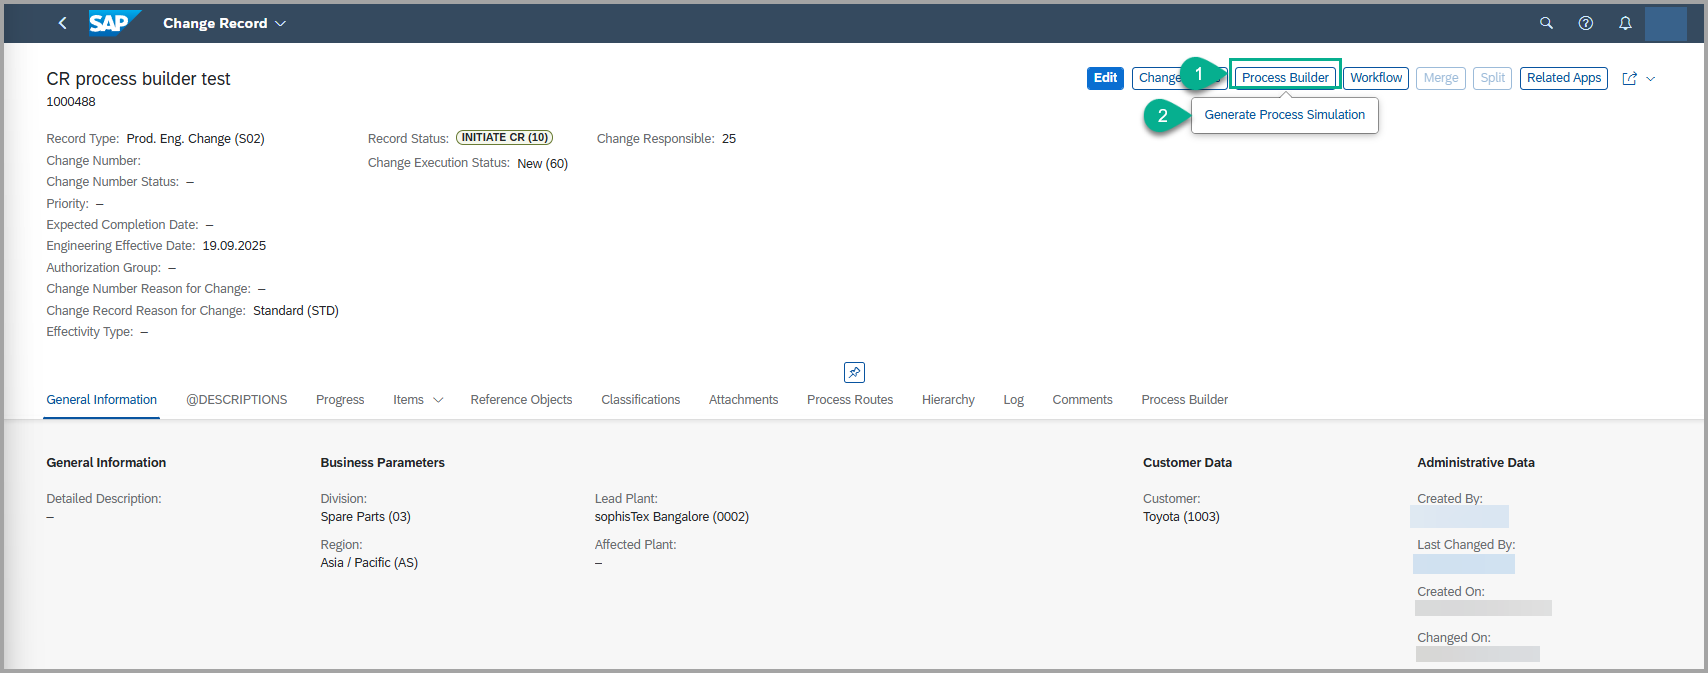
Once the Change Record is created, click on the Process Builder button as shown in the screenshot below.
- A dropdown will appear; click on Generate Process Simulation.
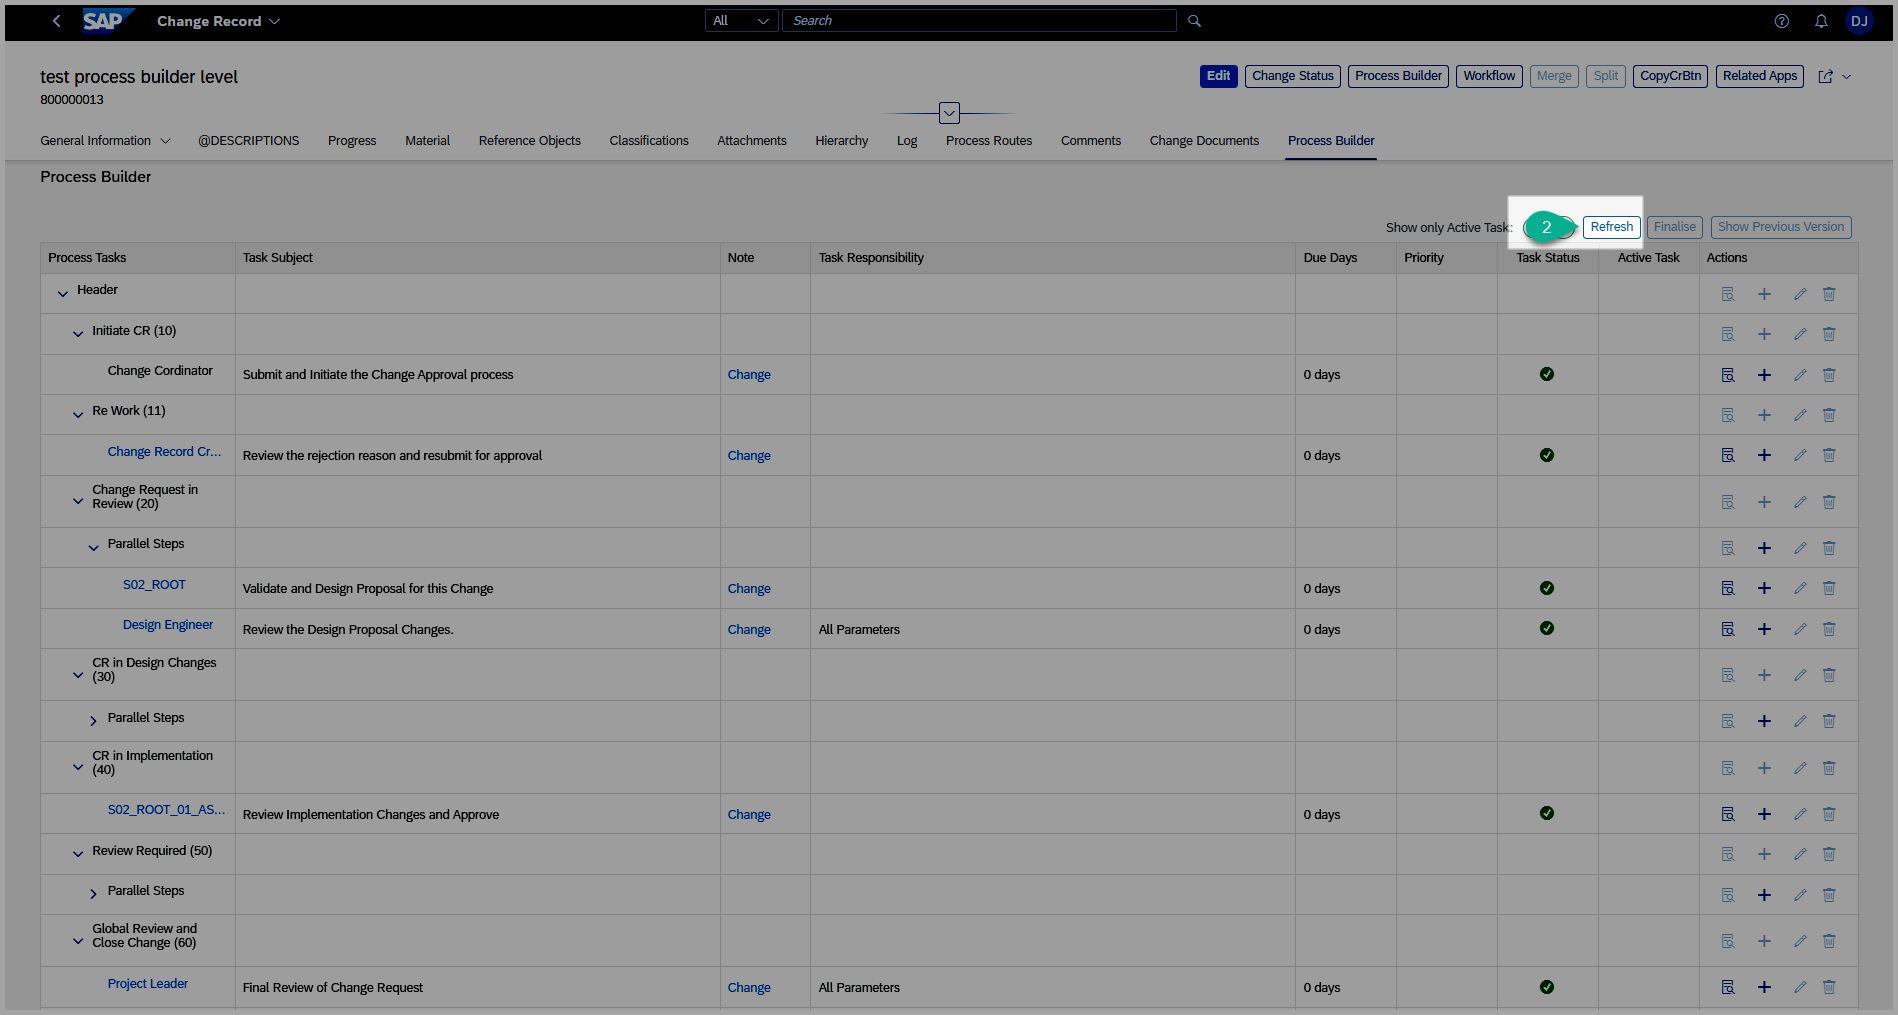
2. Navigate to the Process Builder tab, which will load all Process Builder details related to the
Work Item maintained in the BRF+ Decision Table.
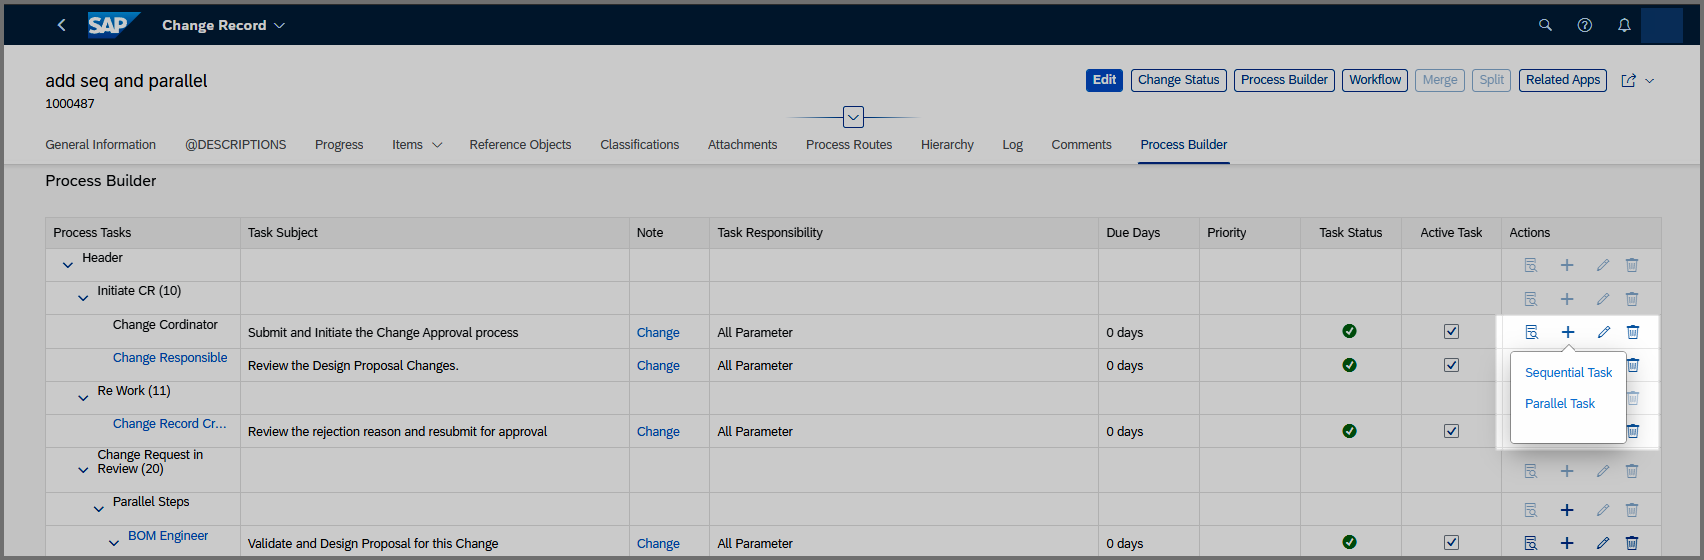
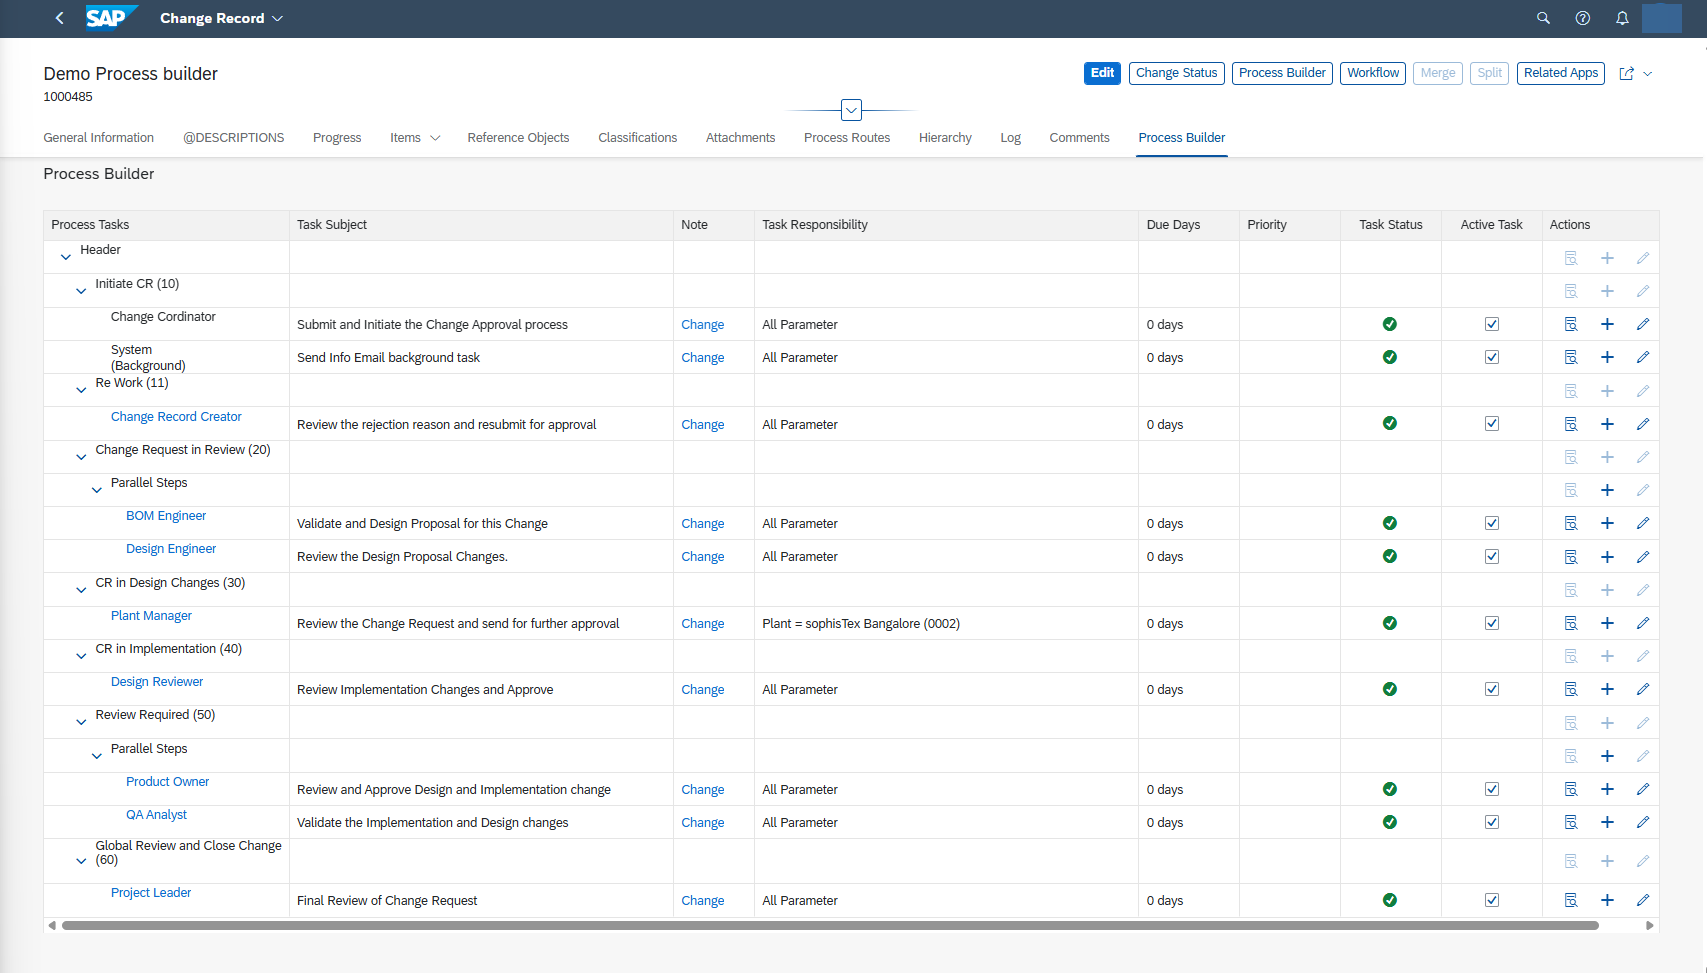 3. You can add or delete (parallel or sequential) tasks as needed for different statuses.
- To add a task, click on the “+” icon and select the type of task to be created.
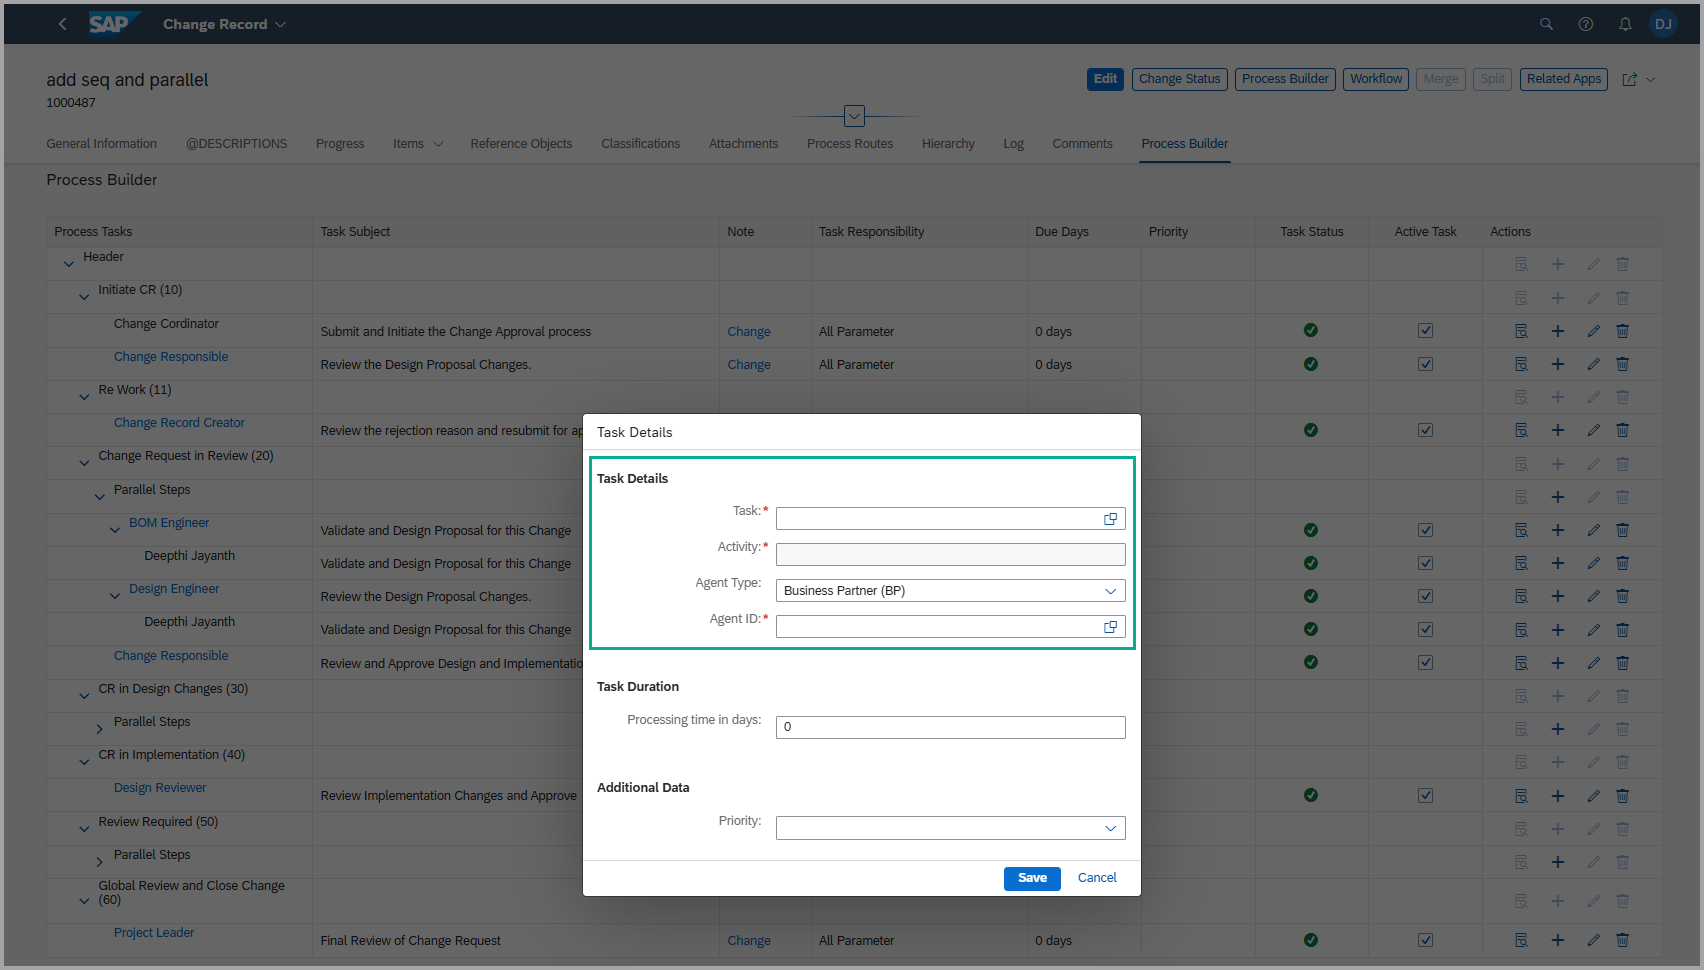
- A pop-up will appear where you need to provide the task details such as Task, Activity, Agent Type, and Agent ID.
- Once all mandatory fields are filled, click on Save.
- If the task is created successfully, a success message will be displayed. In case of failure, an error message will be shown.
- After successful creation:
- The new task will immediately reflect in the Process Builder tab.
- If the work item has not yet been sent for this particular status in the process route, the added task will also appear in the Process Route tab for that status.
- However, if the work item has already been sent for that status, then any modifications or newly added tasks in the Process Builder for that status will not be reflected in the Process Route.
- To delete a task, click on delete icon “🗑”, a pop-up will be appearing for the confirmation, click on okay if the task needs to be deleted.
- To Modify a task, click on Pen Icon “✎” here you can modify the task, Agent type and agent ID.
- to display task details, click on Magnify icon “🔍︎”.
4. To add agents to a particular task (or an already existing task), click on the Team Function
link as shown in the screenshot below.
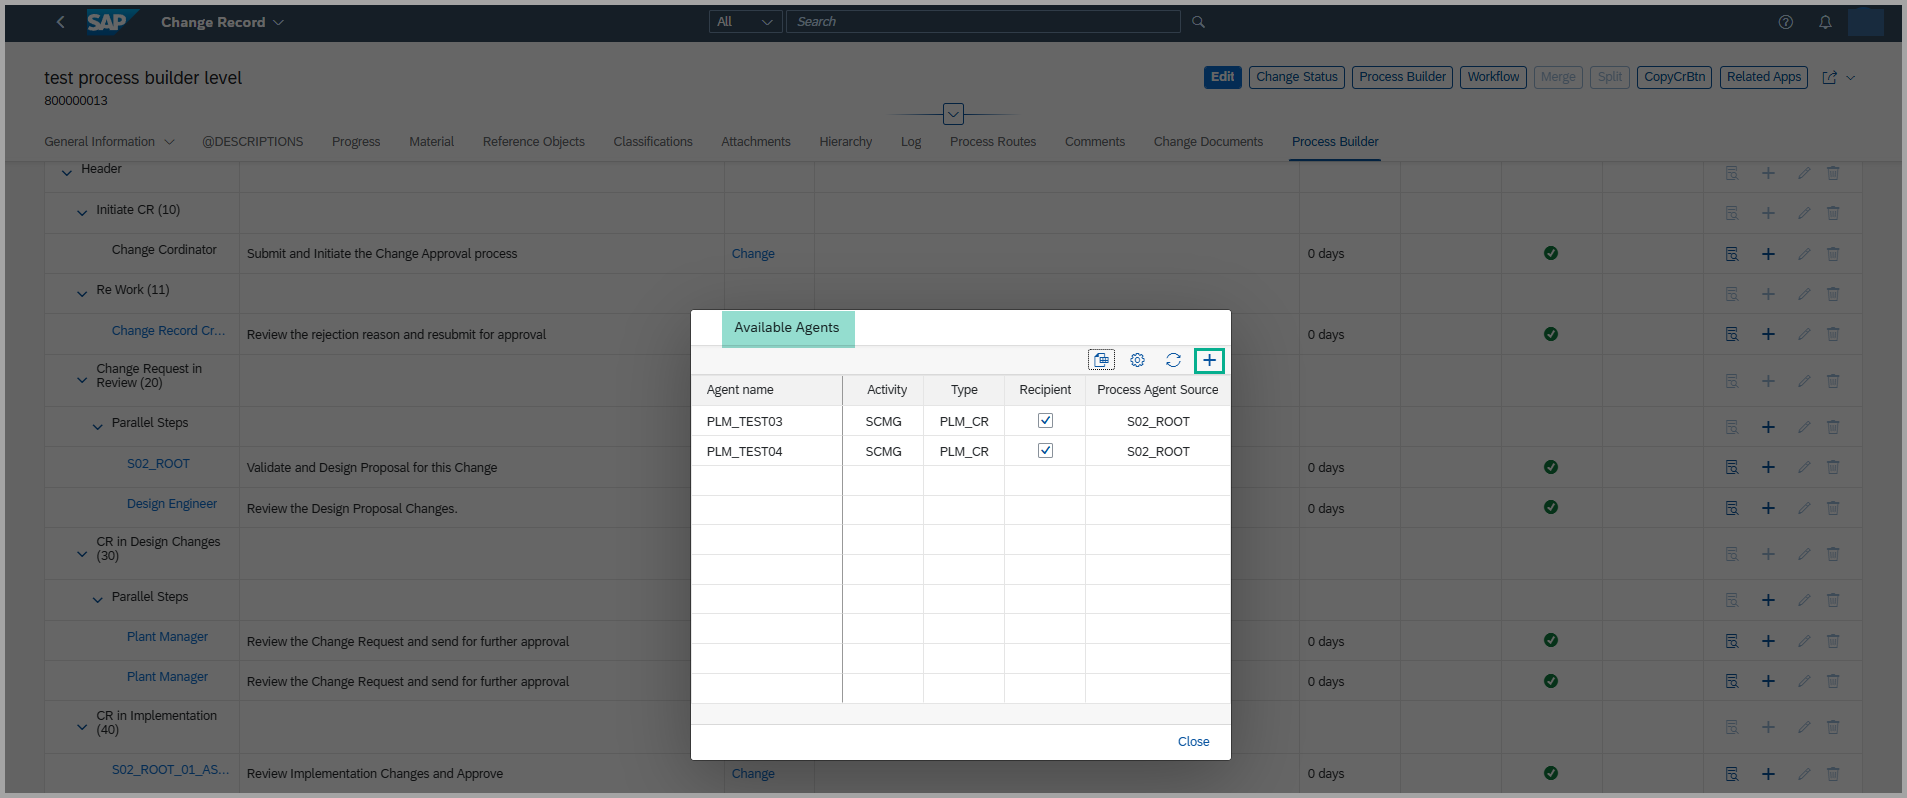
- A pop-up will appear displaying the available agents.
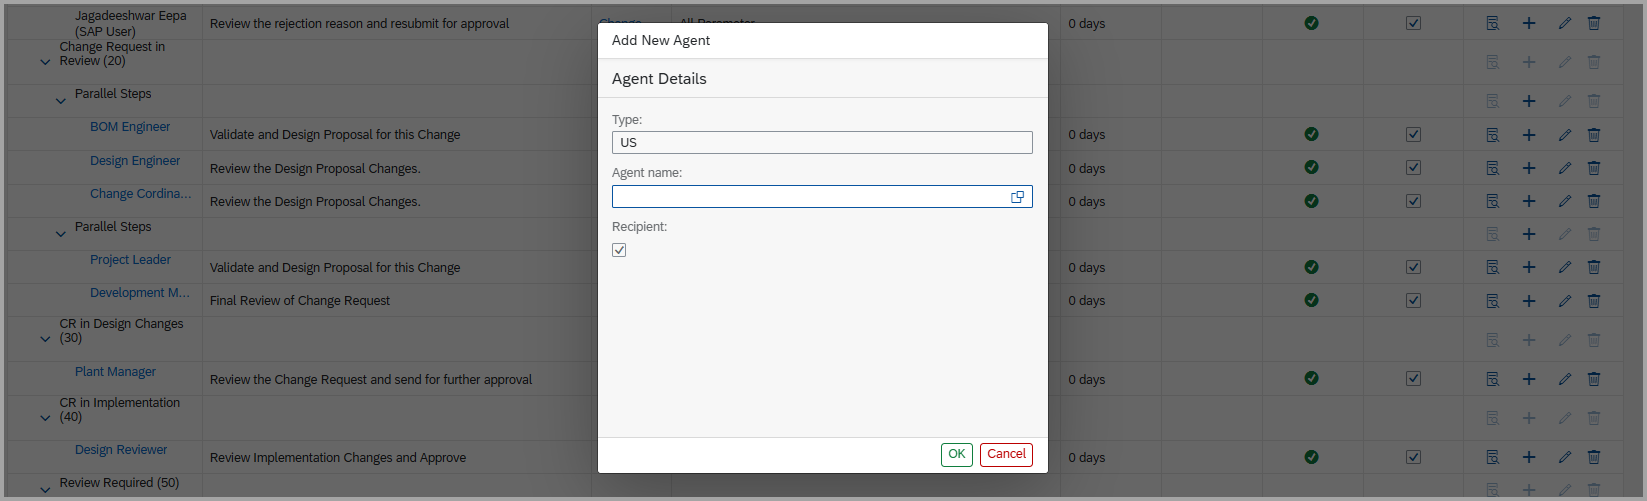
- To add more agents, click on the “+” icon and enter the agent details.
- At least one Agent should be marked as Recipient.

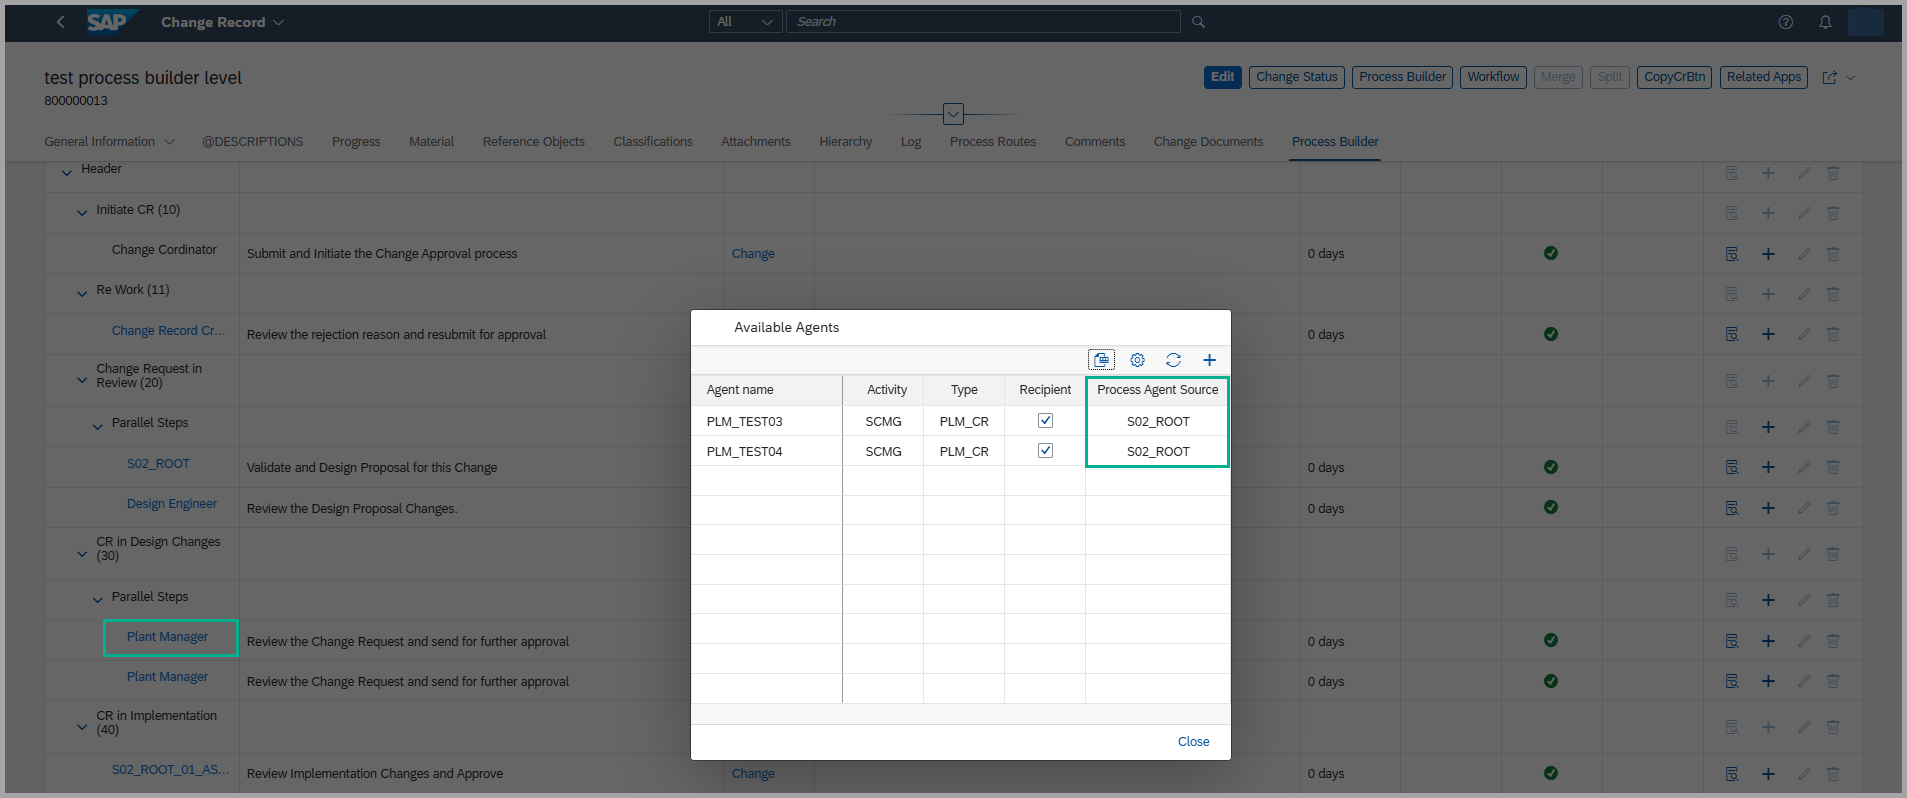
- When you select a specific Team Function or Team Header, it will display the team name from which the agents are fetched.
- If no agent is maintained for a specific task, the task status will be displayed with a red cross mark (❌). This indicates that no agents are assigned, and the task will not be delivered.
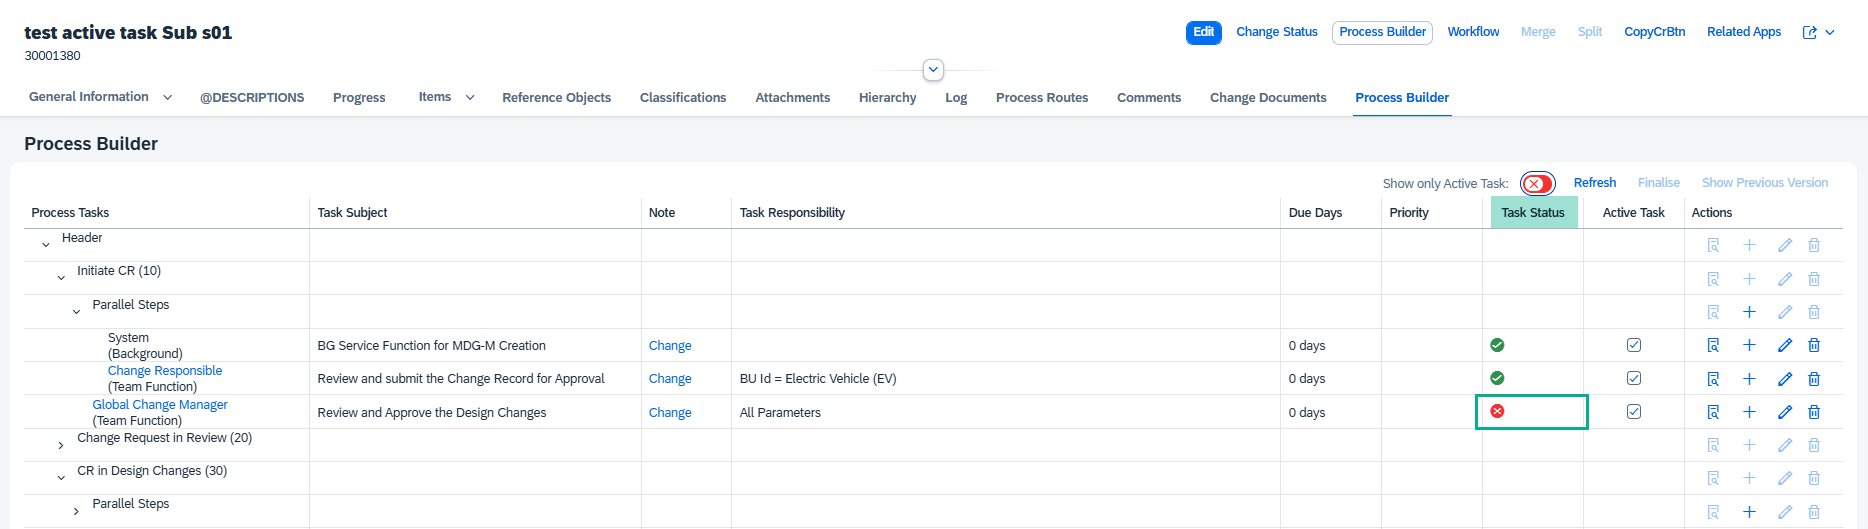
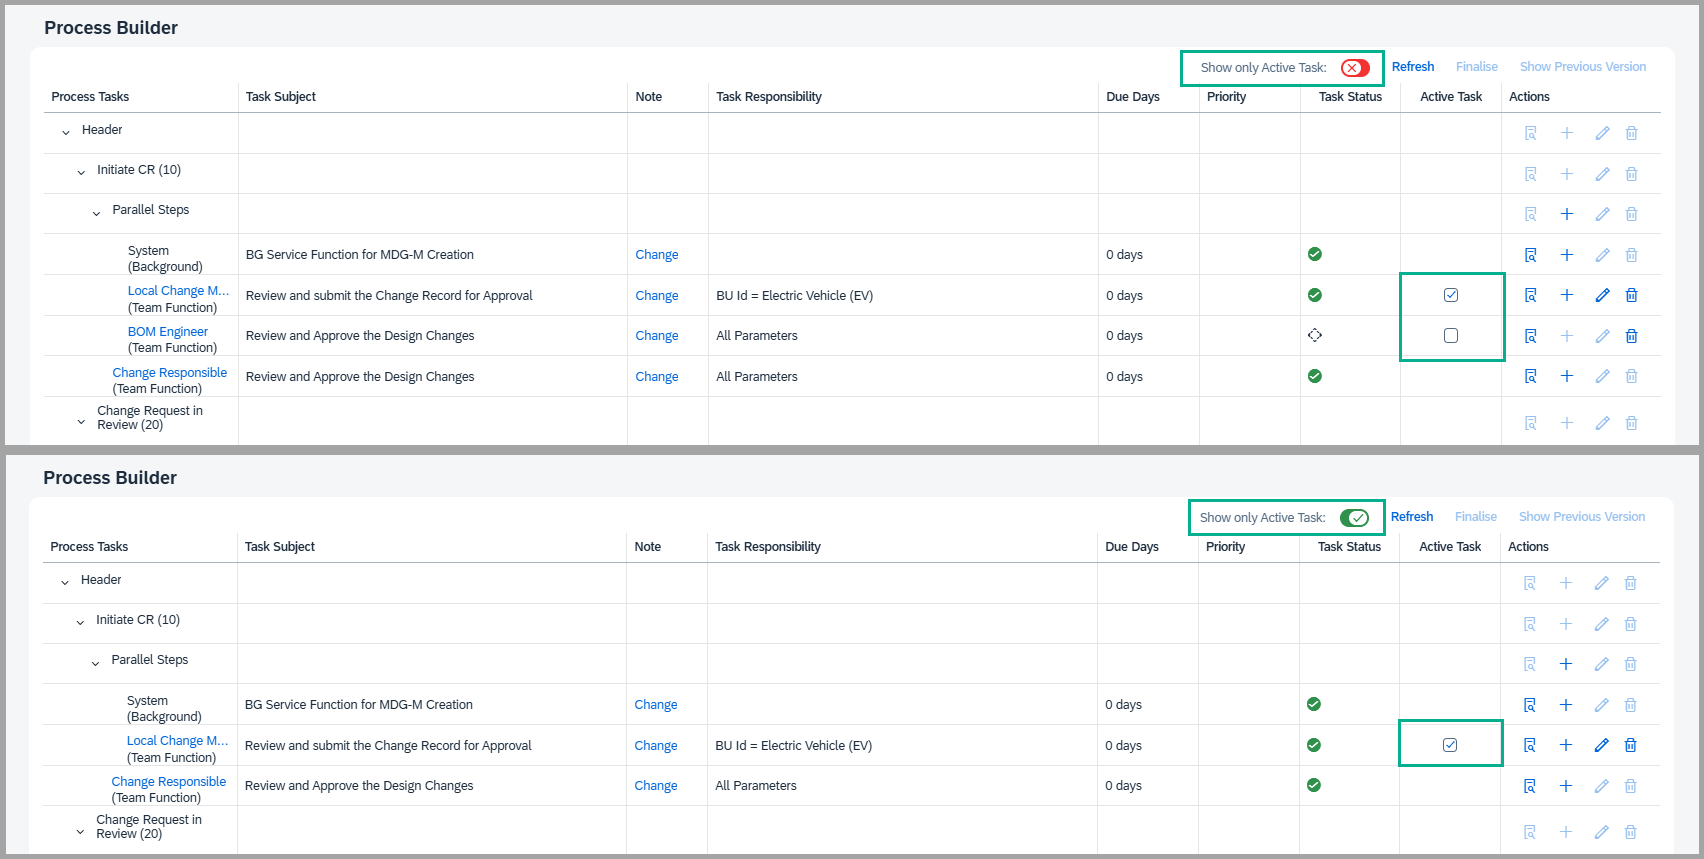
5. To display only the active tasks, there is a toggle button available.
- If you enable this button, it will display only the active tasks.
- If it is disabled, both active and inactive tasks will be displayed.
- Inactive tasks refer to the tasks that are unchecked in the Active Task column.
- Inactive tasks refer to the tasks that are unchecked in the Active Task column. At the process route level, these unchecked tasks will be skipped, and no task will be created.
6. Start the workflow and proceed with the approval process.
7. The tasks generated in the Process Builder will automatically be loaded in the Process
Route tab, one after the other, based on the next status and the sequence maintained.
Re-generate with version
Once the Process Builder is generated for the first time, you can re-generate it again. There are two options available:
- Re-generate with Version
- Re-generate without Version
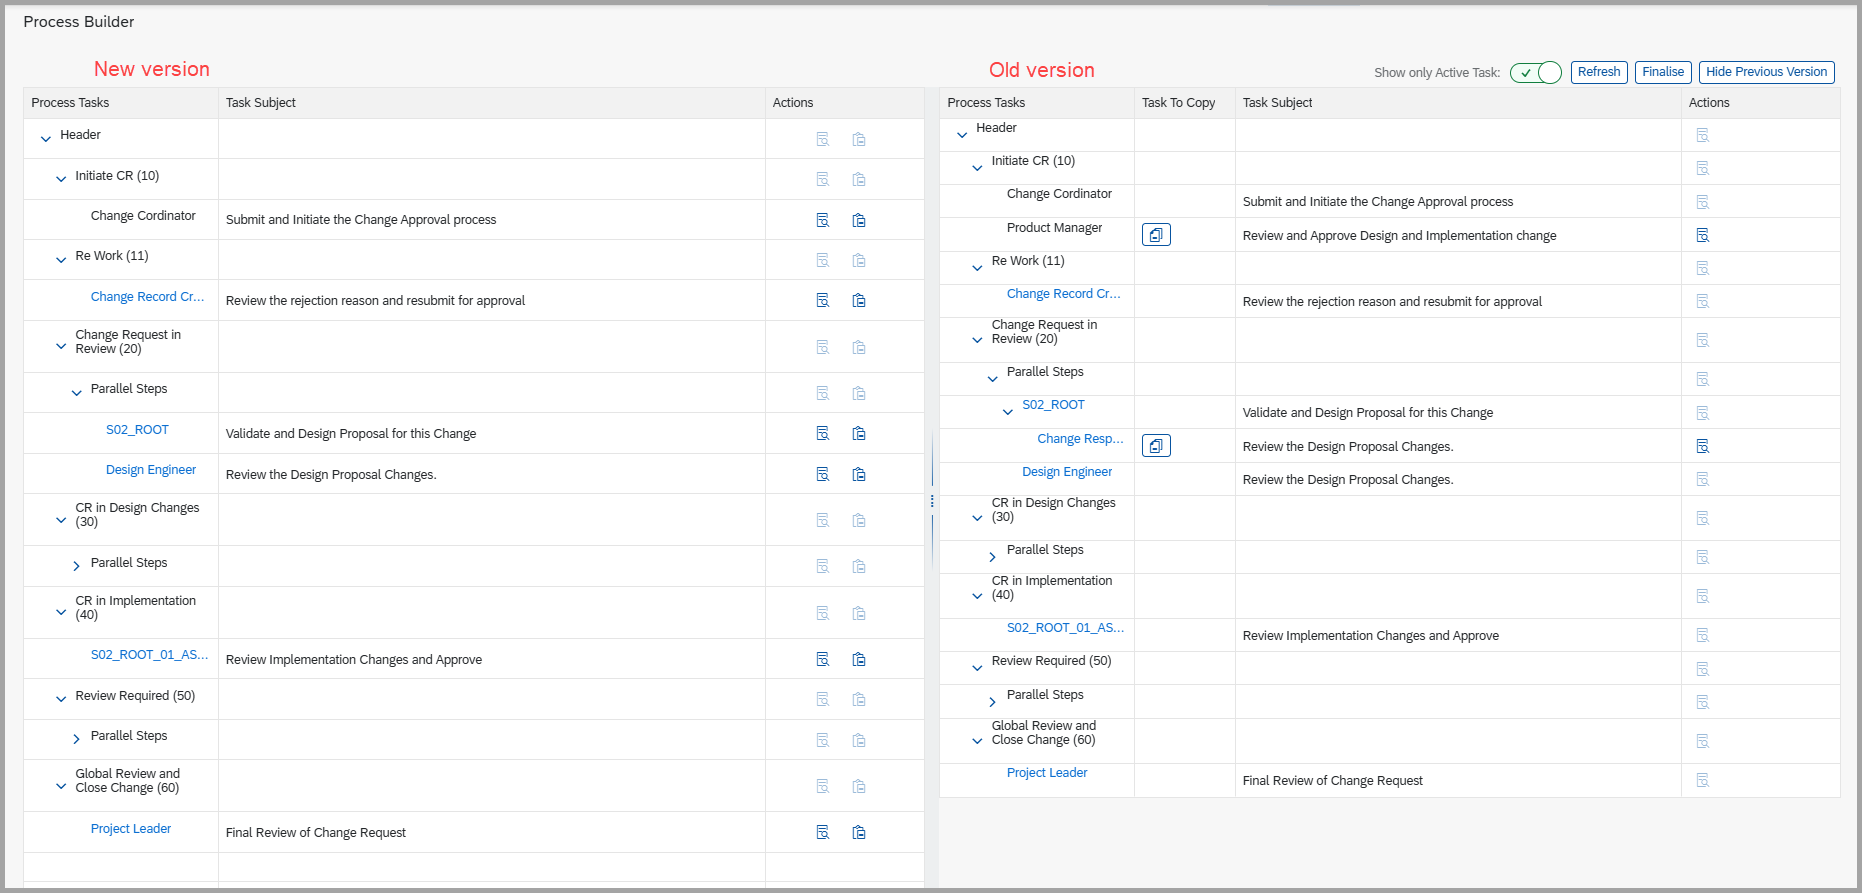
The Re-generate with Version option displays both versions of the Process Builder — the previous and the newly generated one.
You can compare both versions and make the necessary changes to the newer version at the Process Builder level as needed.
- Click on the Process Builder button. It will display two dropdown options.
- Select Re-generate with Version.
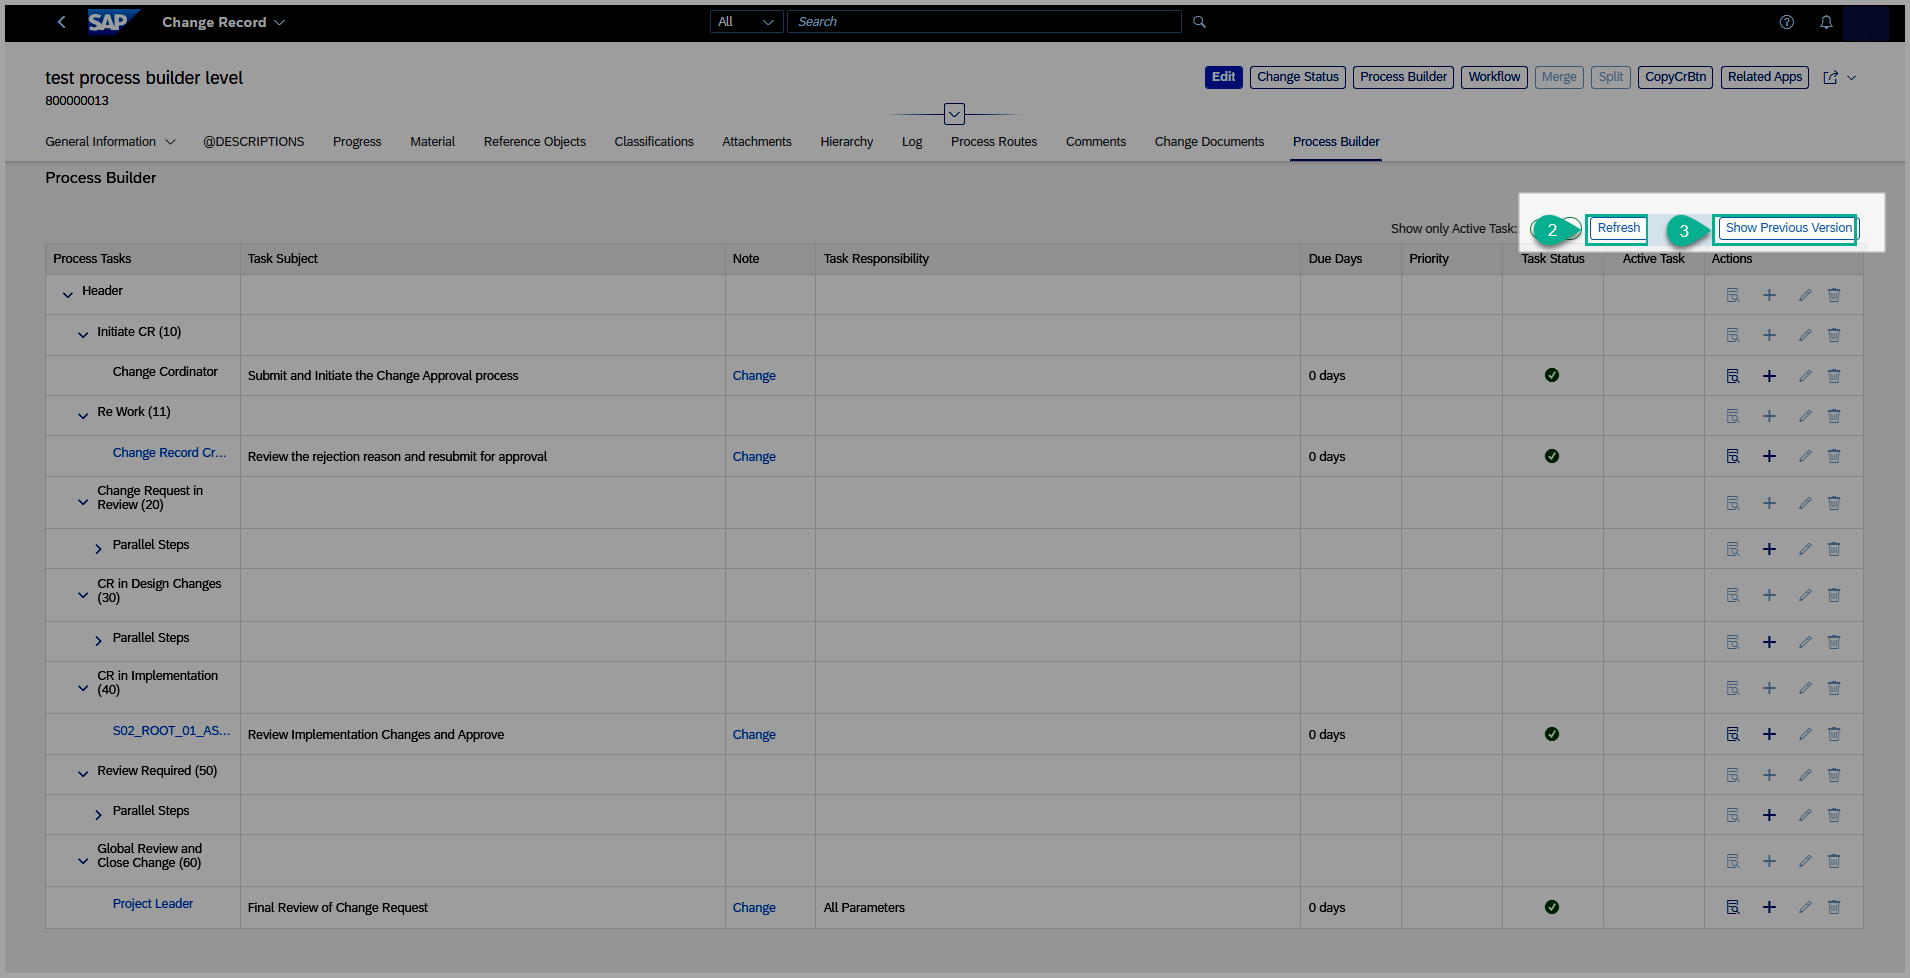
 3. Navigate to the Process Builder tab and click on the Refresh button.
4. After the data is successfully refreshed, click on Show Previous Version button.
- The Show Previous Version option will display both the newer and older versions of the Process Builder, allowing you to compare them and assign custom tasks from the older version to the newer one.
5. After assigning the custom tasks as required to the newer version, click on the Finalize
button.
6. The Finalize button will discard the older version and display only the newer version, which
can then be modified (e.g., adding or updating tasks).
7. Once you click Finalize, both the Finalize and Show Previous Version buttons will be
disabled.
8. Now you can add custom tasks or make changes as needed to the finalized (newer)
version of the Process Builder.
9. Start the workflow and proceed with the approval process.
10. The tasks generated in the Process Builder will automatically be loaded in the Process
Route tab, one after the other, based on the next status and the sequence maintained.
Re-generate without version
The Re-generate without Version option does not display the older version of the Process Builder.
This option deletes the older version and retains only the newly generated one. As a result, you will not be able to compare the old and new versions, nor add any custom tasks from the older version, since it will be discarded during regeneration.
- Click on the Process Builder button and select Re-generate without Version from the dropdown.
 2. Navigate to the Process Builder tab and click on the Refresh button. This action deletes
the older version and generates the new one.
 3. In this case, the Finalize and Show Previous Version buttons will be disabled.
4. Make the required changes to the Process Builder, start the workflow, and proceed with the
approval process.
5. The tasks available in the Process Builder will automatically be loaded in the Process Route
tab, one after the other, based on the next status and the sequence maintained.
Note:
- You cannot delete the last Status Dialog Task.
- At least one task must be assigned to each status.
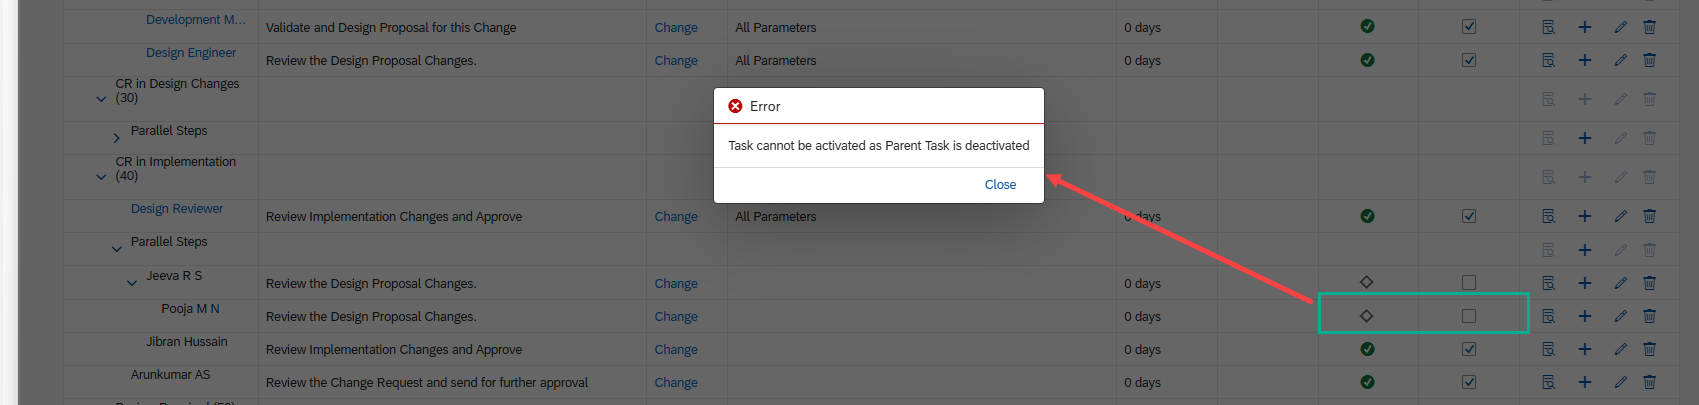
- When you deactivate the parent task of a custom task, any child tasks linked to it will also be deactivated automatically.
- you cannot activate the child task, if the parent task is deactivated.
- If you choose Re-generate with Version, only the custom tasks will have the Copy button.
- Only custom tasks can be copied and assigned to the newer version.
- EDIT / DEACTIVATE tasks possible only for optional tasks from BRF+ and delete possible only for custom tasks.
See Also
Keywords
Simulation, Simulator, Process, Builder, ProcessBuilder, ProcessRoute, Process Route
Prerequisites
Eg. To be able to use the user status actions, you must first include them in a status profile Customizing activity.