Customizing the Creation Wizard - Graphics
Problem
You are not satisfied with the default PPP customizing and would like to change the Creation Wizard Graphical Steps.
Prerequisites
A new BRF+ application according to Creation of Customer BRF+ Application has been created and a Text for the Accessibility Mode according to Translation of BRF+ Text Values has been added.
Environment
PPP BRF+ Customizing
Solution
Step 1: Creation of new Creation Steps
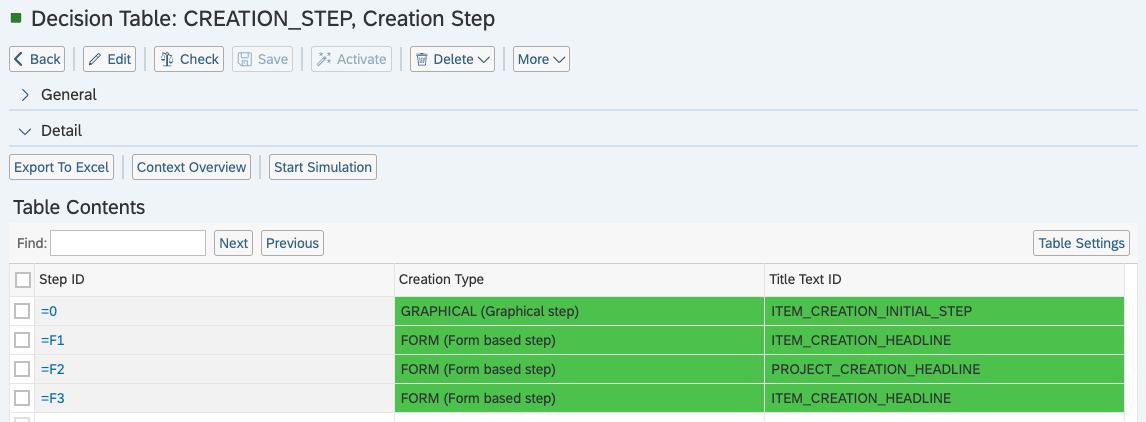
Open your BRF+ Application and navigate to the expression table “Creation Step” (Technical Name: CREATION_STEP).
Disclaimer: You always need at least one Step Id with the value “0”. This Step will then always be the initial Step and can be either a Form or Graphical Step!
-
Step ID: Enter any ID for your Step. This is later used to link a Graphic to a Step in the expression Table “Creation Graphical Steps” (Technical Name: CREATION_GRAPHICAL_STEPS).
-
Creation Type: Choose GRAPHICAL (F4 Help). This determines, which expression tables are used later on by PPP.
-
Title Text ID: Enter any Text ID (Used in “Translatable Texts”, Technical Name: TEXTS). The Text of the Text ID will be used as the Title of the Creation Step.
Example of one Graphical Step and three Form Based Steps:
Step 2: Creating new Graphics
Upload Image on the Backend-System through MIME Repository
- Open SE80
- Click on MIME Repository
- You can create an subfolder where you want to store the images
- Right click on folder and click on Import MIME Objects
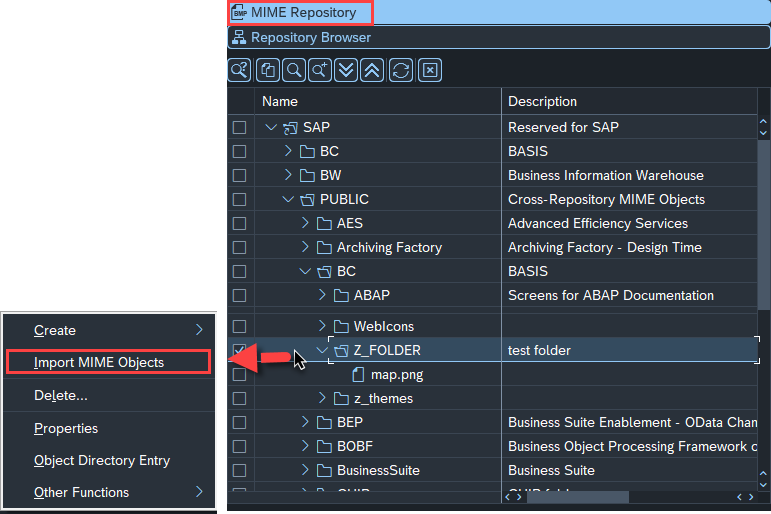
-
Note:
We recommend using the MIME Repository because it ensures faster image retrieval at runtime. However, some systems may require a developer key for this process. Despite this, the MIME Repository remains the preferred approach for optimal performance.-
Alternative: Upload via SE78 (if you cannot use the MIME Repository):
- Open the SE78 transaction.
- Follow the Guide on how to upload an image to a SAP Backend.
- This method does not require a developer key and supports bitmap images.
-
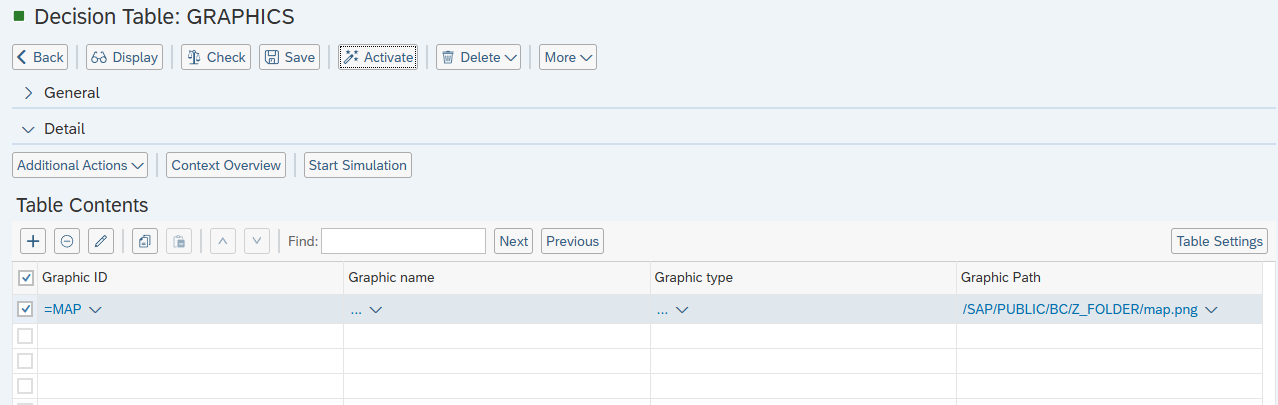
Open your BRF+ Application and navigate to the expression table “Graphics” (Technical Name: GRAPHICS).
-
Graphic ID: Enter any Graphic ID. This is later used to link a Step ID to a Graphic in the expression Table “Creation Graphical Steps” (Technical Name: CREATION_GRAPHICAL_STEPS) and “Creation Areas” (Technical Name: CREATION_AREAS).
-
Graphic Name: Enter the name of the image in the Backend-System.
-
Graphic Type: Choose between the two available Graphic Type via F4 Help. This field is necessary if you uploaded an image not through the MIME Repository, but using SE78 transaction (Guide on how to upload an image to a SAP Backend).
-
Graphic Path: Enter the full path of the image where it’s stored in the MIME Repository in the Backend-System. (Start with the folder ‘SAP’).
Example of two images being used for Graphical Steps
Step 3: Creating clickable Areas for Graphical Steps
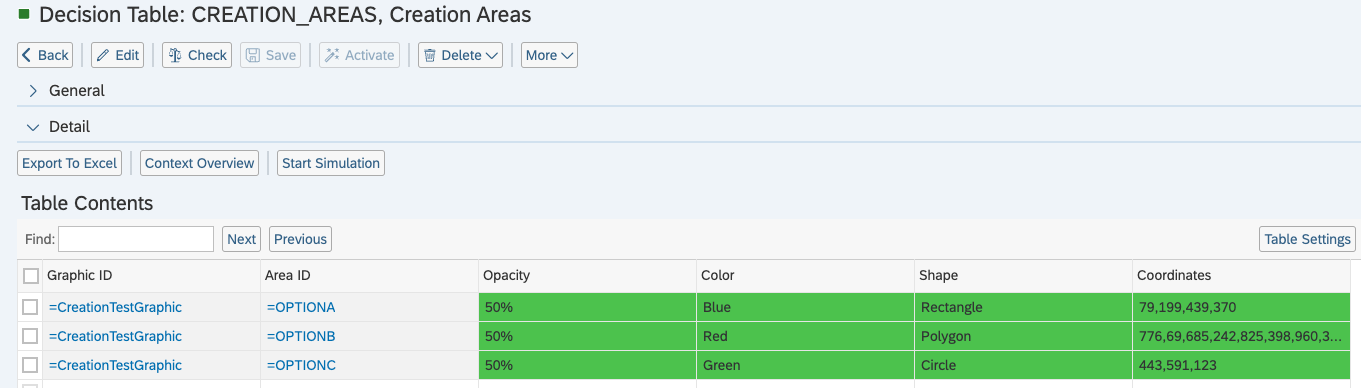
Open your BRF+ Application and navigate to the expression table “Creation Areas” (Technical Name: CREATION_AREAS).
-
Graphic ID: Enter the GRAPHIC_ID from the expression table “Graphics” (Technical Name: GRAPHICS).
-
Area ID: Enter any ID for the Area. This is later used in expression table “Creation Graphical Step Choice” (Technical Name: CREATION_GRAPHICAL_STEP_CHOICE), to determine, which Area is clickable for a step.
-
Opacity: Enter any percentage for the opacity of an area when hovered over in the UI.
-
Color: Enter any CSS color (e.g. Blue, Red, Green, etc.) for the area when hovered over in the UI.
-
Shape: Choose between “Rectangle”, “Polygon” and “Circle”.
-
Coordinates: Enter the coordinates of each corner of the Area separated by “,”. This has to be in Pixel.
| Shape | Coordinates |
| Rectangle | X (Top Left), Y (Top Left), X (Bottom Right), Y (Bottom Right) |
| Polygon | X (First), Y (First), X (Second), Y (Second), X (Third), Y (Third), .. |
| Circle | X (Middle), Y (Middle), Radius |
An example of possible shapes and areas:
Step 4: Linking Step IDs to Graphic IDs
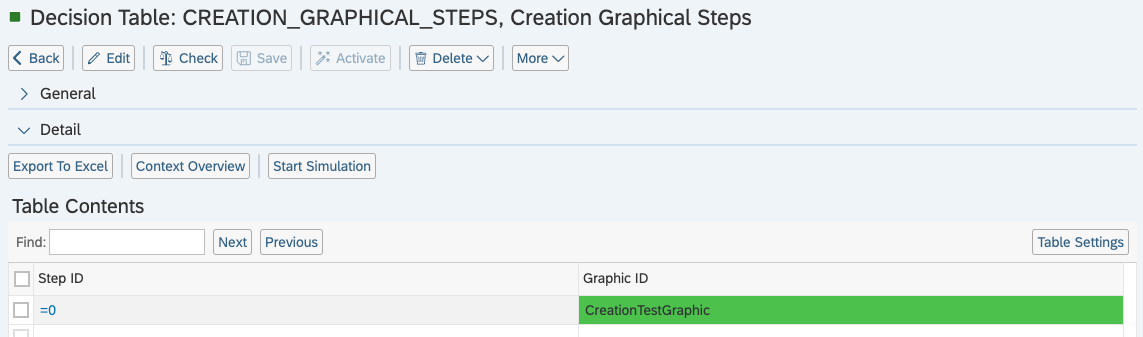
Open your BRF+ Application and navigate to the expression table “Creation Graphical Steps” (Technical Name: CREATION_GRAPHICAL_STEPS).
-
Step ID: Enter the STEP_ID from the expression table “Creation Step” (Technical Name: CREATION_STEP).
-
Graphic ID: Enter the GRAPHIC_ID from the expression table “Graphics” (Technical Name: GRAPHICS).
Example of a linked Graphic to a Step:
Step 5: Defining Graphical Steps (What is visible?/What is next?)
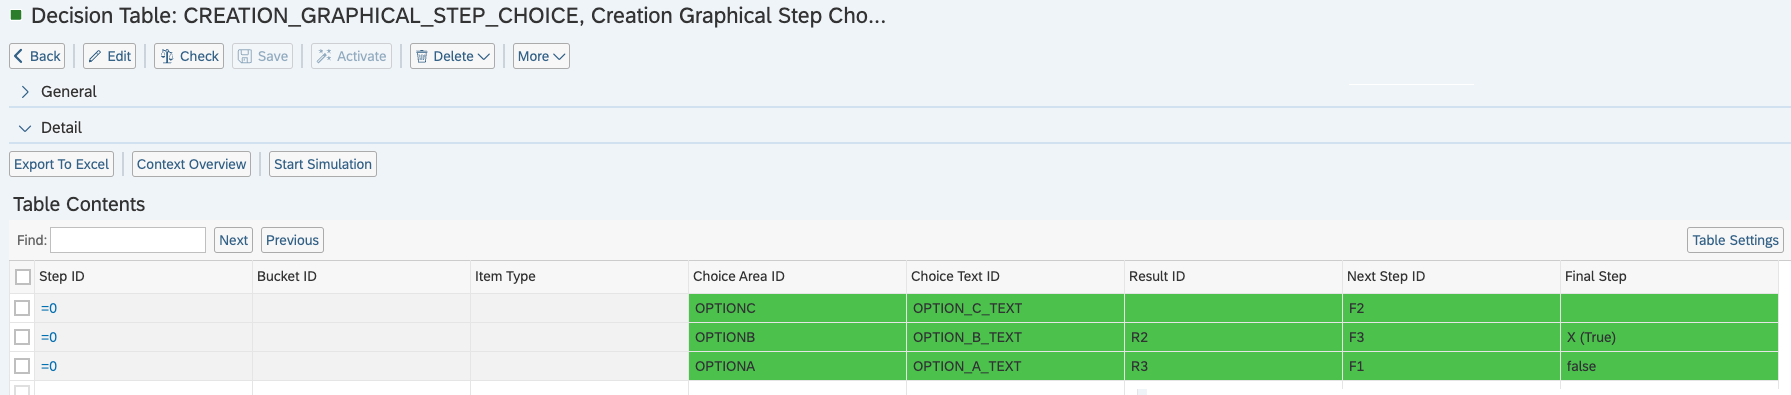
Open your BRF+ Application and navigate to the expression table “Creation Graphical Step Choice” (Technical Name: CREATION_GRAPHICAL_STEP_CHOICE).
-
Step ID: Enter the STEP_ID from the expression table “Creation Step” (Technical Name: CREATION_STEP).
-
Bucket ID (Optional): Enter a Bucket ID, if the creation is supposed to be narrowed down, depending on the already entered input.
-
Item Type (Optional): Enter an Item Type, if the creation is supposed to be narrowed down, depending on the already entered input.
-
Choice Area: Enter the Area ID from expression table “Creation Areas” (Technical Name: CREATION_AREAS). The given Area is then shown for this step.
-
Choice Text ID: Enter any Text ID (Used in “Translatable Texts”, Technical Name: TEXTS). The Text of the Text ID will be used when a list is shown instead of the Graphic. This is the case for Accessibility and Mobile Compatibility scenarios.
-
Tooltip Text ID: Enter any Text ID (Used in “Translatable Texts”, Technical Name: TEXTS). The Text of the Text ID will be used as the Tooltip of the clickable Area.
-
Result ID: Enter any Result ID (Used in “Creation Result Buckets”, Technical Name: CREATION_RESULT_BUCKETS; “Creation Result Datasets”, Technical Name: CREATION_RESULT_DATASETS; “Creation Result Item Types”, Technical Name: CREATION_RESULT_ITEM_TYPES; “Creation Result Project Templates”, Technical Name: CREATION_RESULT_PROJECT_TEMPLA). This ID will be used for predefined Resultsets to choose from. More Info in: Customizing the Creation Wizard - Results
-
Next Step ID: Enter any STEP_ID from the expression table “Creation Step” (Technical Name: CREATION_STEP). This Step is then shown after completing the current Step.
Example of an initial Step (0) with three clickable Areas:
See Also
- Customizing Fields - Basic Field Config
- Translation of BRF+ Text Values
- Customizing the Creation Wizard - Forms
- Customizing the Creation Wizard - Results
Keywords
brf+, add, graphic, creation