
Post Update Activities: 2024.1.6
Situation
You’re upgrading from an earlier version of PPM Process Package to a newer release. Manual steps for migration are necessary.
Solution
The following steps are necessary, if you implemented your own BRF+ customizing.
If you have not created your own BRF+ application according to Creation of Customer BRF+ Application, skip until step Activate Gantt Chart.
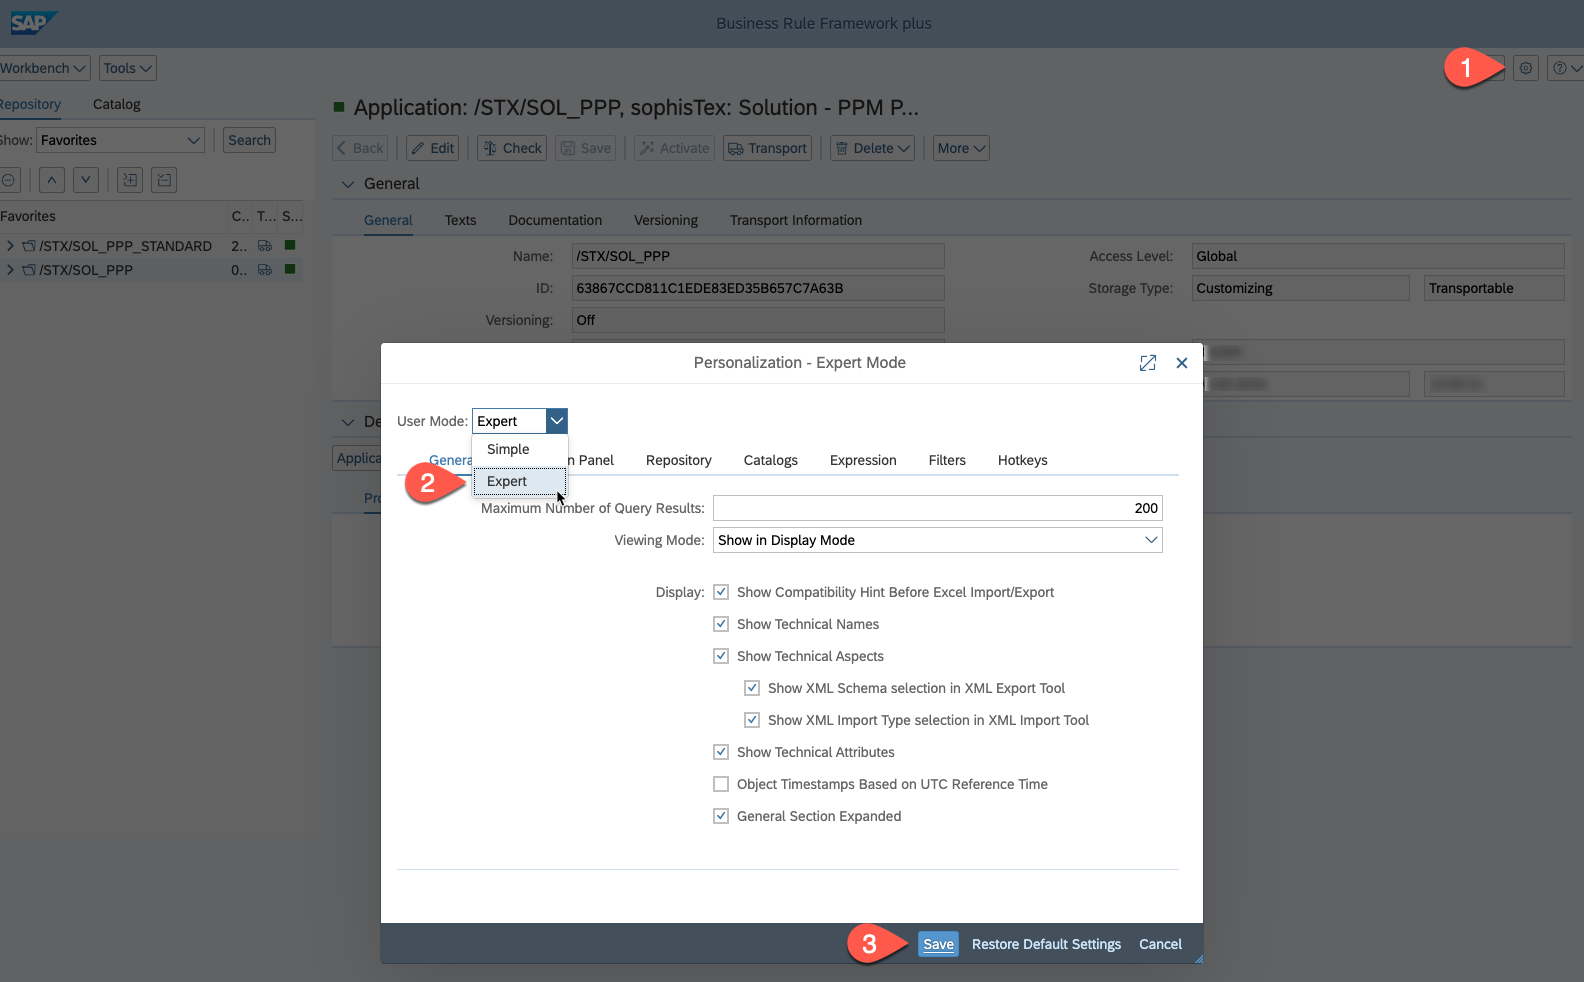
1. Enter Expert Mode in BRF+
Open BRF+ via transaction BRF+ and click on the settings wheel at the top right. Select the EXPERT mode from the drop-down menu at the top left and then save:
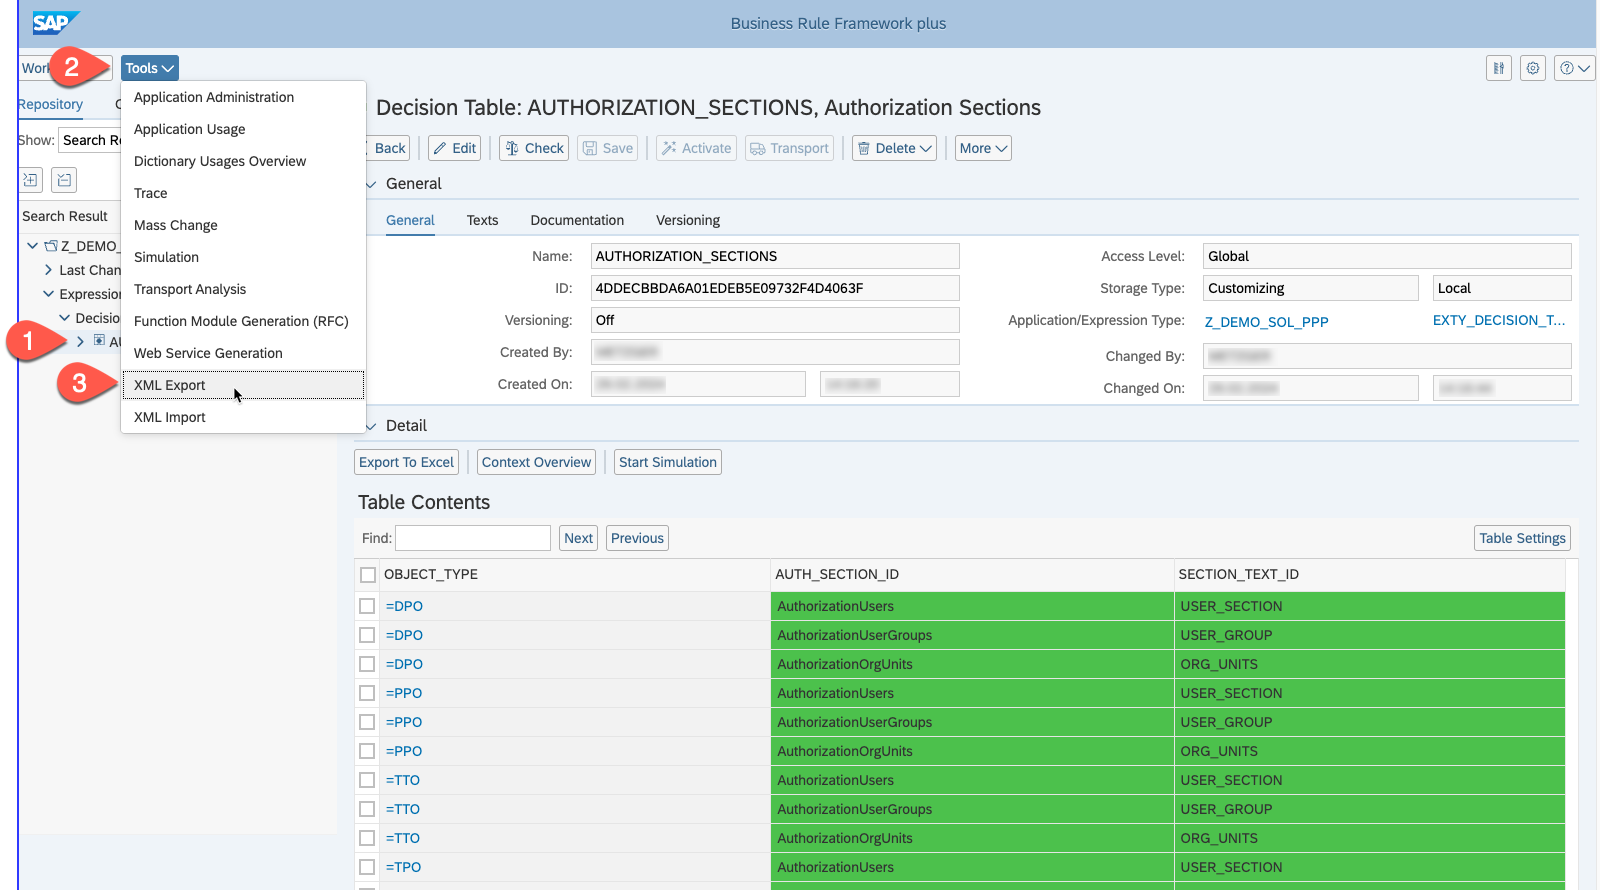
2. Export of Expression Tables
Navigate to your already existing BRF+ application. Export each expression Table in your custom application via the “XML Export” Feature of BRF+. This is done by selecting the expression table and then clicking Tools and XML Export:
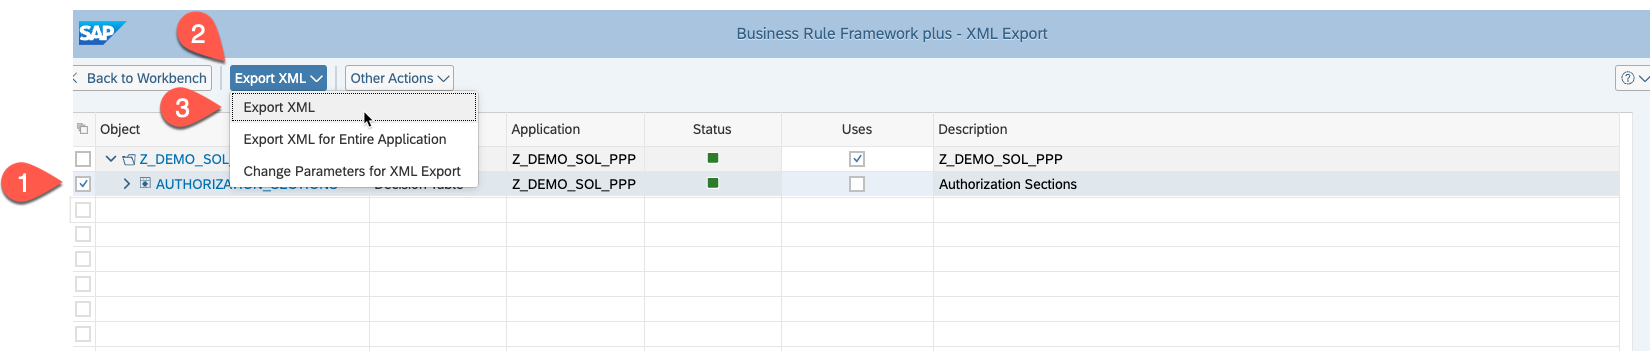
The XML Export Tool will be opened. Now select the single Expression Table and click Export XML and again Export XML:
The XML will be downloaded and look something like this:
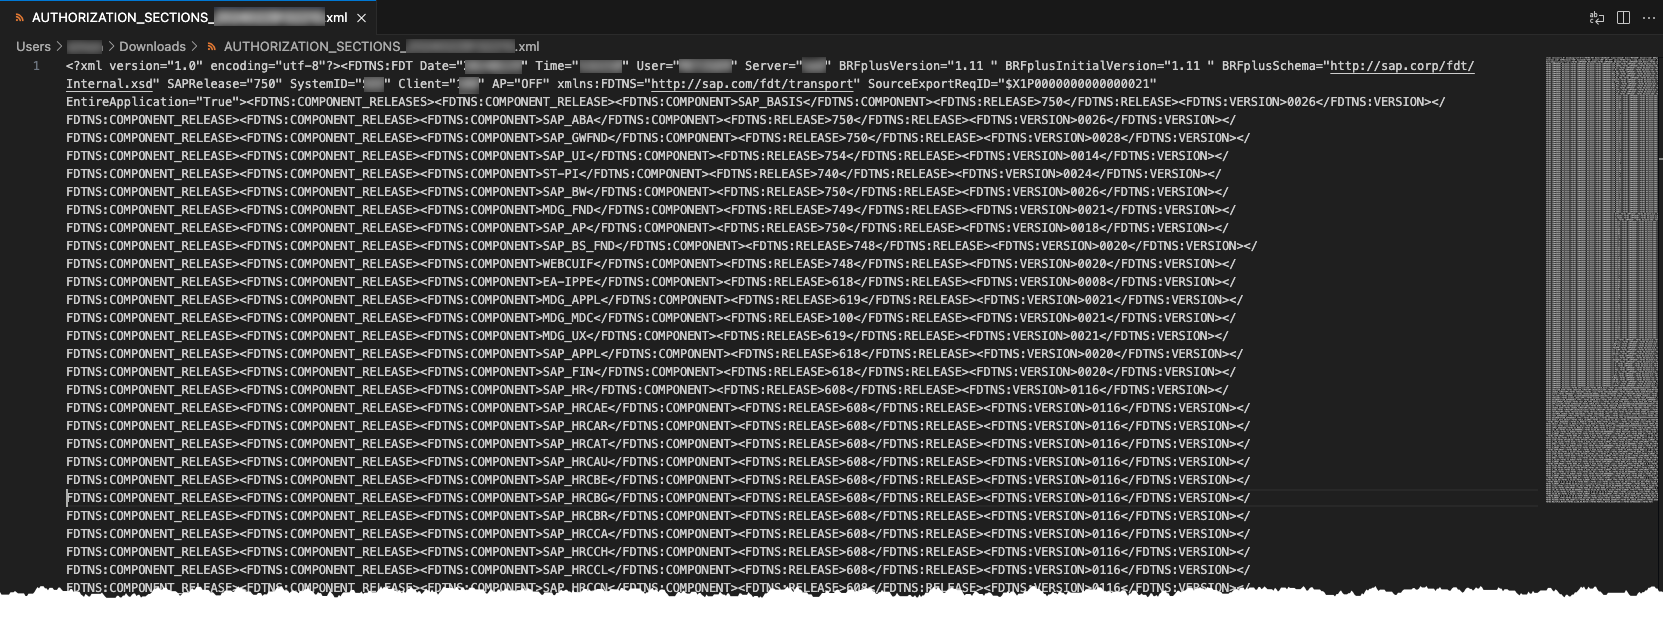
Repeat this Step for each expression Table in your application.
3. Deletion of Objects
Delete all Expression Tables, Rulesets and Functions from your own application. This can be done by right clicking a BRF+ object and selecting Delete:

Make sure to not select “Include Referenced Objects”:

After the deletion, no more Expression Tables, Rulesets or Function should exist in your BRF+ application:
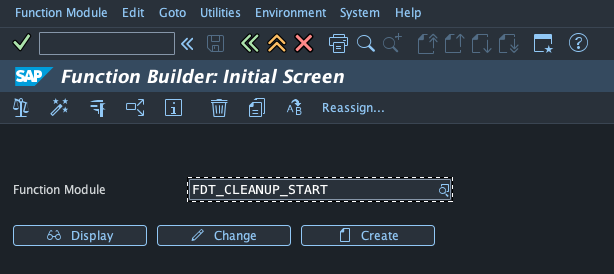
4. Run Function Module FDT_CLEANUP_START
Open transaction SE37 and enter FDT_CLEANUP_START. Press Execute (F8):
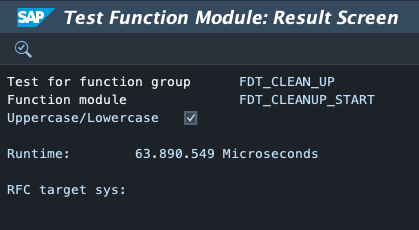
Now select “Uppercase/Lowercase” and press Execute (F8) again:

Once the function model successfully deleted all objects, this view will show up:
5. Update of BRF+ application
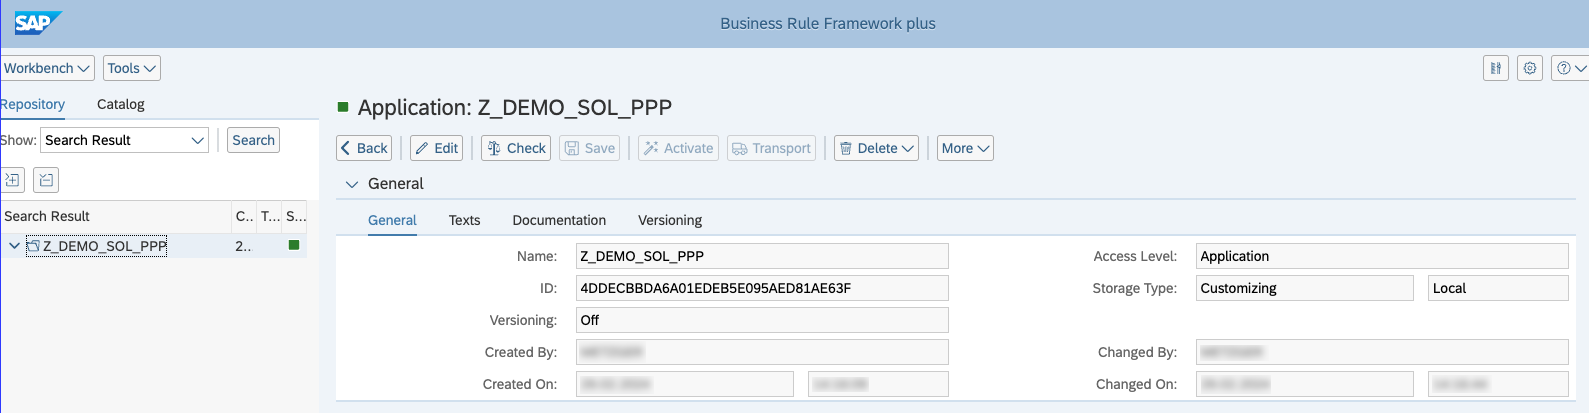
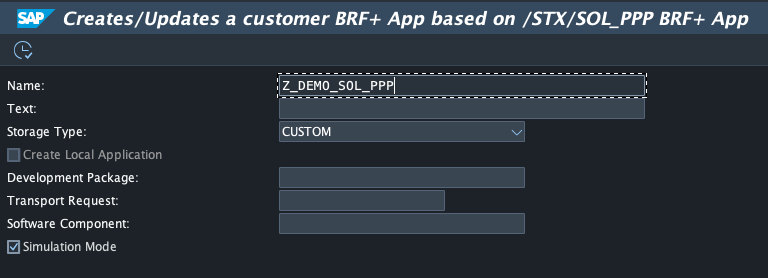
Open transaction /STX/SOL_PPP_BRF+ and enter the name of your app:
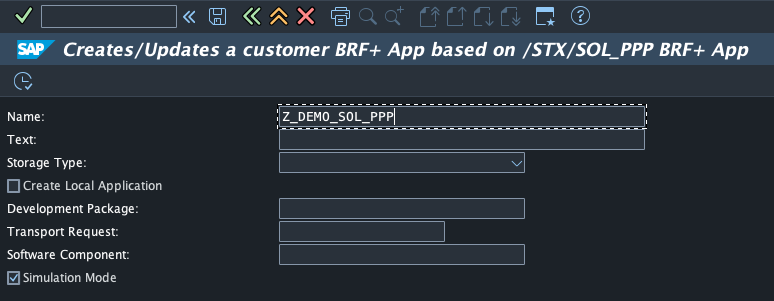
After pressing Enter, the below input fields adapt, depending on what input is needed.
If no application with this name is found, the report will create a new application. For this scenario, please follow the steps mentioned in Creation of Customer BRF+ Application.
If an application is found, it may require a Transport request, depending on if the application is transportable and not locked by a Transport Request already. In the example, the application a local application, so a Transport Request is not required:
Run the Report in simulation mode with Execute (F8) and you will see an overview, of what exactly will be copied / changed:
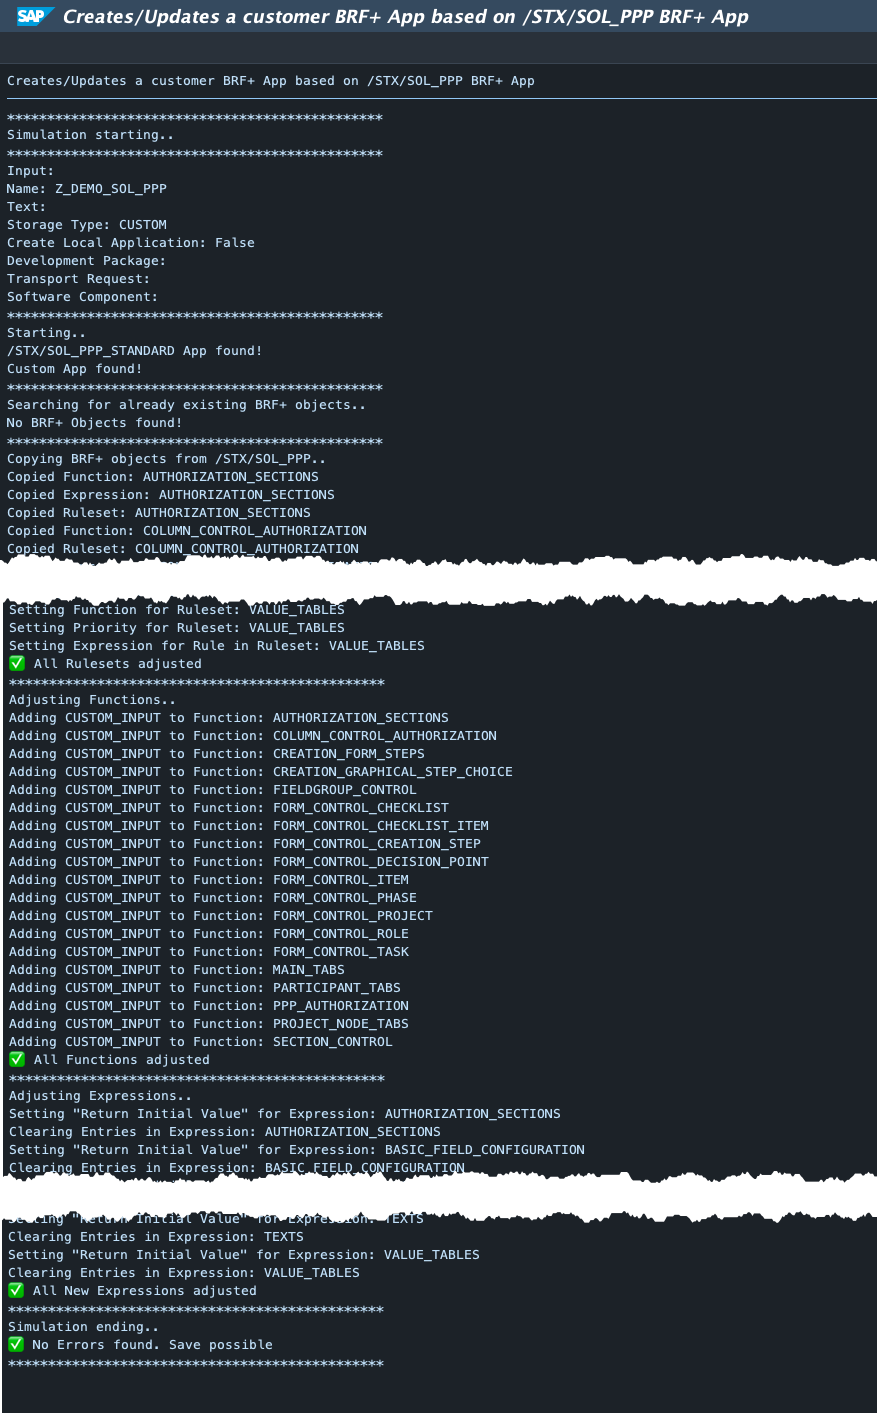
When the simulation ends with the message: “✅ No Errors found. Save possible”, return (F3) and execute (F8) the report without simulation mode. You will get the same Overview with extra messages at the bottom:
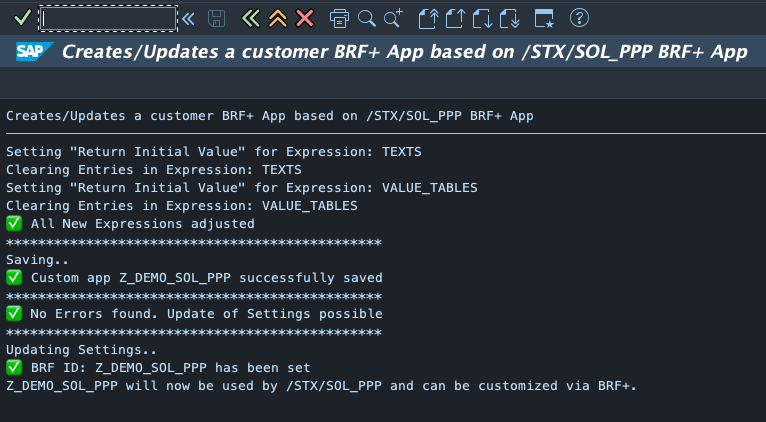 Your application is now successfully saved and will now be used by
 /STX/SOL_PPP.
6. Import of old customizing
To use the “Import XML” Feature of BRF+, first you need to export the expression table as XML, where you want to add your customizing. Repeat Step 2 with the new Expression Table. Now open the just downloaded XML file with a file editor of your choice (Notepad++, Visual Studio Code, ..) as well as the corresponding previously downloaded XML file of Step 2.
For better visuals, we suggest to use an xml formatter to make the file more human readable.
❗Sometimes, a formatter adds New Line Characters when formatting the XML. This can then not be interpreted by the XML Import of BRF+.❗
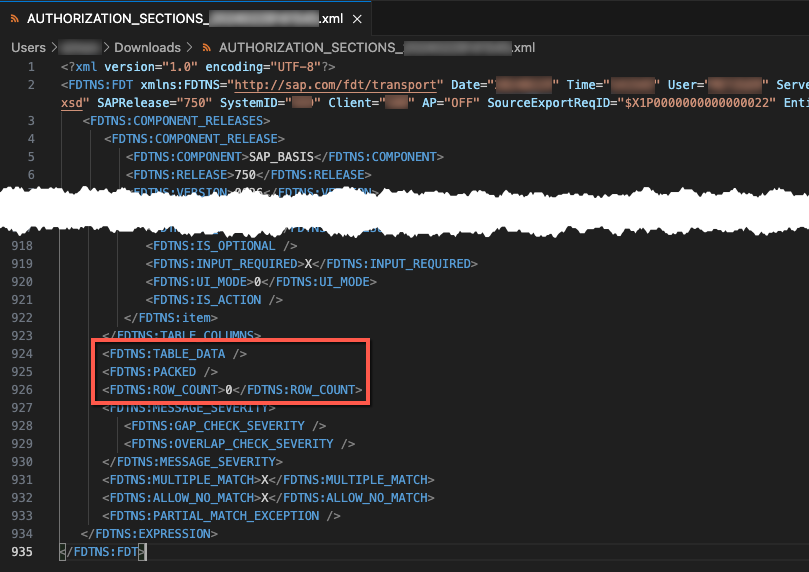
In your old customizing XML locate the entry _ <FDTNS:TABLE_DATA> _. From there, copy the file all the way to _ </FDTNS:ROW_COUNT> _ to the clipboard (Select everything inside the red marked area and press ctrl + c):
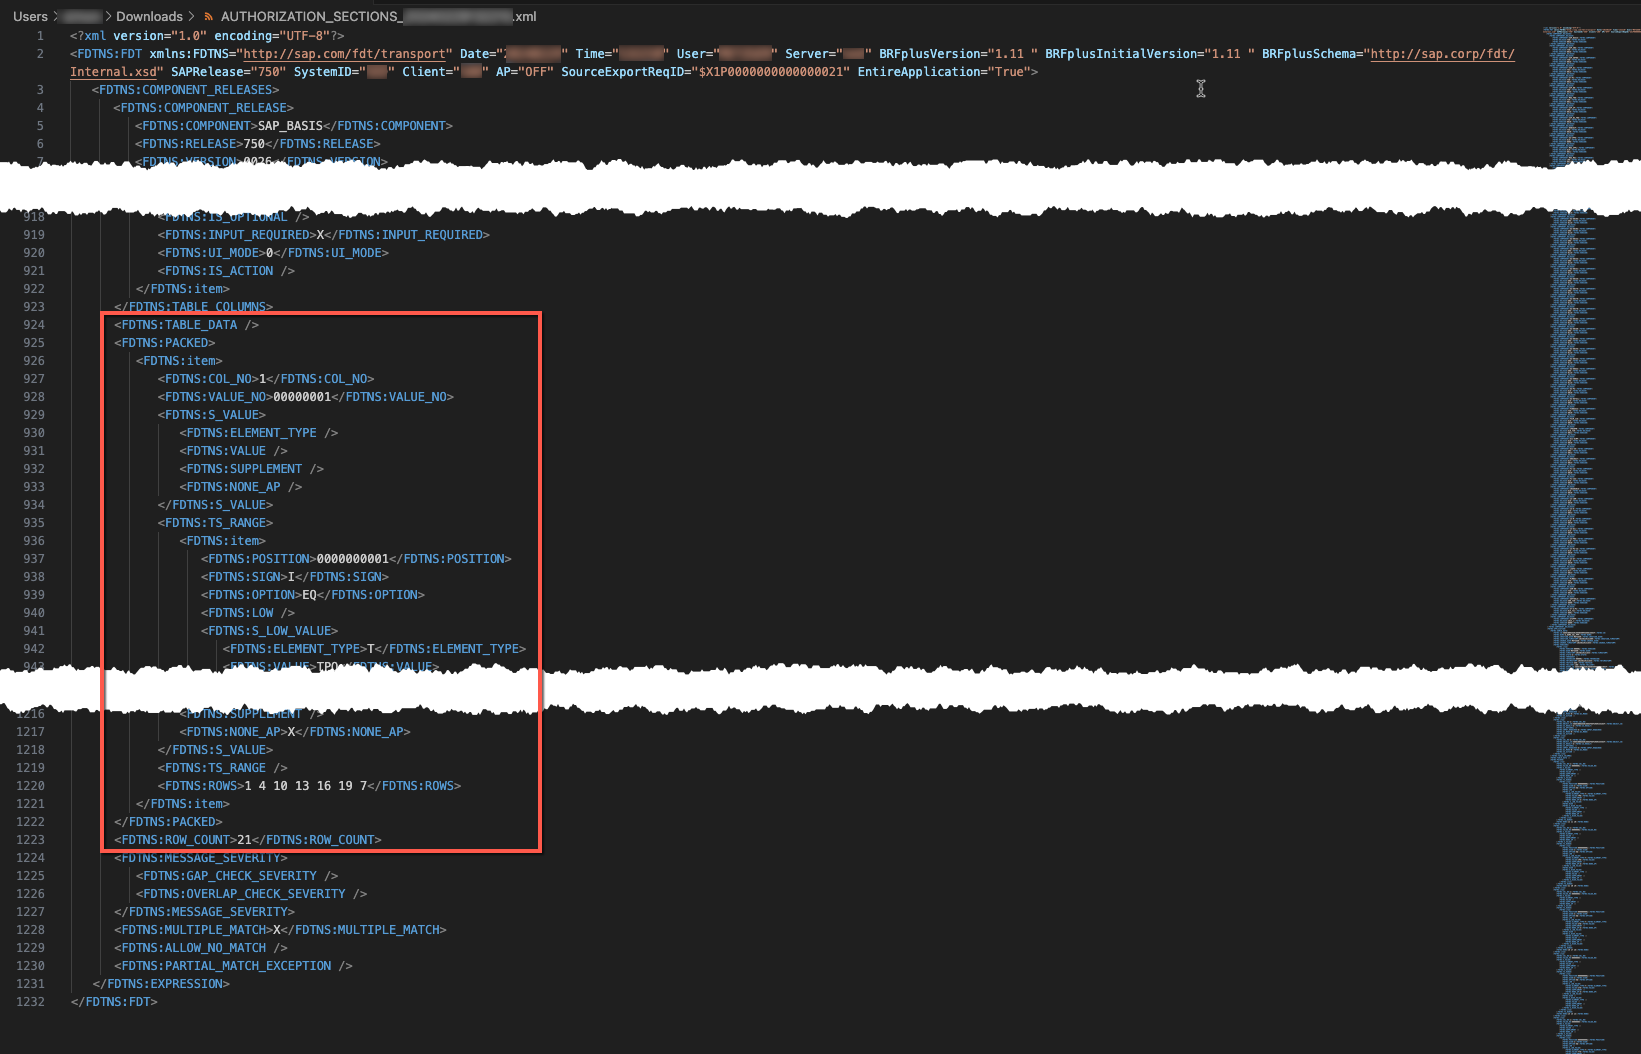
The data between _ <FDTNS:TABLE_DATA> _ and _ </FDTNS:ROW_COUNT> _ varies for each expression table.
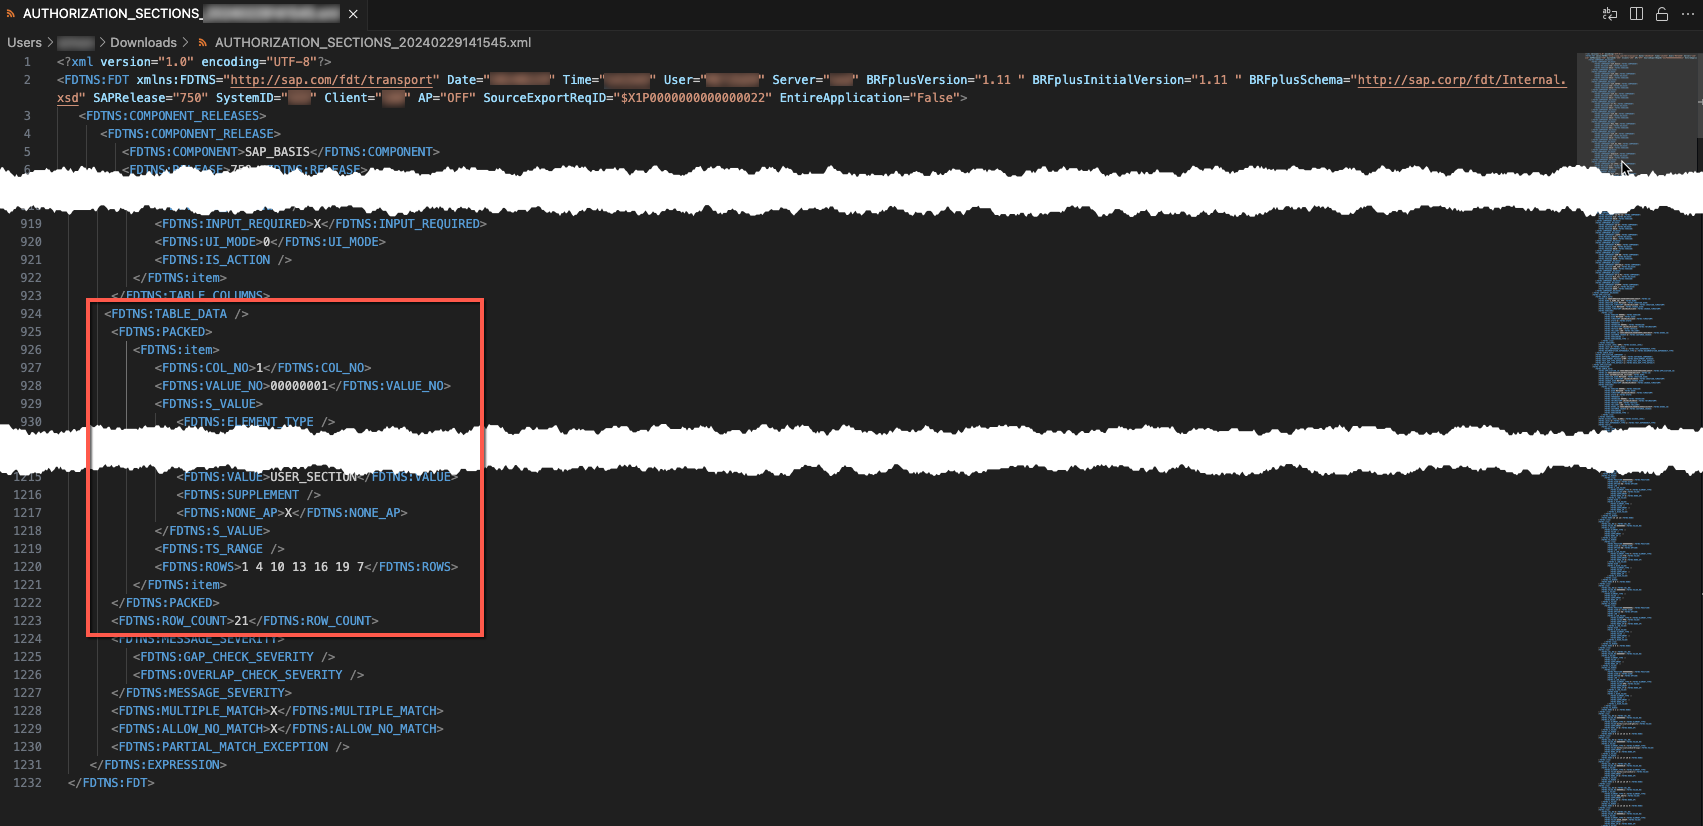
Now locate _ <FDTNS:TABLE_DATA> _ the inside XML file of the new expression table:
Now replace everything from _ <FDTNS:TABLE_DATA> _ to _ </FDTNS:ROW_COUNT> _ with the data of the old customizing. (Select all and press ctrl + v) The result should look something like this:
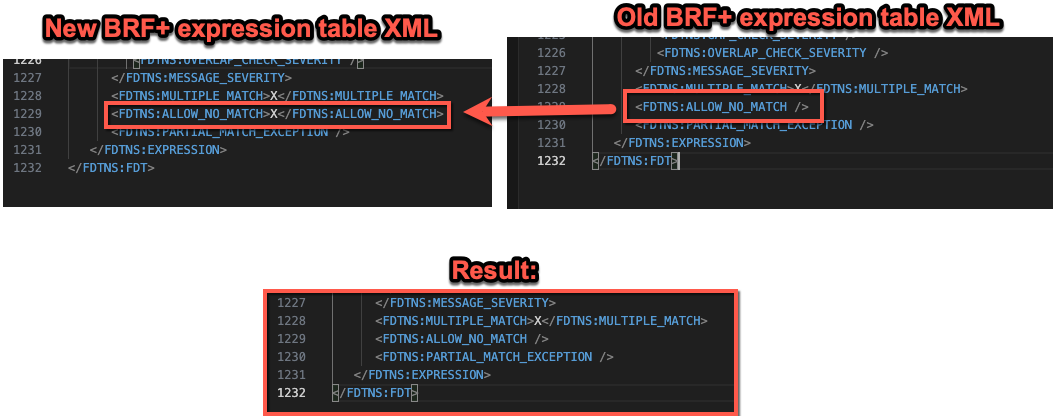
Lastly, copy the line _ <FDTNS:ALLOW_NO_MATCH> _ from the old expression table XML to the new one: (This can also be set via Table Settings in BRF+)
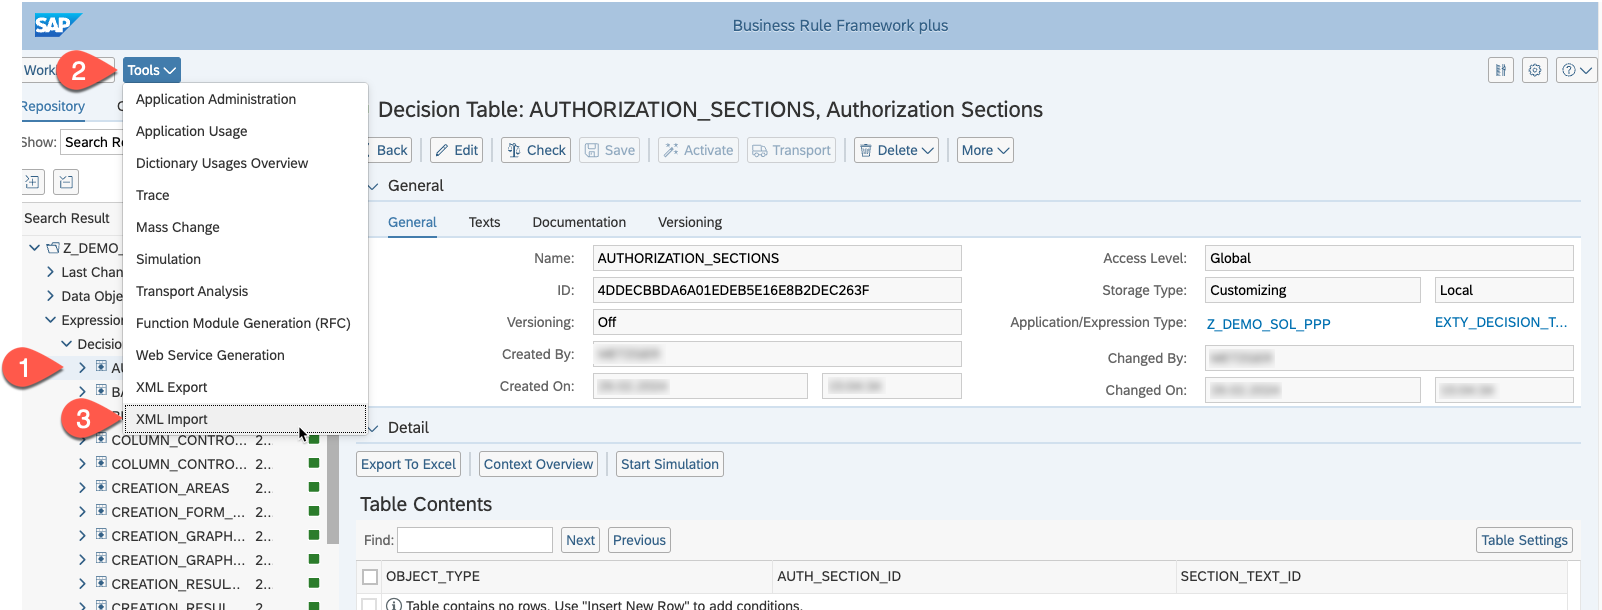
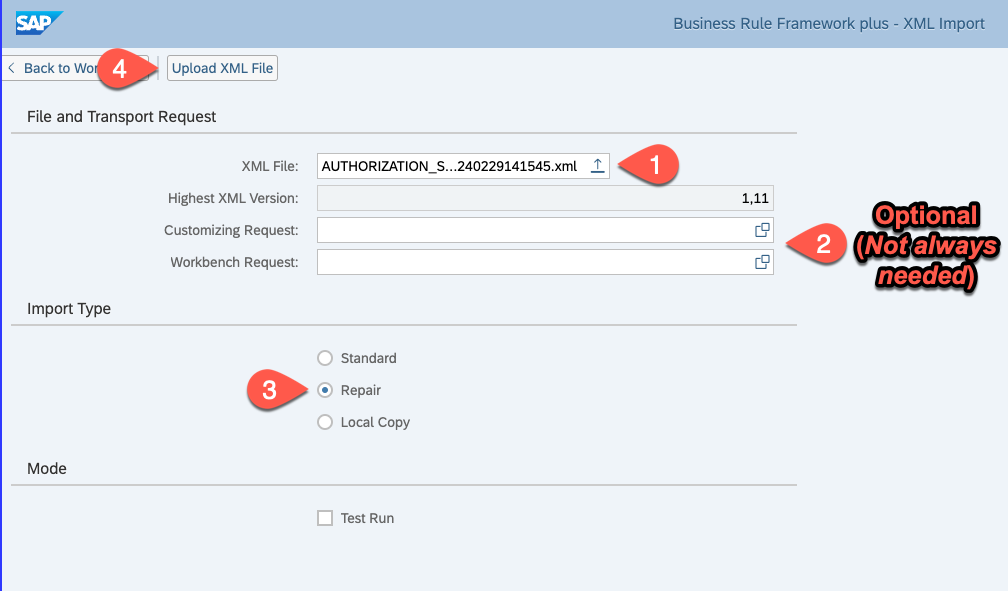
Now import the new XML by selecting the expression table in BRF+ and clicking “Tools” and then “XML Import”:
In the new view, select the new XML file, choose a Transport Request if needed and choose the Repair option. Now click “Upload XML File”:
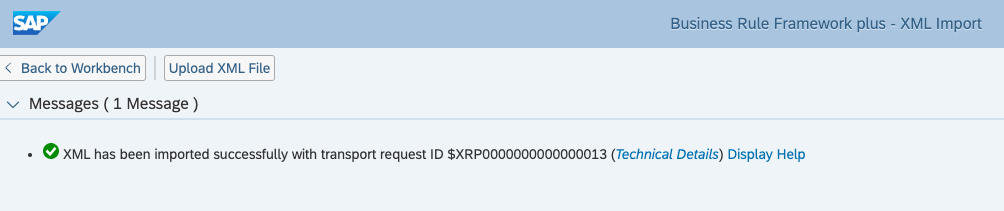
If everything worked correctly, you will be prompted a message like this:
Now repeat this step for each expression table you exported earlier.
Activate Gantt Chart
On a separate topic, completely independent from the BRF+ migration, a service for the newly introduced Gantt chart has been added which needs to be activated.
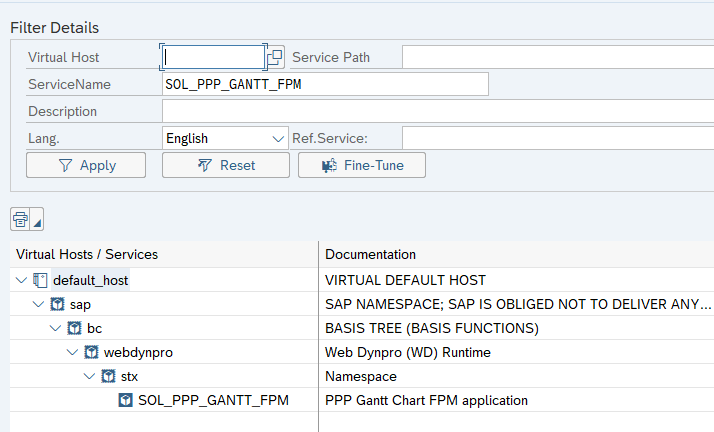
- Open Transaction
SICFon the backend system. - As “Service Name”, enter
SOL_PPP_GANTT_FPM. - Execute, you should see the following tree structure:
- Right click on
SOL_PPP_GANTT_FPM→ Activate Service - You should now be able to open the Gantt Chart in PPP