Custom Input: Adding Custom Condition Columns to a BRF+ Decision Table
Custom Input: Adding Custom Condition Columns to a BRF+ Decision Table
To add additional Condition Columns to a BRF+ decision table, follow these steps:
Step 1: Verify Support for Custom Input
- Check if the decision table supports Custom Input by consulting the Custom Input overview or checking Context Overview of the table.
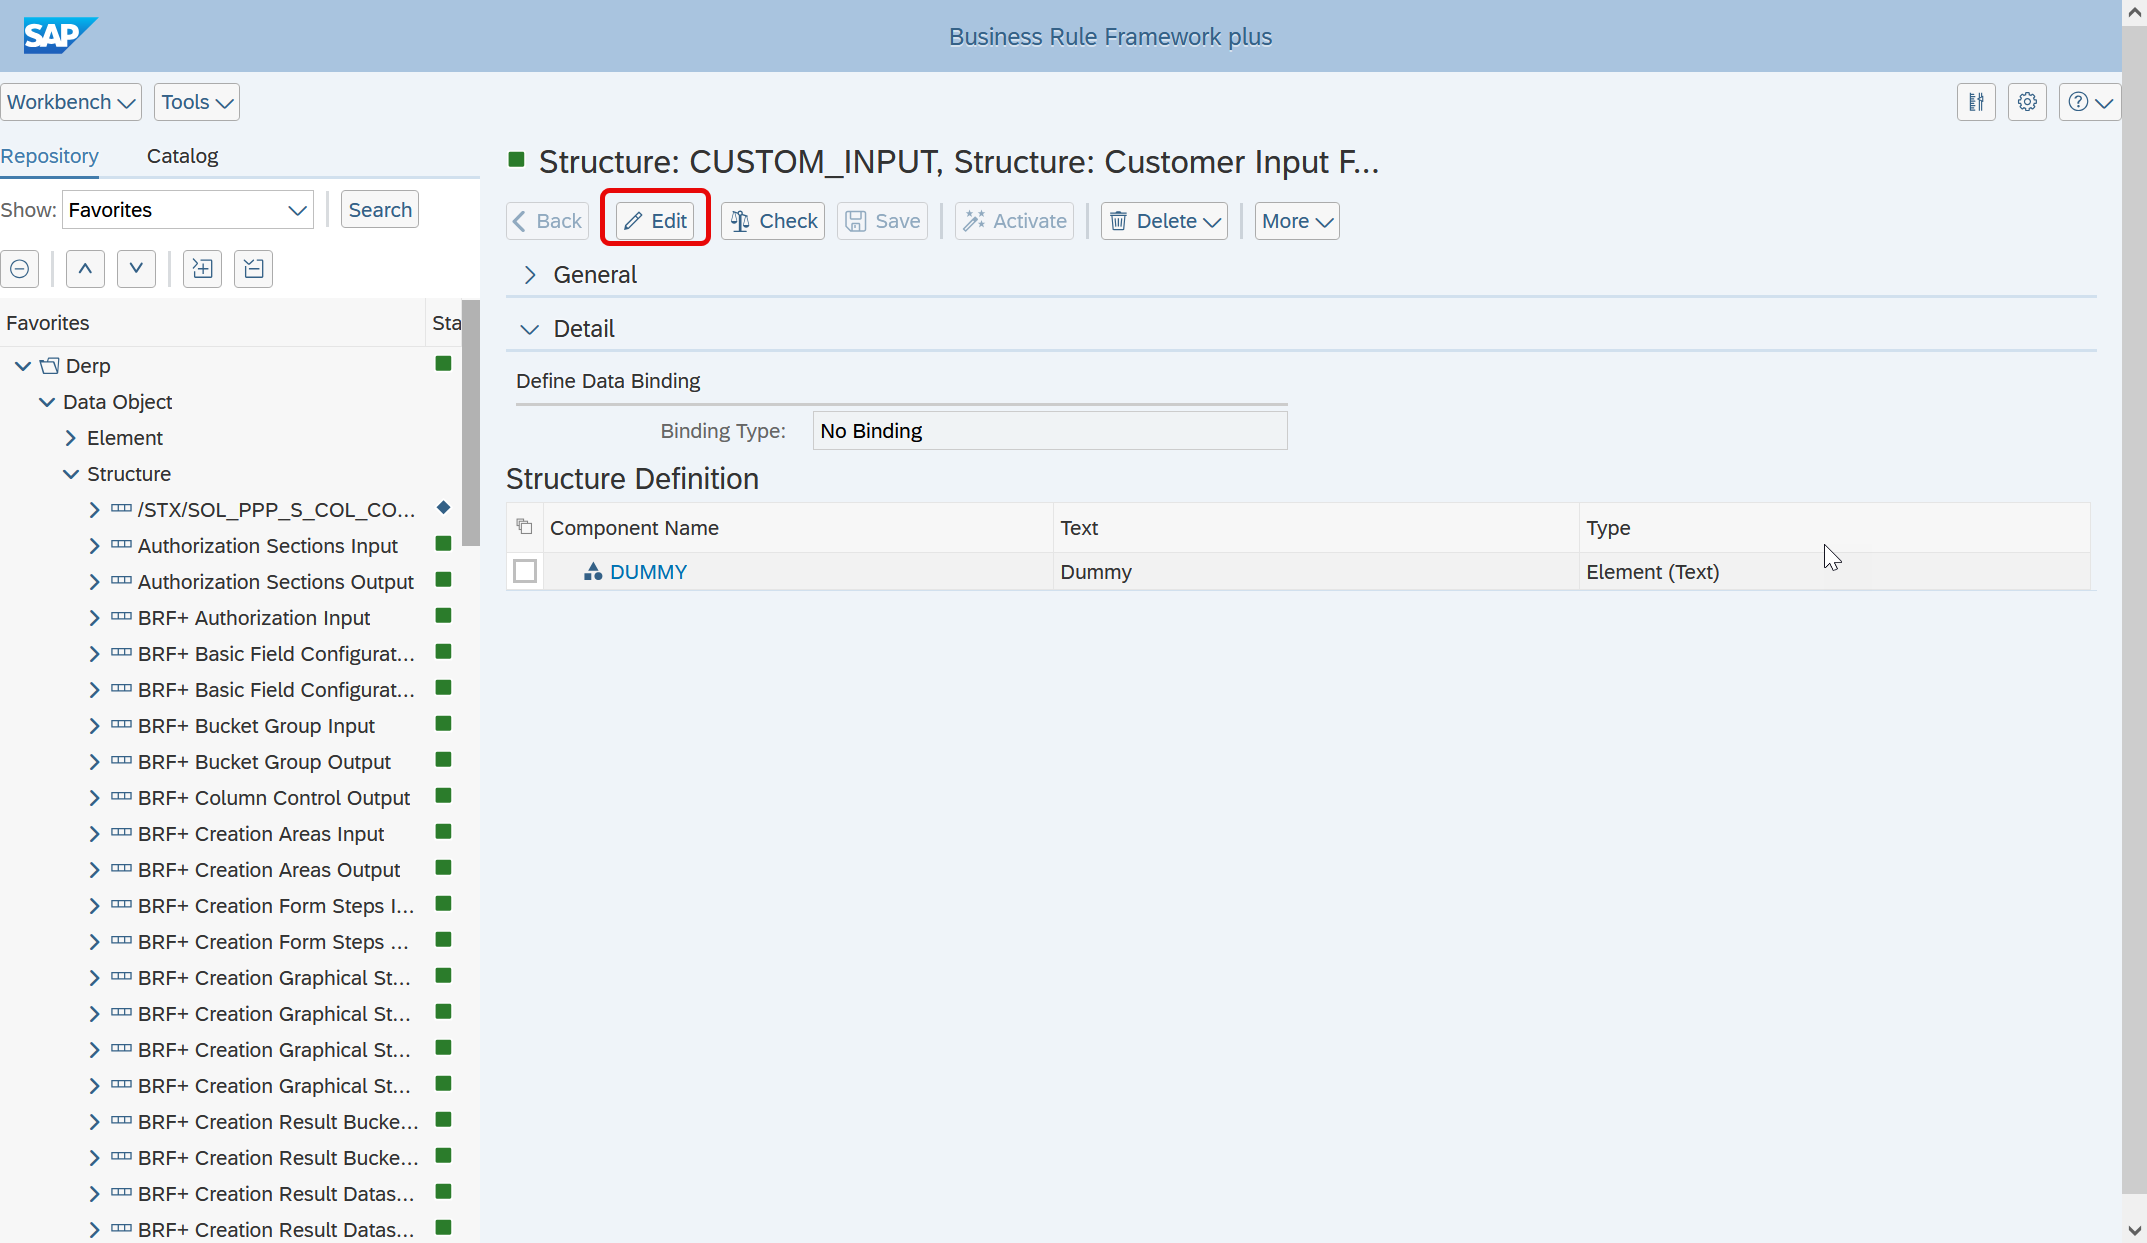
Step 2: Add a Data Object to Structure: CUSTOM_INPUT
-
Navigate to Structure: CUSTOM_INPUT:
- Path:
Your Customer Application → Data Object → Structure → Structure: CUSTOM_INPUT. - Note: Structure: CUSTOM_INPUT is located at the bottom of the list.
- Path:
-
Enable Edit Mode:
- This will allow modifications to the structure.
-
Add a Data Object:
-
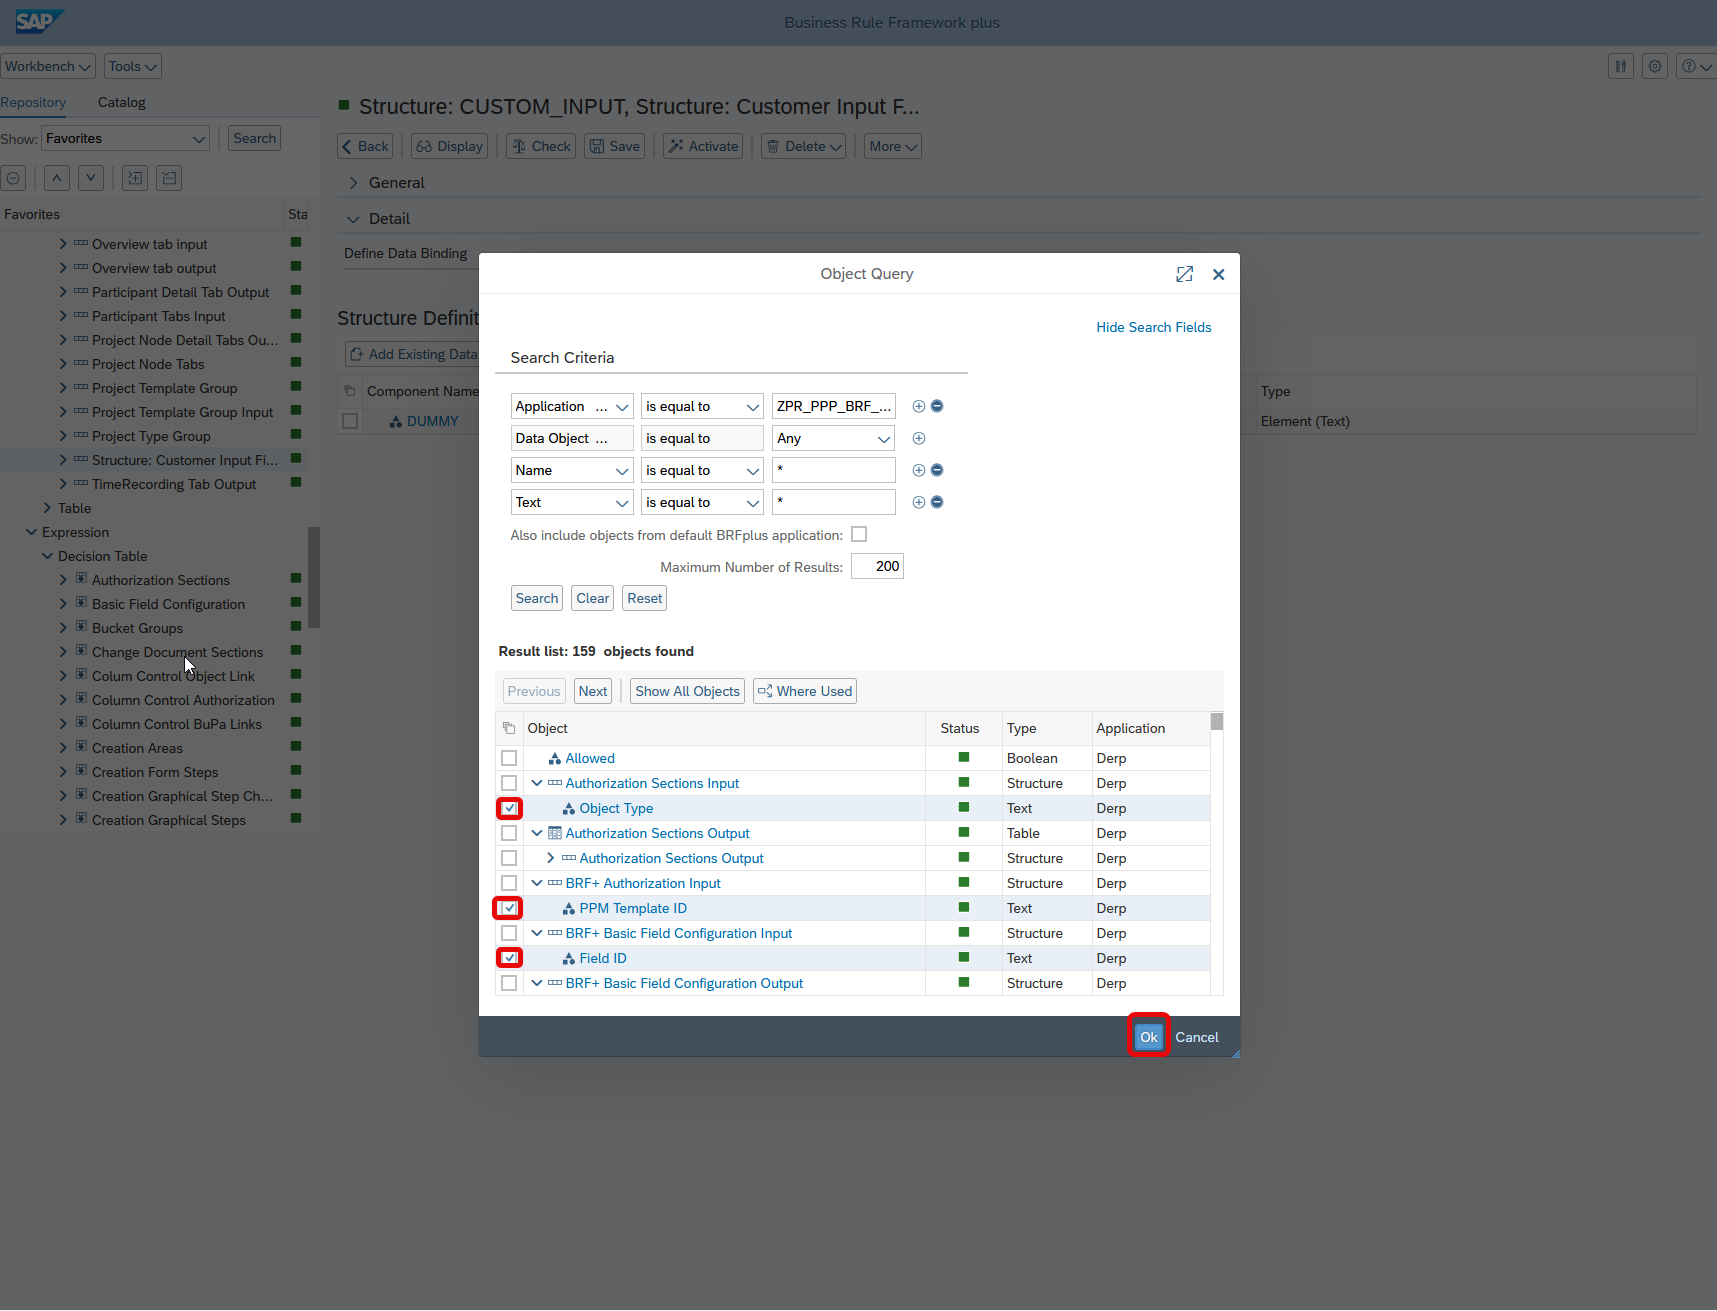
Option 1: Use an Existing Data Object
- Click on Add Existing Data Object.
- Use the search bar or browse the list to find the required data object.
- Select the data object and click OK.
-
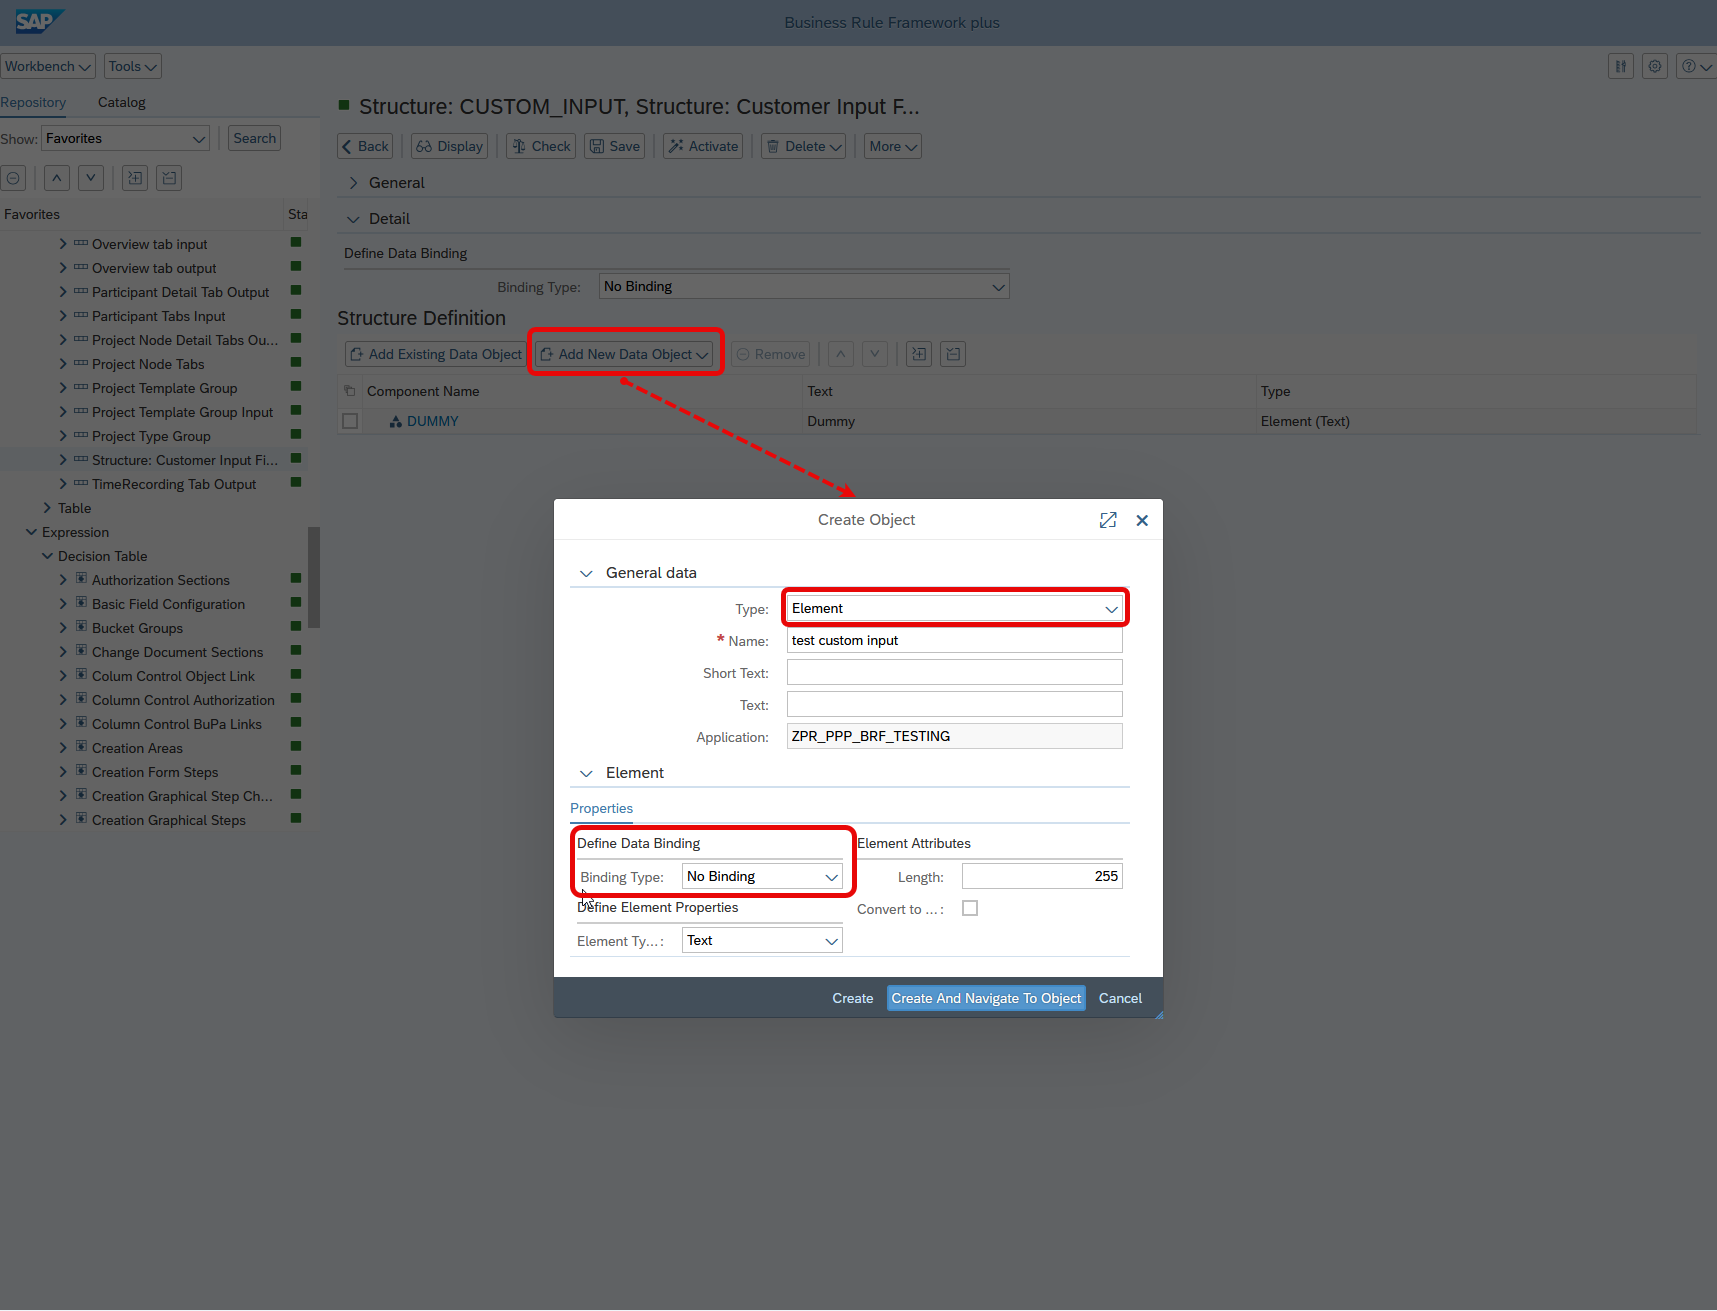
* **Option 2: Create a New Data Object**
* Click on **Add New Data Object**.
* Select **Element** as the object type.
* Provide a name for the new data object.
* Optionally, bind the new data object to an existing **DDIC** or **BRF+ element**.
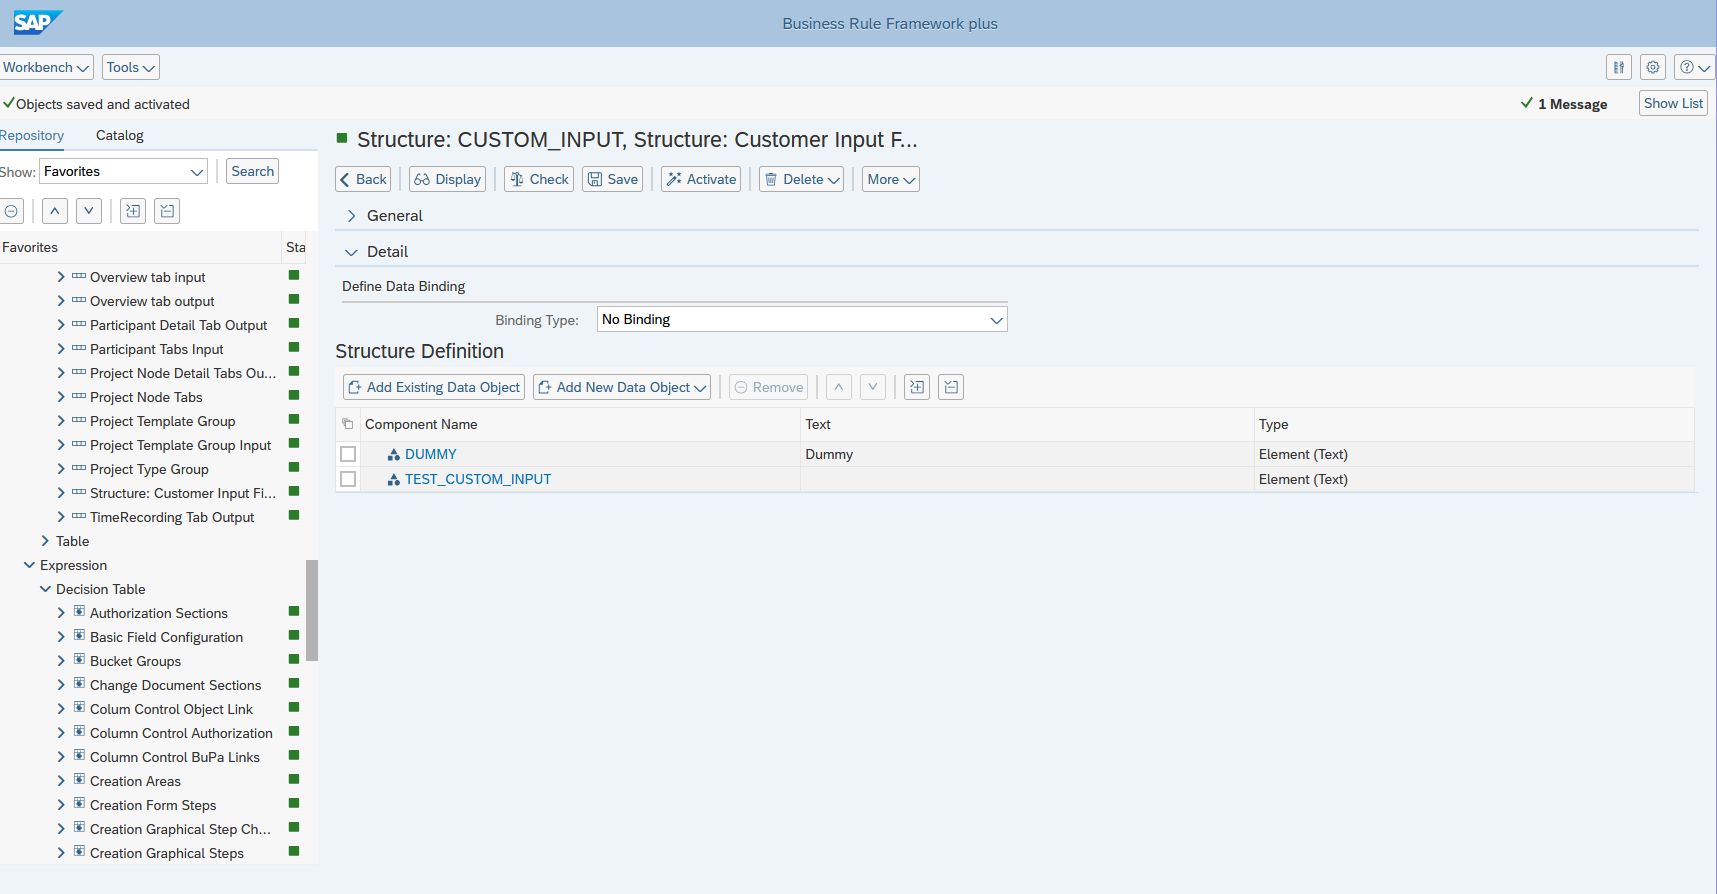
* Save and activate **Structure: CUSTOM\_INPUT** after creating the new data object.
- The created Object will appear in the list,
Step 3: Add a Custom Column to the Decision Table
-
Open the relevant Decision Table in BRF+.
-
Enable Edit Mode.
-
Access Table Settings:
- Located in the upper-right corner of the BRF+ table.
-
Navigate to the Condition Columns section.
-
Insert a Custom Column:
- Click Insert Column and select From Context Data Object.
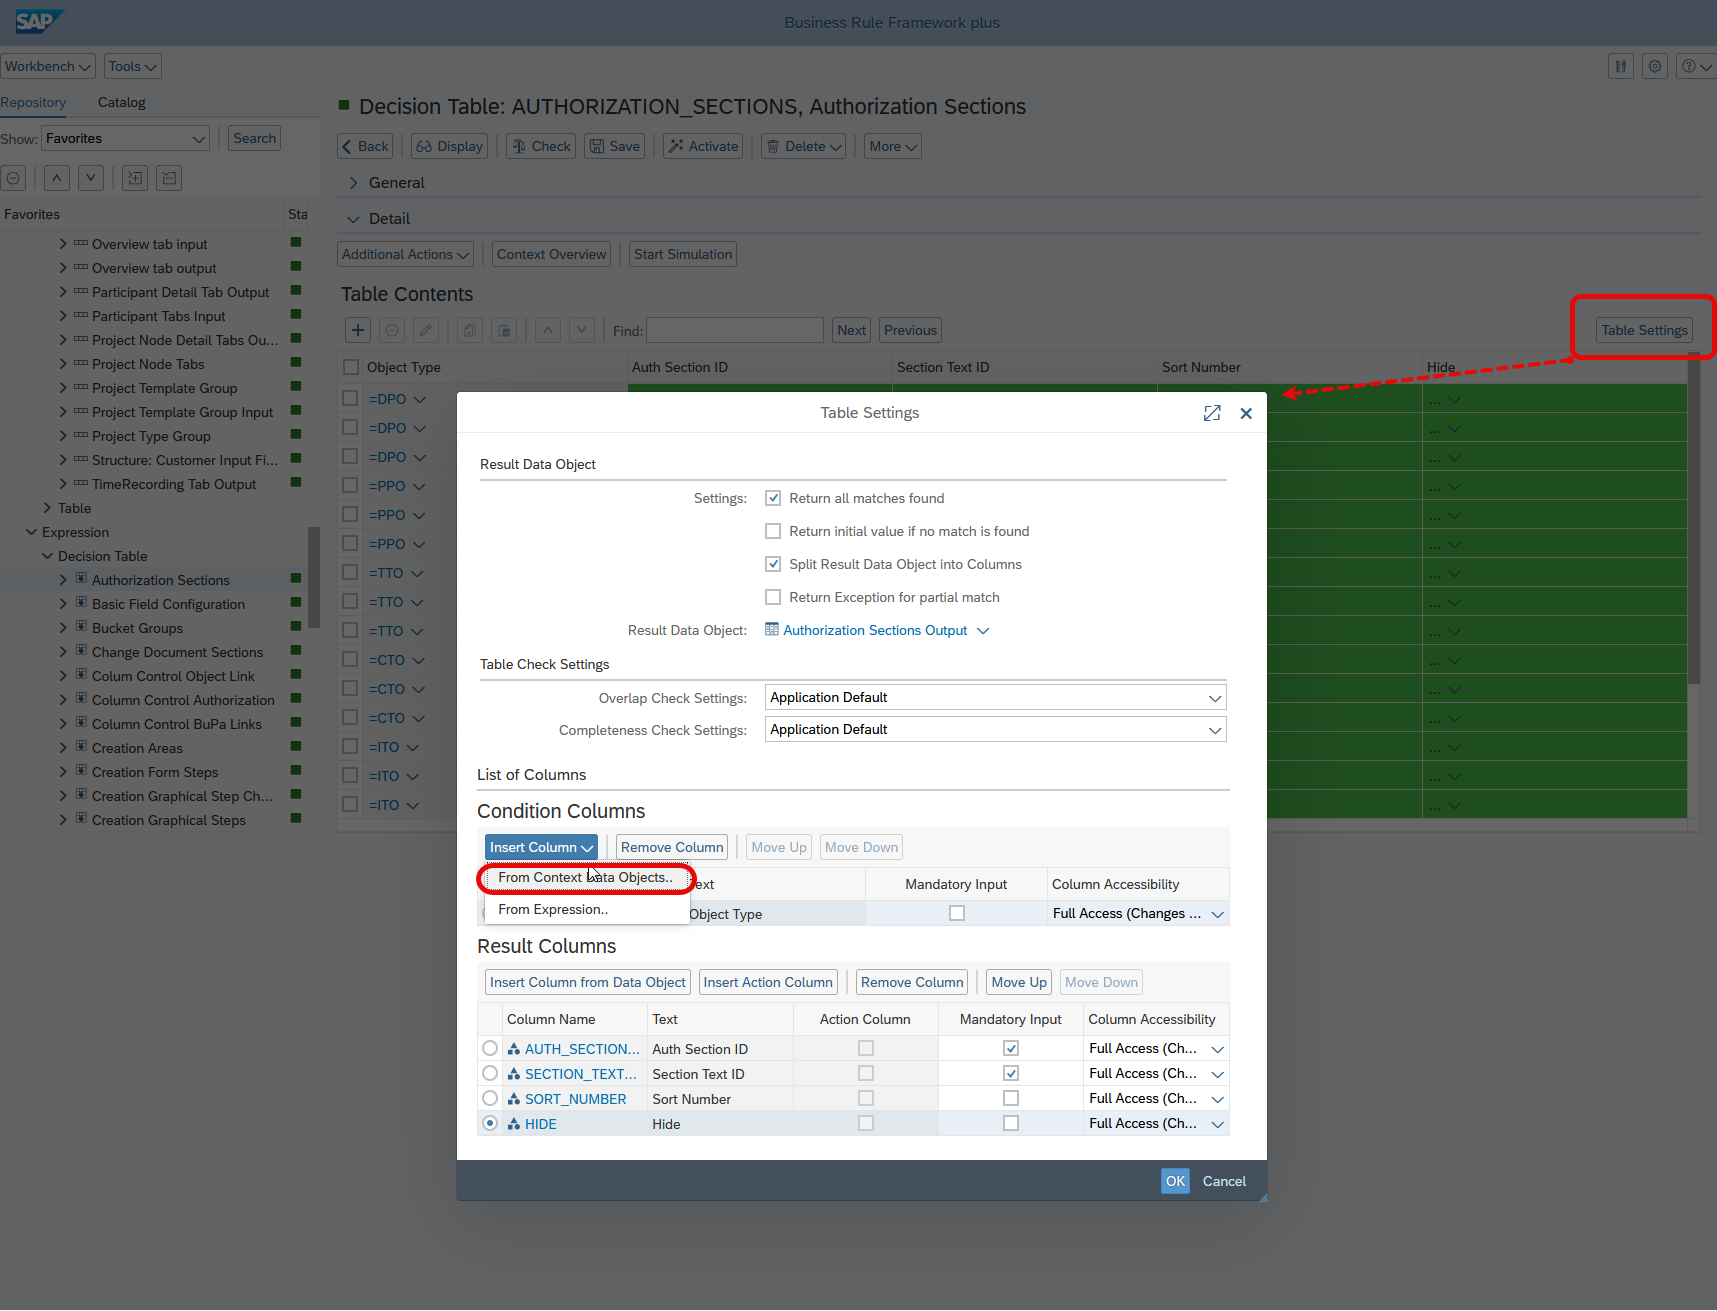
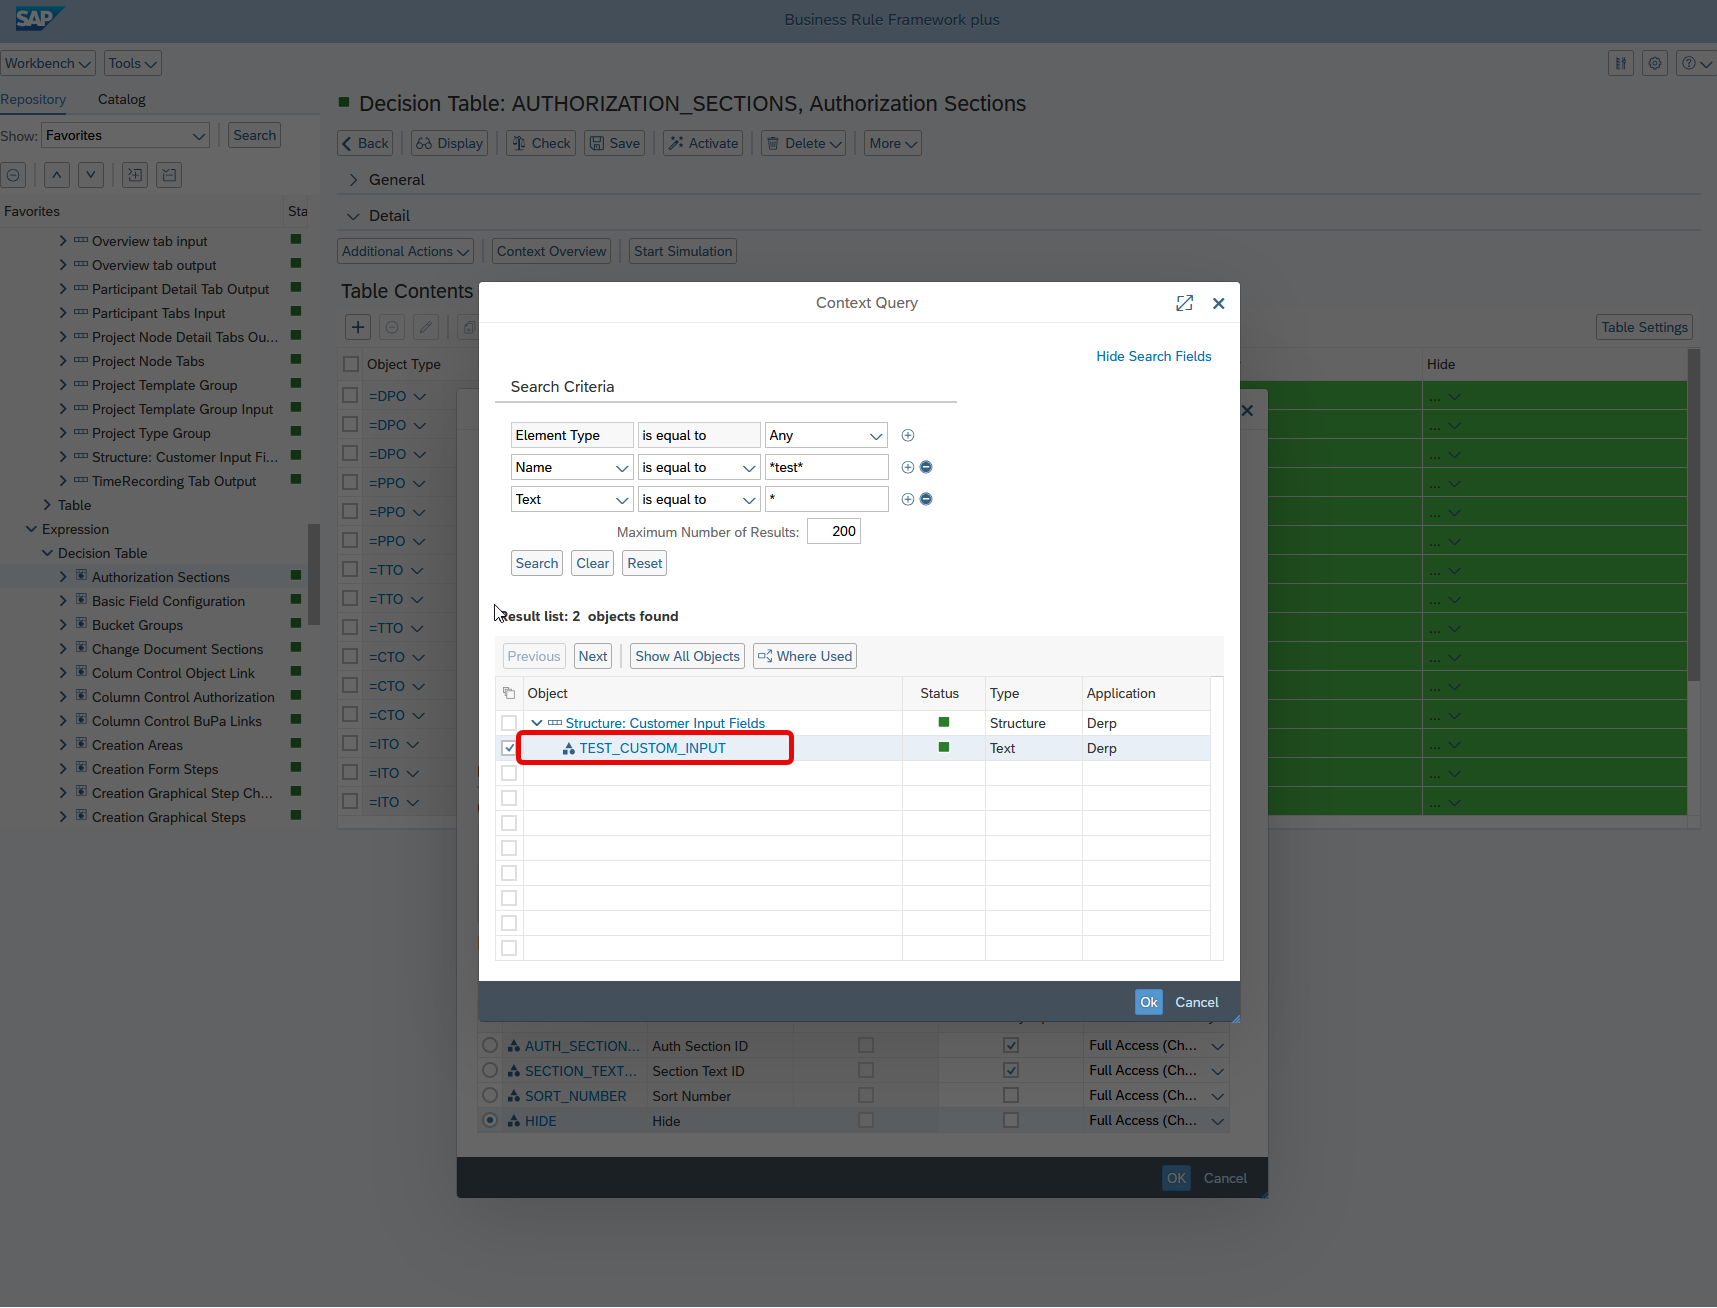
* Use the structure browser or search field to locate the data object added to **Structure: CUSTOM\_INPUT**.
* Click **OK** in the **Context Query** window.
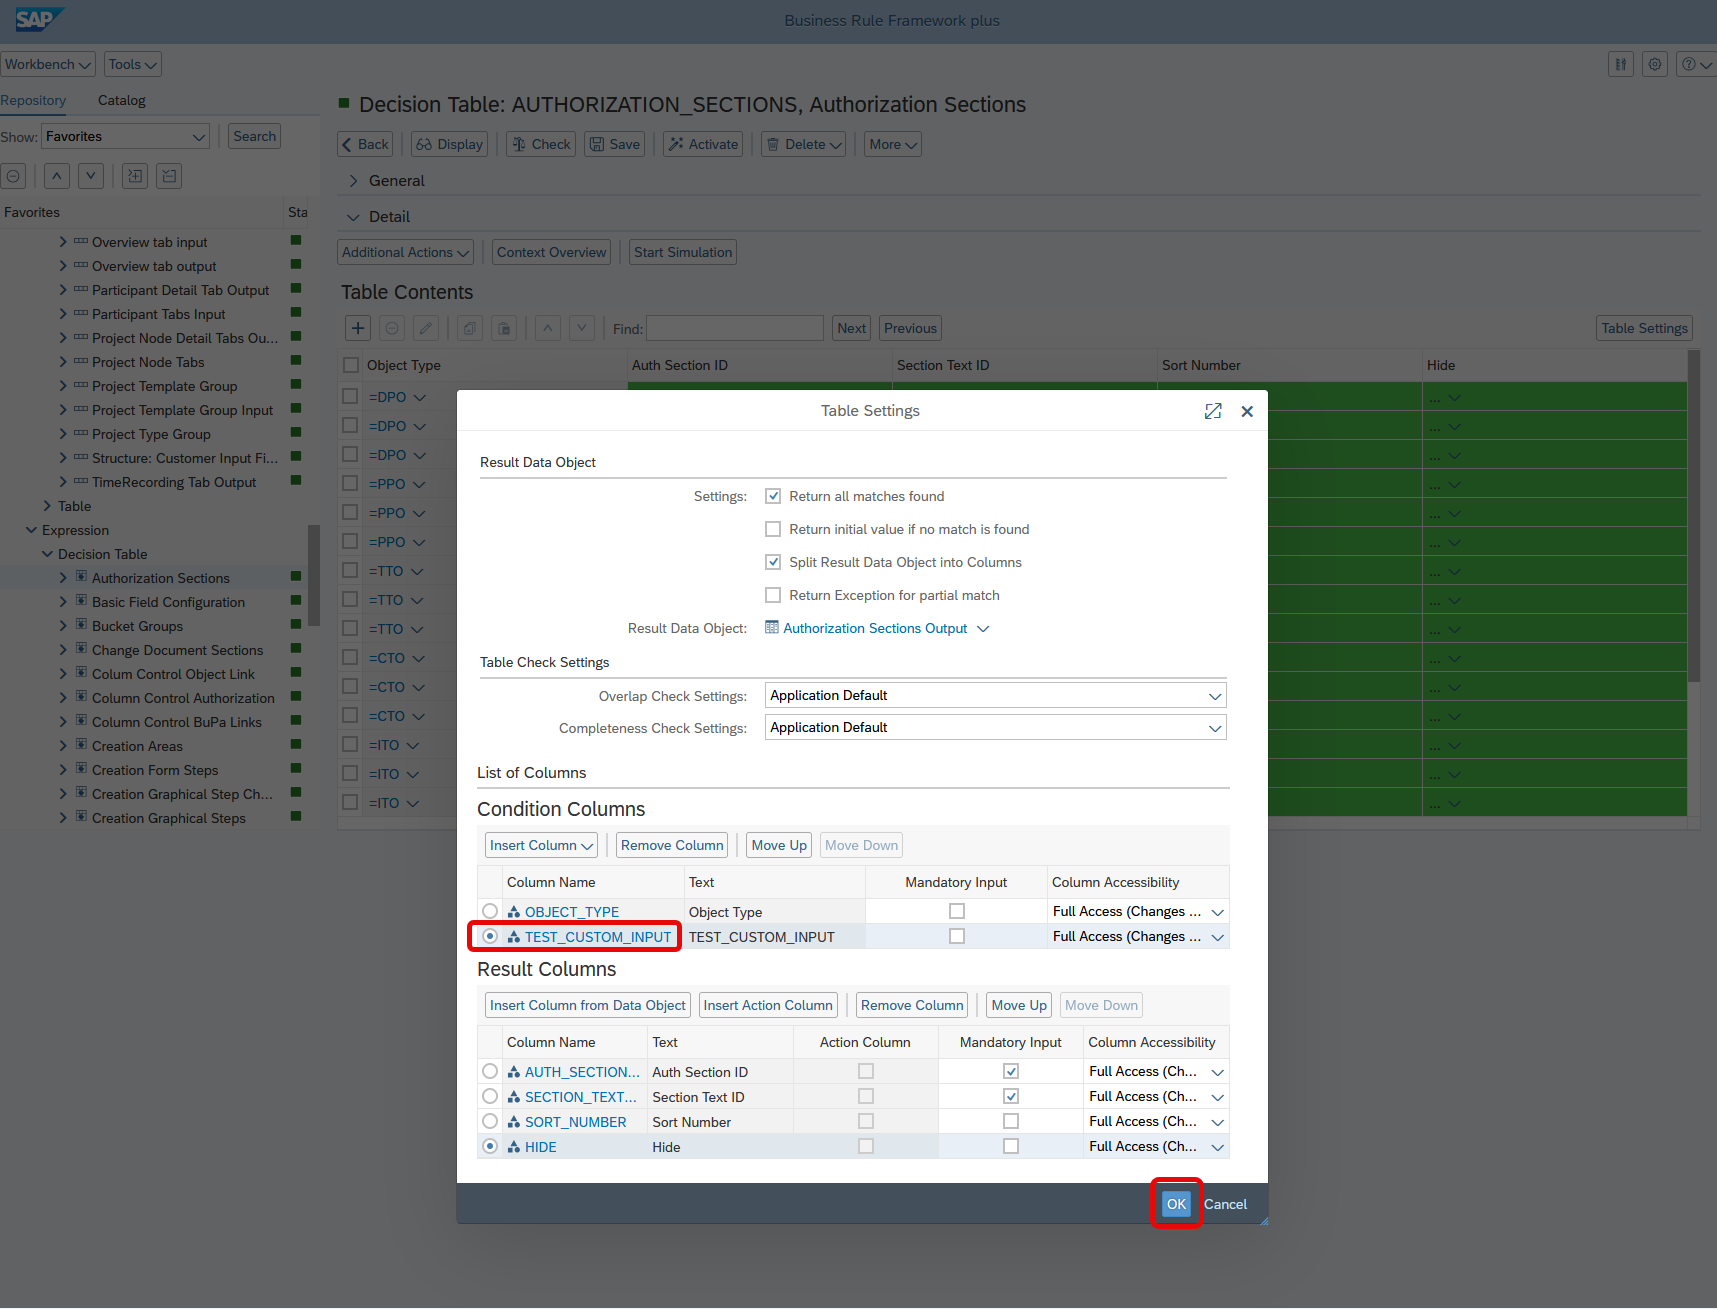
* Confirm in **Table Settings** to finalize the addition.
Step 4: Save and Use the Custom Condition Column
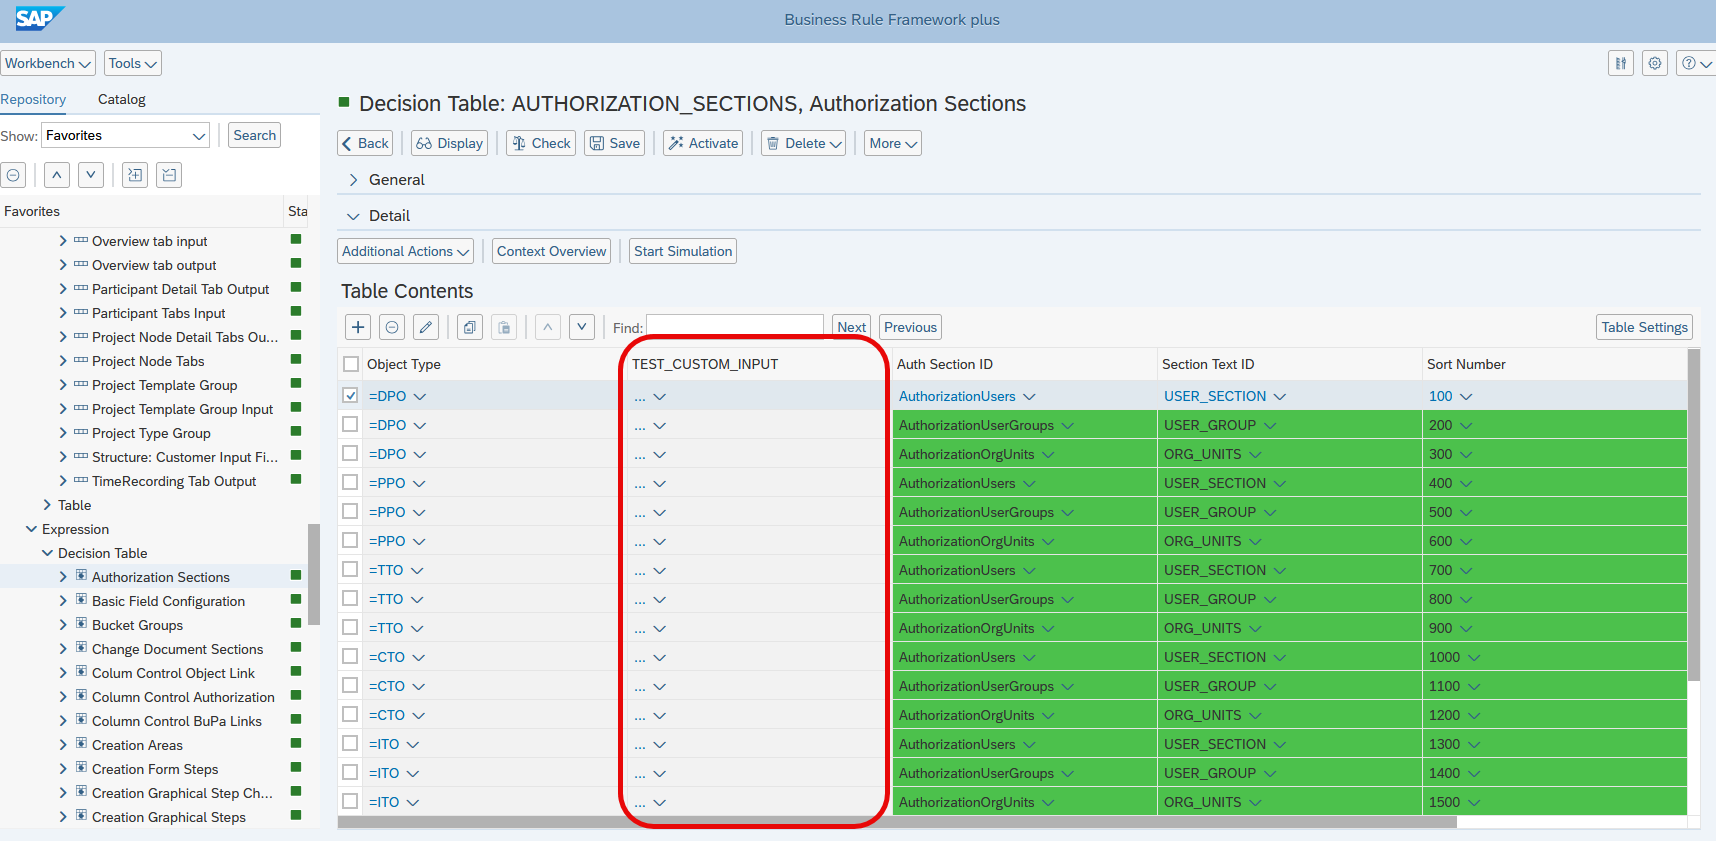
- The custom condition column will now appear in your decision table.
- You can use this column to further refine and narrow down your PPP workflows.
Key Notes
- Custom Input Verification: Always ensure the decision table supports custom input before proceeding.
- Activation: Always save and activate Structure: CUSTOM_INPUT after making changes.
See also
Custom Input
BRF+ Decision Tables
Keywords
- Custom Input
- Structure: CUSTOM_INPUT
- Condition Columns
- Data Objects