Mass Creation of Teams Hierarchy
Overview
XCM provides functionality to create and maintain teams and their hierarchies for Change Records (CRs). This includes the ability to mass create team structures by downloading and uploading an Excel template via executing report program.
Steps to run the upload program
Step 1: Access the Teams Hierarchy Upload Transaction
Open the transaction code /n/XCM/TR_MASS_UPLOAD via the command field in SAP GUI
Step 2: Choose the Appropriate Operation Mode
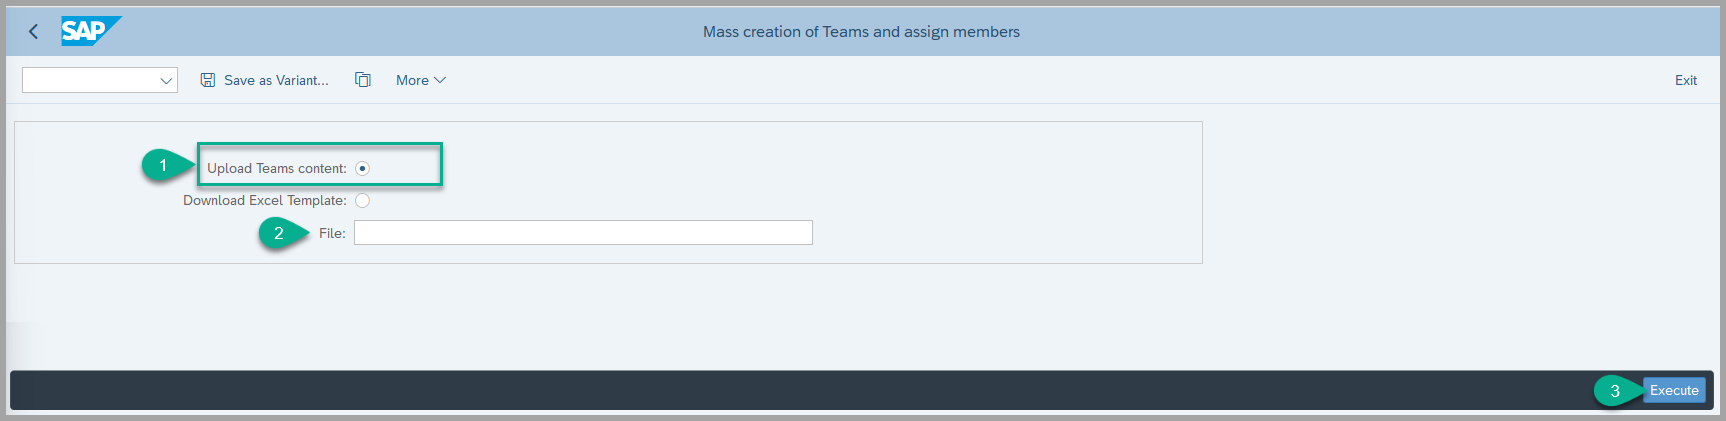
You will now see two primary options for processing:
1. Upload Teams Content
1.  If you have a properly completed Excel template, choose the first radio button: **Upload Teams Content**.
2.  This option allows you to upload new team structures and hierarchies.
2. Download Excel Template
- Use this option to get the latest Excel template for updating team functions or members.
- Select “Download with Data” and choose the appropriate Team Type.
- The system will generate an Excel template pre-filled with existing data for that team type, making it easier to update team members or functions.
- This is particularly helpful when modifying existing teams.

Note: Do not alter the structure of the Excel file (e.g., sheet names, column headers, or field formats). Any changes outside of the allowed fields may result in upload errors.
Step 3: Upload the Updated File
-
After your Excel file is properly prepared:
- Choose the Upload Teams Content radio button.
- Attach your Excel file.
- Click Execute (F8) to proceed.
-
System will validate the file and process the creation or update of teams and their hierarchical assignments.
Step 4: Review the Results After execution:
- The system will create or update teams and their hierarchies based on the data in the uploaded Excel file.
- A message will be displayed for each entry, indicating success or failure, which you can review for details.
How to fill in the Excel Template for Team and Hierarchy Creation
The example below demonstrates how to perform the mass creation of teams and their hierarchy using an Excel template. Each sheet in the template has been explained separately to show the mapping between the sheet and the corresponding Teams artifacts it creates. However, please note that you must fill in the data across all sheets at once and then submit the complete file to the upload program to create the hierarchy as illustrated below.
1. Team Header Sheet
- This sheet is used to define the teams, including both super teams and sub-teams.
- In Column A, list all the teams you want to create.
- Use Column G to specify the parent (super) team for each sub-team.
- For example, if “TEAM S01” is the super team and “SUB S01” is a sub-team under it, then “SUB S01” should have “TEAM S01” specified in Column G.

- This structure helps the system understand how the team hierarchy is built.

2. Team Responsibility Sheet
- In this sheet, maintain the attribute values for each team defined in the first sheet.
- These attribute values represent the responsibility definitions used during workflow processes.
- In the Global ID column, reference the team names created in the Team Header Sheet.
- When a workflow is triggered, the system uses these attributes to determine the appropriate responsible persons.


3. Team Members Sheet
- This sheet is used to assign functions (roles) to users based on the teams created.
- You can map each function to the corresponding user within the relevant team, as per your business requirements.


Keywords
Teams Hierarchy, Upload Program
Prerequisites
- Please follow All the IMG Customization mentioned in the task - IMG Customization and in the Set Up Teams and Responsibility Management for Change Record
- Do not alter the structure of the Excel file (e.g., sheet names, column headers, or field formats). Any changes outside of the allowed fields may result in upload errors.