IMG Customization
General Information
In this page page outlined the required IMG configuration steps as prerequisites for setting up process route configuration in BRF+ to automate the Change Record workflow process.
Configuration steps
Define Background Services:
- Background service is implemented to automate the actions within the process.
- In this customizing activity, you define the background services required to automate the processes and include them in an approval process.
- Every service is defined for PLM and is linked to a specific service class implementation
- IMG Path: Logistics - General → Product Lifecycle Management (PLM) → Change Records → Process Routes → Define Background Services
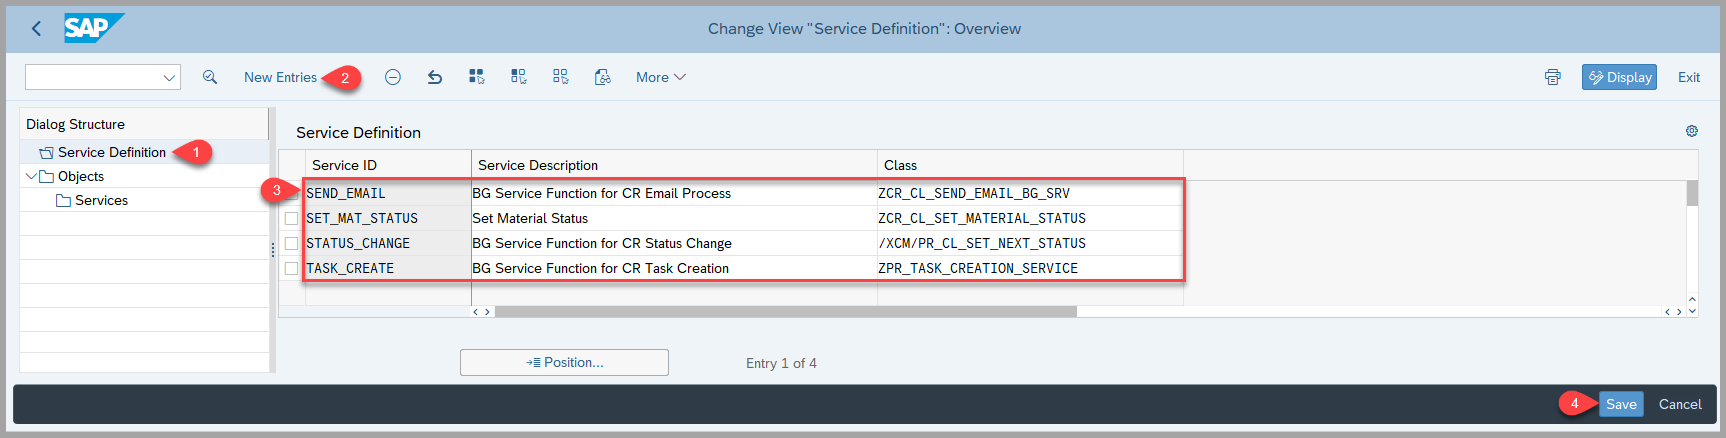
- For each Service ID, a corresponding class must be created implementing the interface
/PLMB/IF_PR_BACKGROUND_SERVICE. This class is invoked when the background task is created.


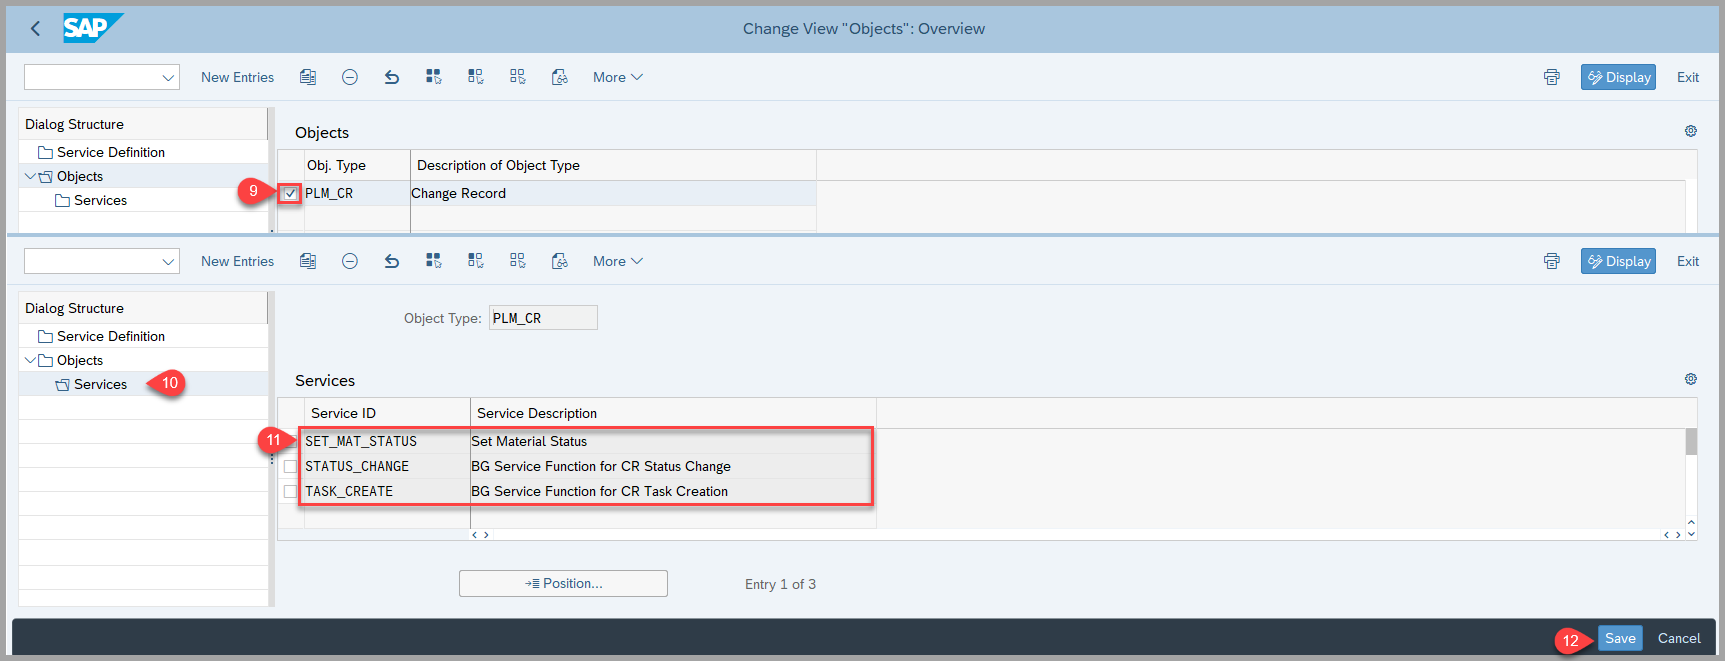
- In this customizing step, you include the defined services as part of the PLM_CR (Change Record) objects.
- This makes the services available for use as background activities in the Add Task or Change Task screens within the Process Route configuration.
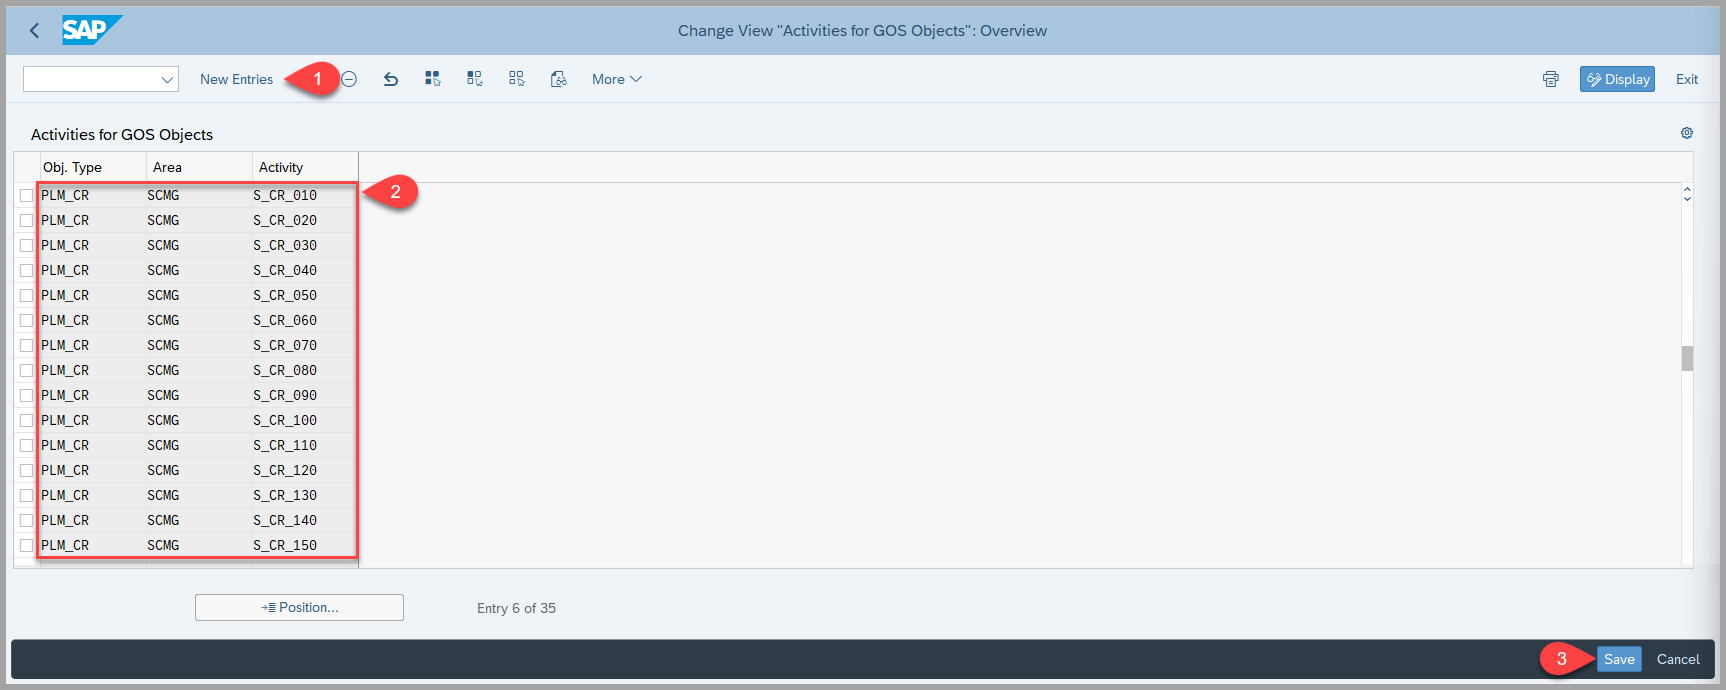
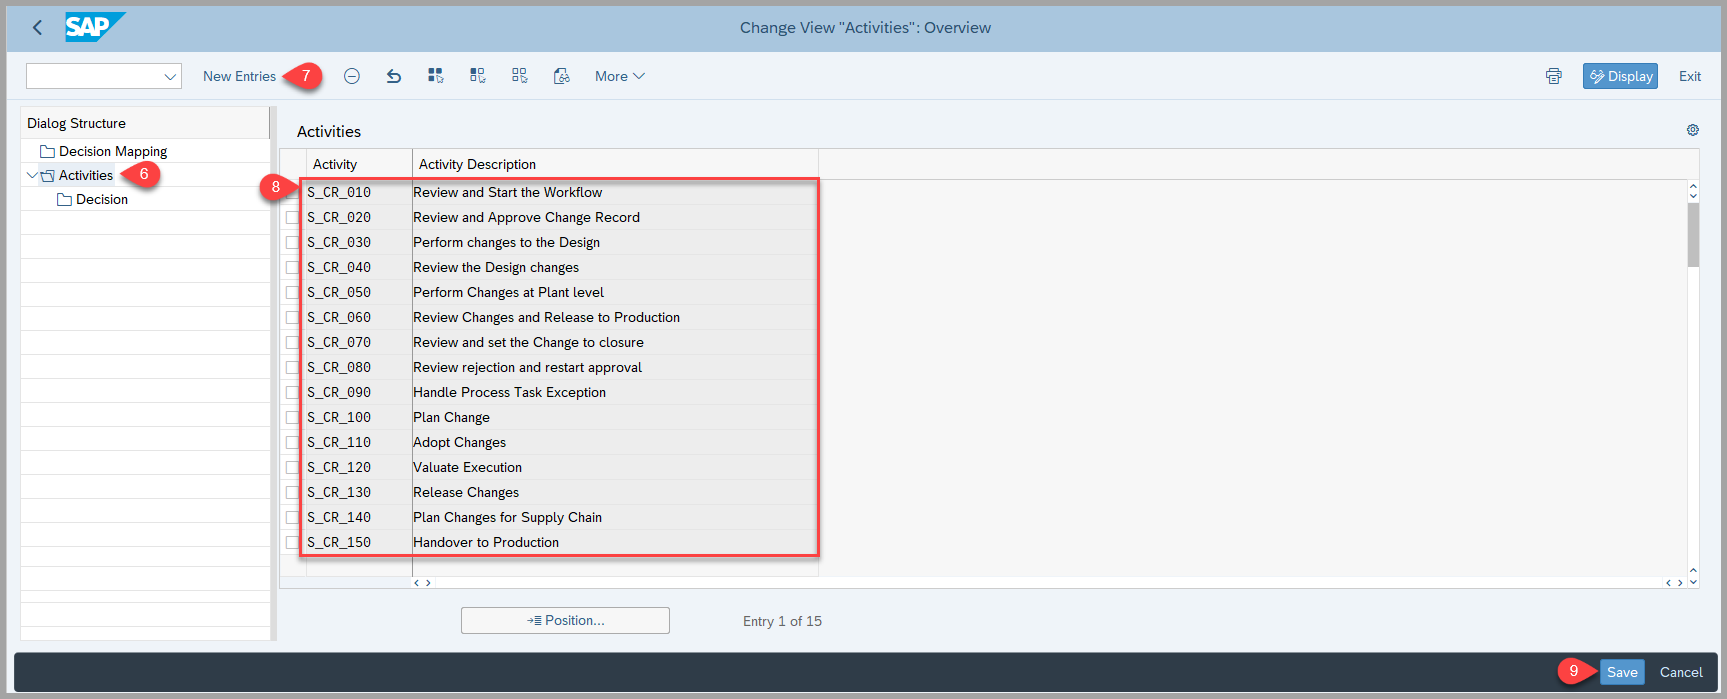
Define Activities for Process Route:
- In this customizing activity, you define the activities that can be assigned to the process route item. These activities can later be linked to a decision profile.
- IMG Path: Logistics - General → Product Lifecycle Management (PLM) → Change Records Process Routes → Define Activities for Process Route
Maintain Task Names and Decision Options:
-
This section is relevant only if you are implementing the My Inbox app for your SAP Business Workflow. If the workflow task step type is User Decision, configuring a task and decision options is optional.
-
To configure task names and decision options, follow this IMG path: Logistics - General → Product Lifecycle Management (PLM) → Change Records → Process Routes → Maintain Task Names and Decision Options
-
Fill in the Step Name table as described below and save your entries:
- Workflow ID: Enter the ID of your workflow template.
- Step ID: Enter the task step from your workflow template.
- Icon MIME Repository Path: Leave this field blank.
- Step Description: Enter the task name (Step Description is available as title for workflow task in My Inbox).

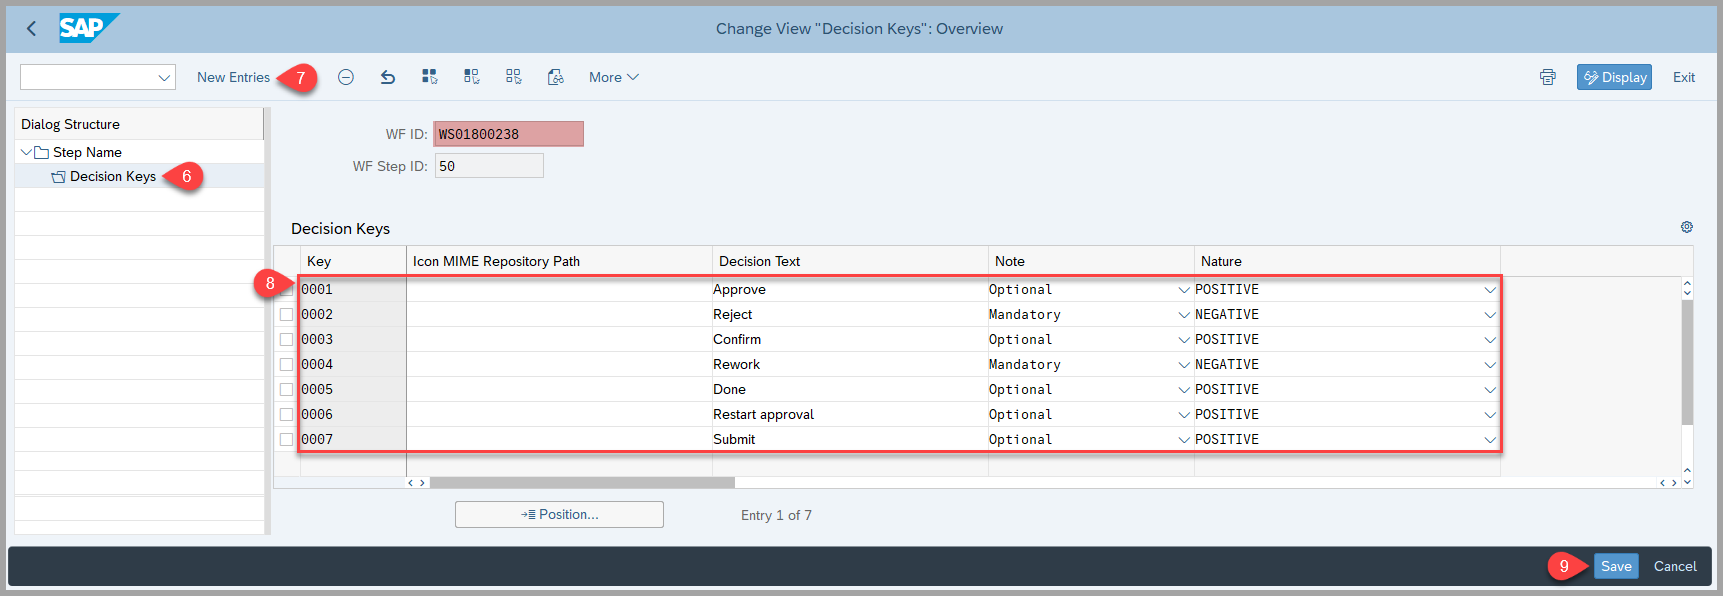
- Step 1- Select the entry in the Step Name table and choose Decision Keys in the navigation panel.

-
Step 2 - Add and define your decision options in the Decision Keys table.
-
Key: Enter a numeric decision key, starting with 1 for the first option, 2 for the second, and so on. These keys determine the order of decision options in the Workflow Builder.
-
Icon Mime Repository Path: Leave this field blank.
-
Decision Text: Enter the label for the decision option. This text appears as a button label in the application. Keep it within 14 characters to ensure it fits on the device screen.
-
Comment On: Select this checkbox if you want to make adding a comment mandatory when executing the decision.
-
Nature: Here you have the following options:
- Select POSITIVE for the approve type decision option.
The decision option is displayed either as a green push-button or in a gray popover (depending on the space available) on the detail screen of the application. - Select NEGATIVE for the reject type decision option.
The decision option is displayed either as a red push-button or in a gray popover (depending on the space available) on the detail screen of the application. - Leave the field empty for multiple decision options.
The decision options are displayed either as gray push-button or in a gray popover (depending on the space available) on the detail screen of the application.
- Select POSITIVE for the approve type decision option.
-
Define and Assign Decisions:
- The below customizing activity will define mapping of My inbox and Process route decisions.
- IMG Path: Logistics - General → Product Lifecycle Management (PLM) → Change Records → Process Routes → Define and Assign Decision
- Step 1 - Enter the decision which is already maintained in the above customizing activity 4 (step 2) with appropriate key value
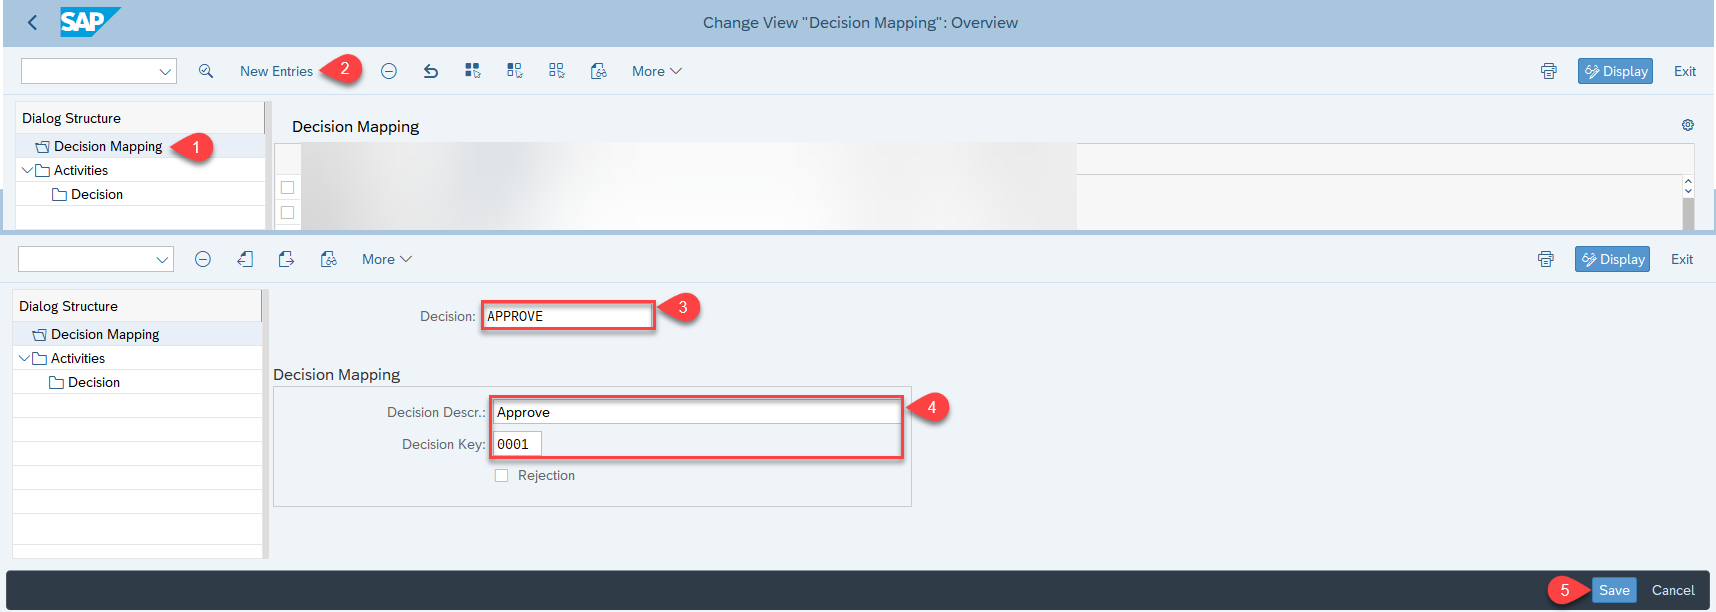
-
Step 2 - add the activities created in the above 2 Point
-
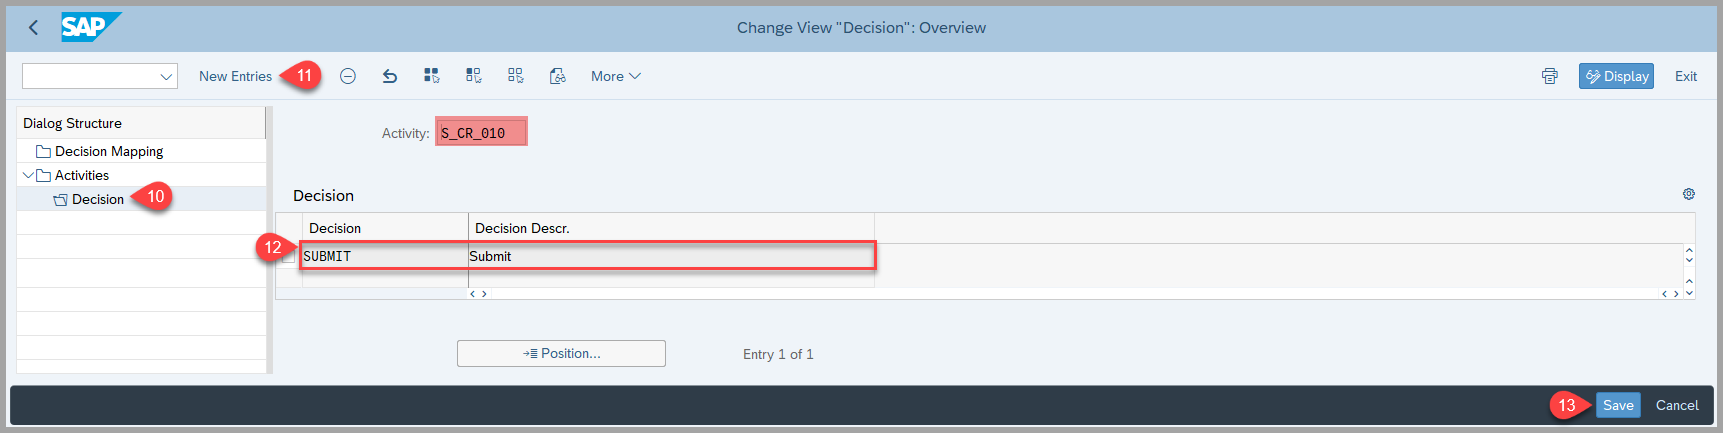
User Decision is available in Process Route table ONLY if the corresponding activity is configured in Define Decisions. When user clicks the button Approve in My Inbox:
- Workflow task gets completed in My Inbox
- Decision Approve becomes available in Process Route table
- Step 3 - add the decision created in the above step.
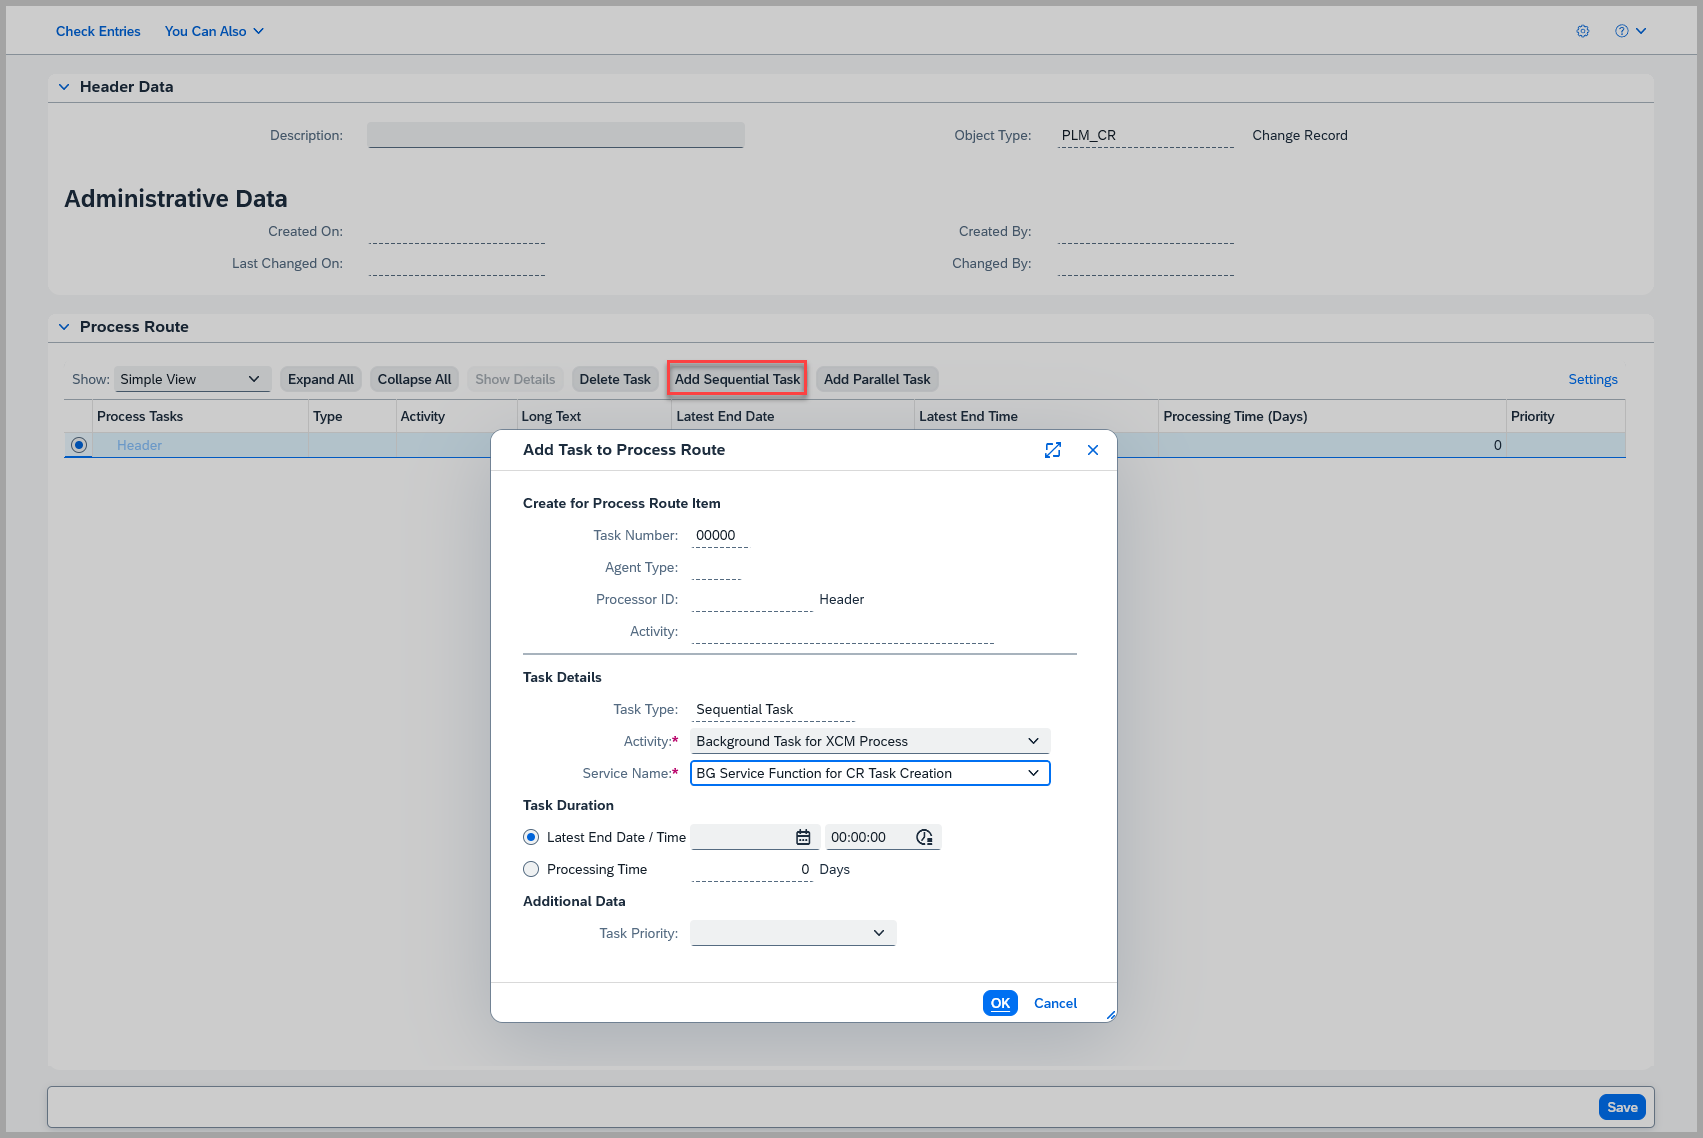
Creation of Global Process Route Template
- This section describes the required settings you need to create a global process route template.
- To support the automated process, you create and activate a global process route template with a predefined set of tasks in the Global Process Route Template Workbench app.
- This global template can be used in any change record type.
- Step 1 - Choose Create Global Process Route Template and create the template for the object type PLM_CR


- Step 2 - Add sequential tasks to the new template
- Step 3 - Check the new global template:

-
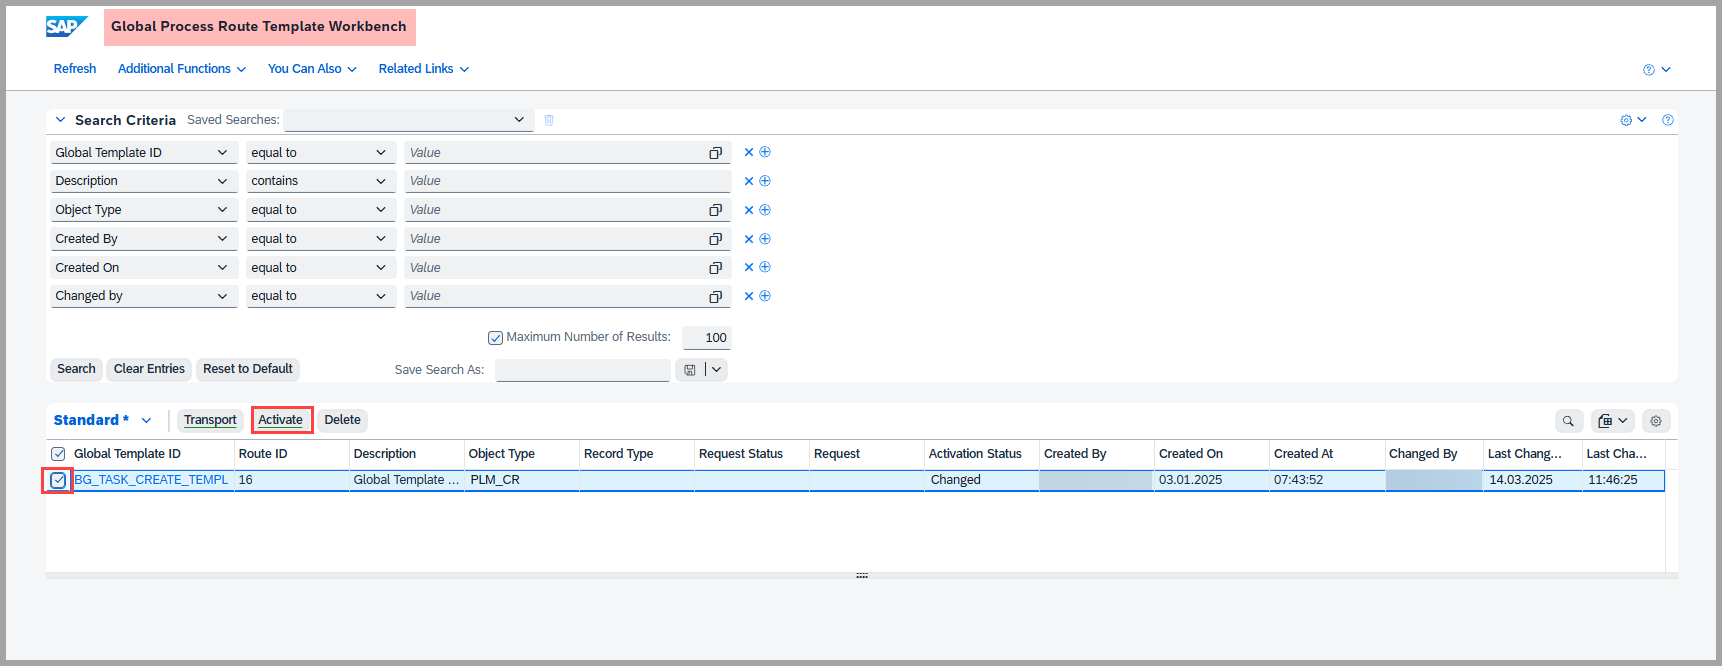
Step 4 - click on You can also Drop down
- Select Global Process Route Template Workbench
- Select/ check box the the template you create
- click on Activate
See Also
Keywords
Template, Global Process Route, Background task, Status determination, Decision Keys, Activity, Process Version.
Prerequisites
Eg. To be able to use the user status actions, you must first include them in a status profile Customizing activity.