Customizing Fields - Forms, Sections and FieldGroups
Problem
You are not satisfied with the default PPP customizing and would like to add/remove Forms, Sections and FieldGroups as well as their corresponding fields from the Basic Field Configuration.
Environment
PPP BRF+ Customizing
Prerequisites
A new BRF+ application according to Creation of Customer BRF+ Application has been created and a Field has been added to the Basic Field Config according to Customizing Fields - Basic Field Config.
Solution
Step 1: Assigning Fields to a FieldGroup
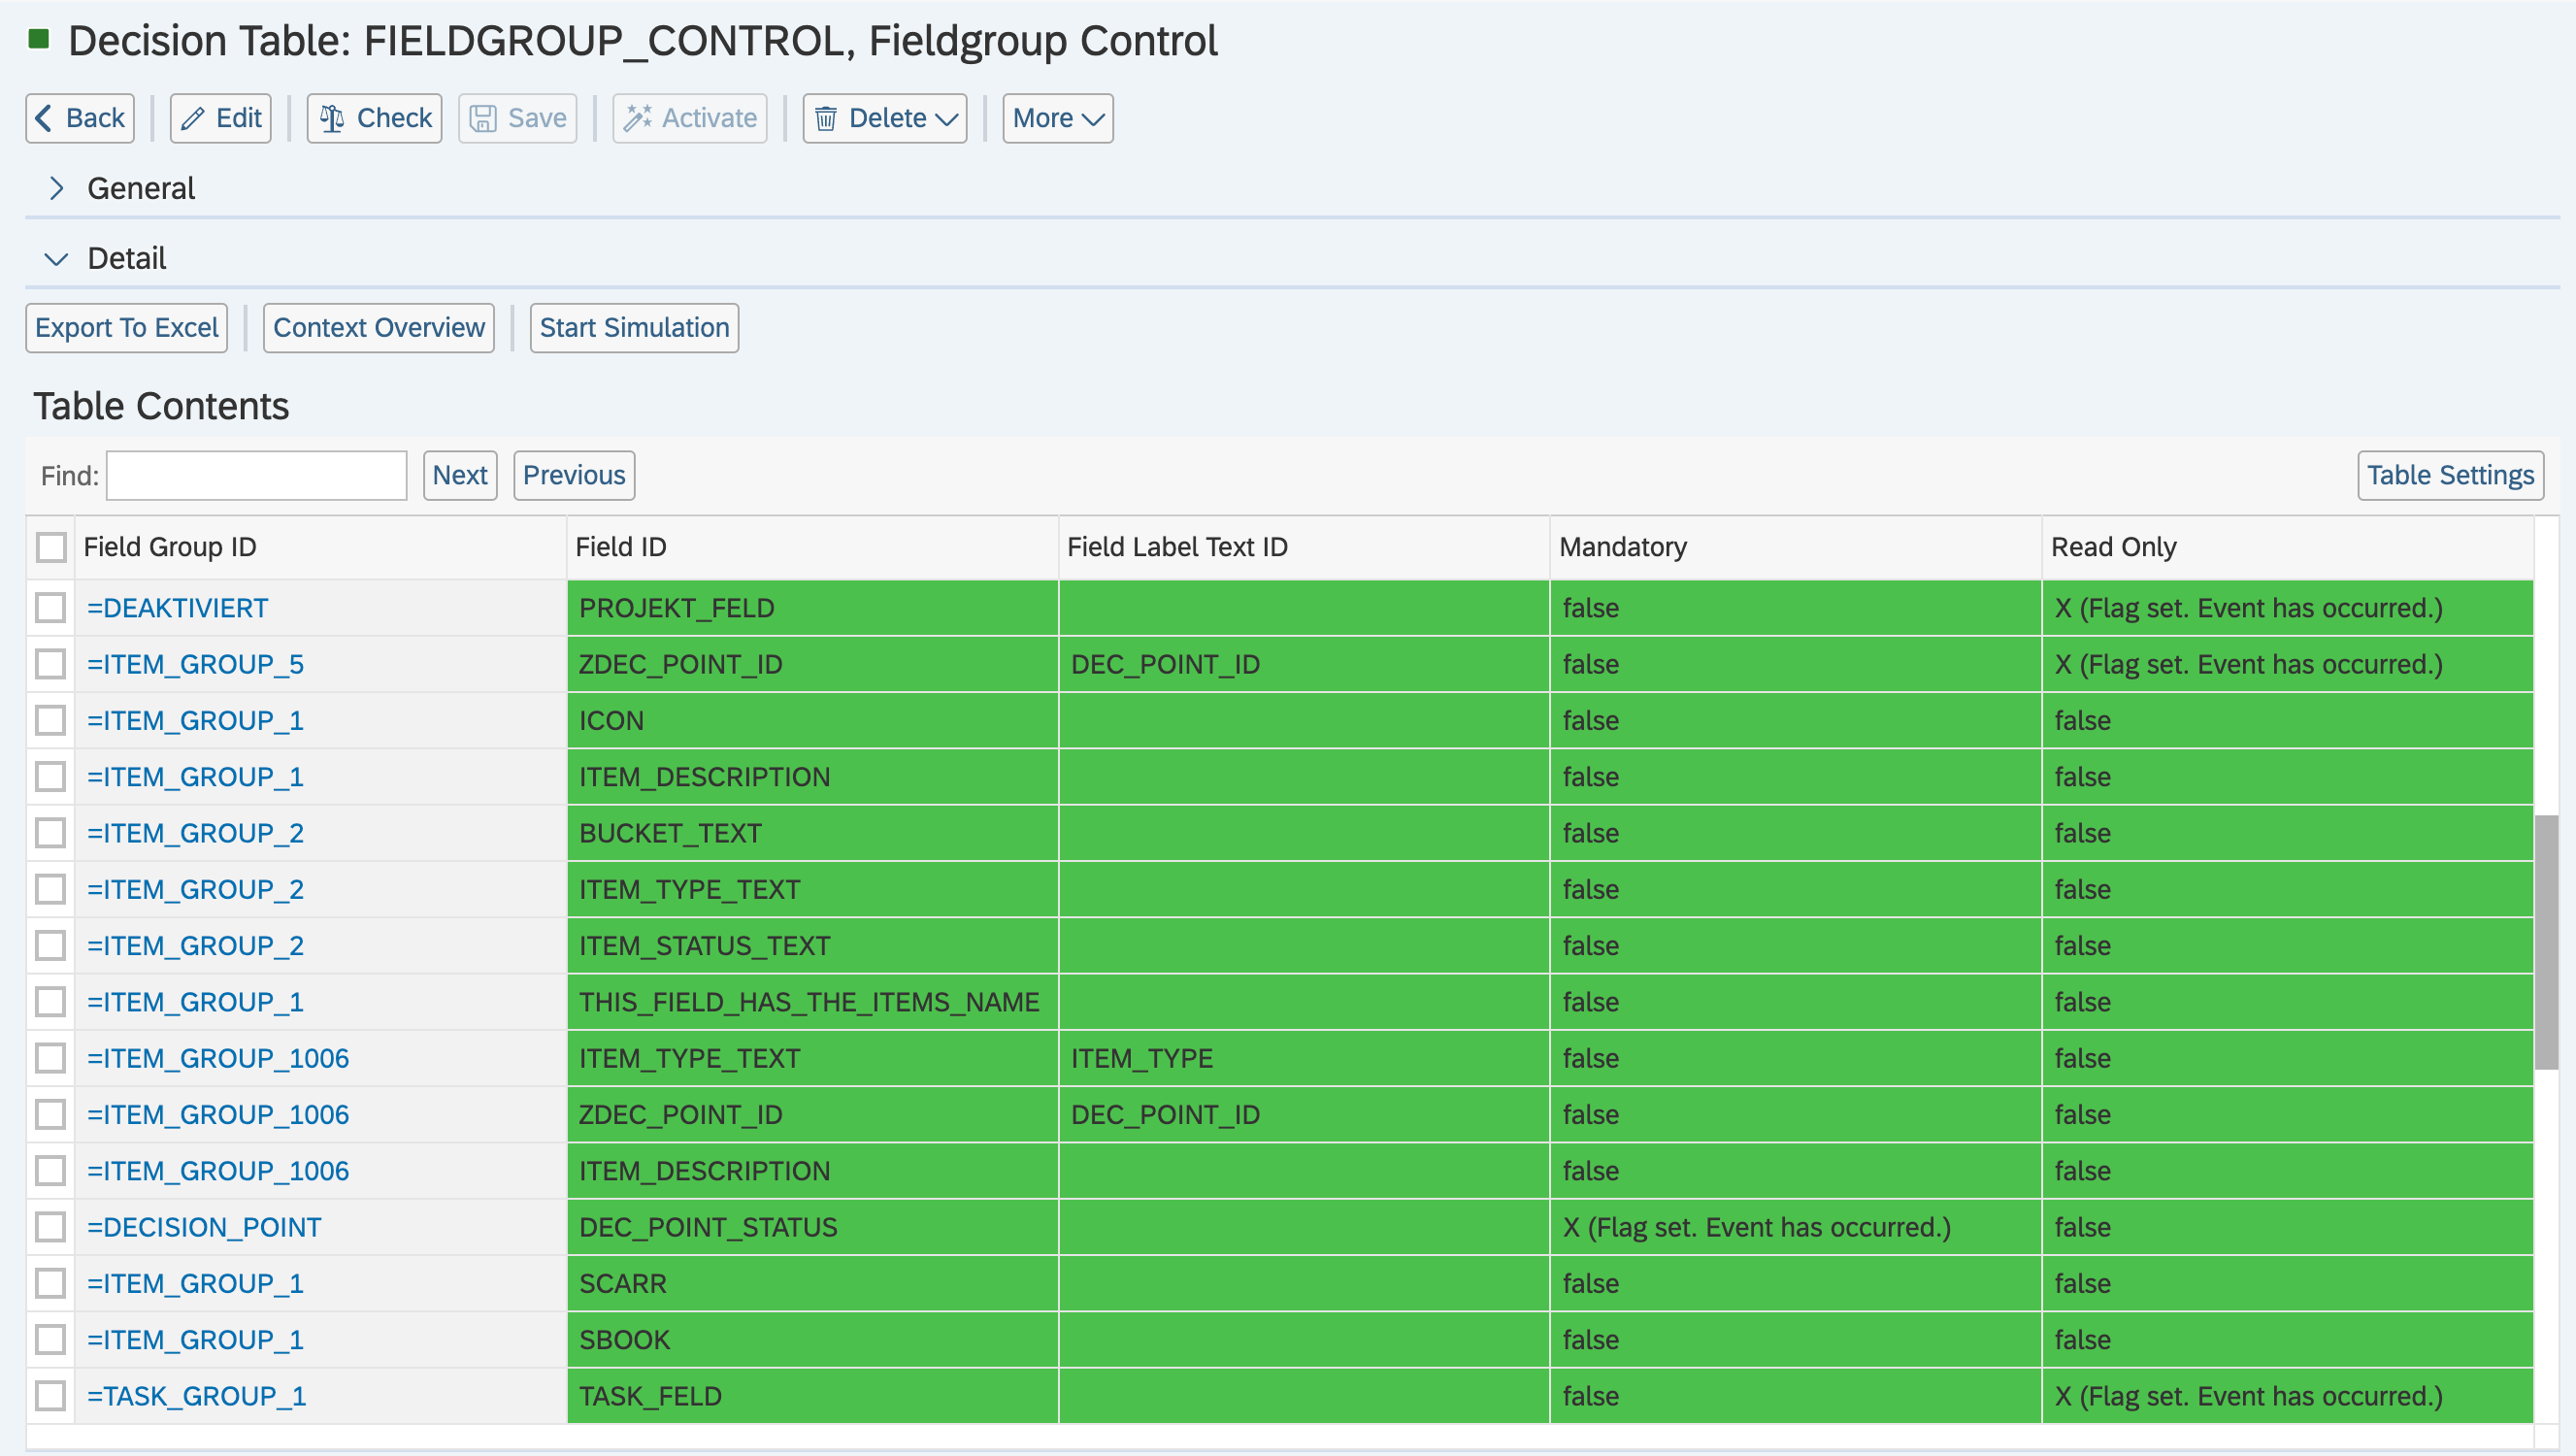
Open your BRF+ Application and navigate to the expression table “Field Group Control” (Technical Name: FIELDGROUP_CONTROL).
-
Field Group ID: Enter any ID for your Field Group. This ID is later used to assign Field Groups to Sections.
-
Field ID: Enter the Field ID of the Field you want to have inside the Field Group. This Field ID has to exist in the “Basic Field Config” (Technical Name: BASIC_FIELDCONFIGURATION) expression table.
-
Field Label Text ID: Enter any Text ID (Used in “Translatable Texts”, Technical Name: TEXTS). The Text of the Text ID will be used as the Label for the Field Group.
-
Mandatory: Marks the field as mandatory. If set to true, validations are called, which check if the field is filled before saving in the PPP UI.
-
Read Only: Marks the field as read only. If set to true, the field can not be changed inside this FieldGroup.
An example of a “FieldGroup” customization:

Step 2: Assigning FieldGroups to a Section
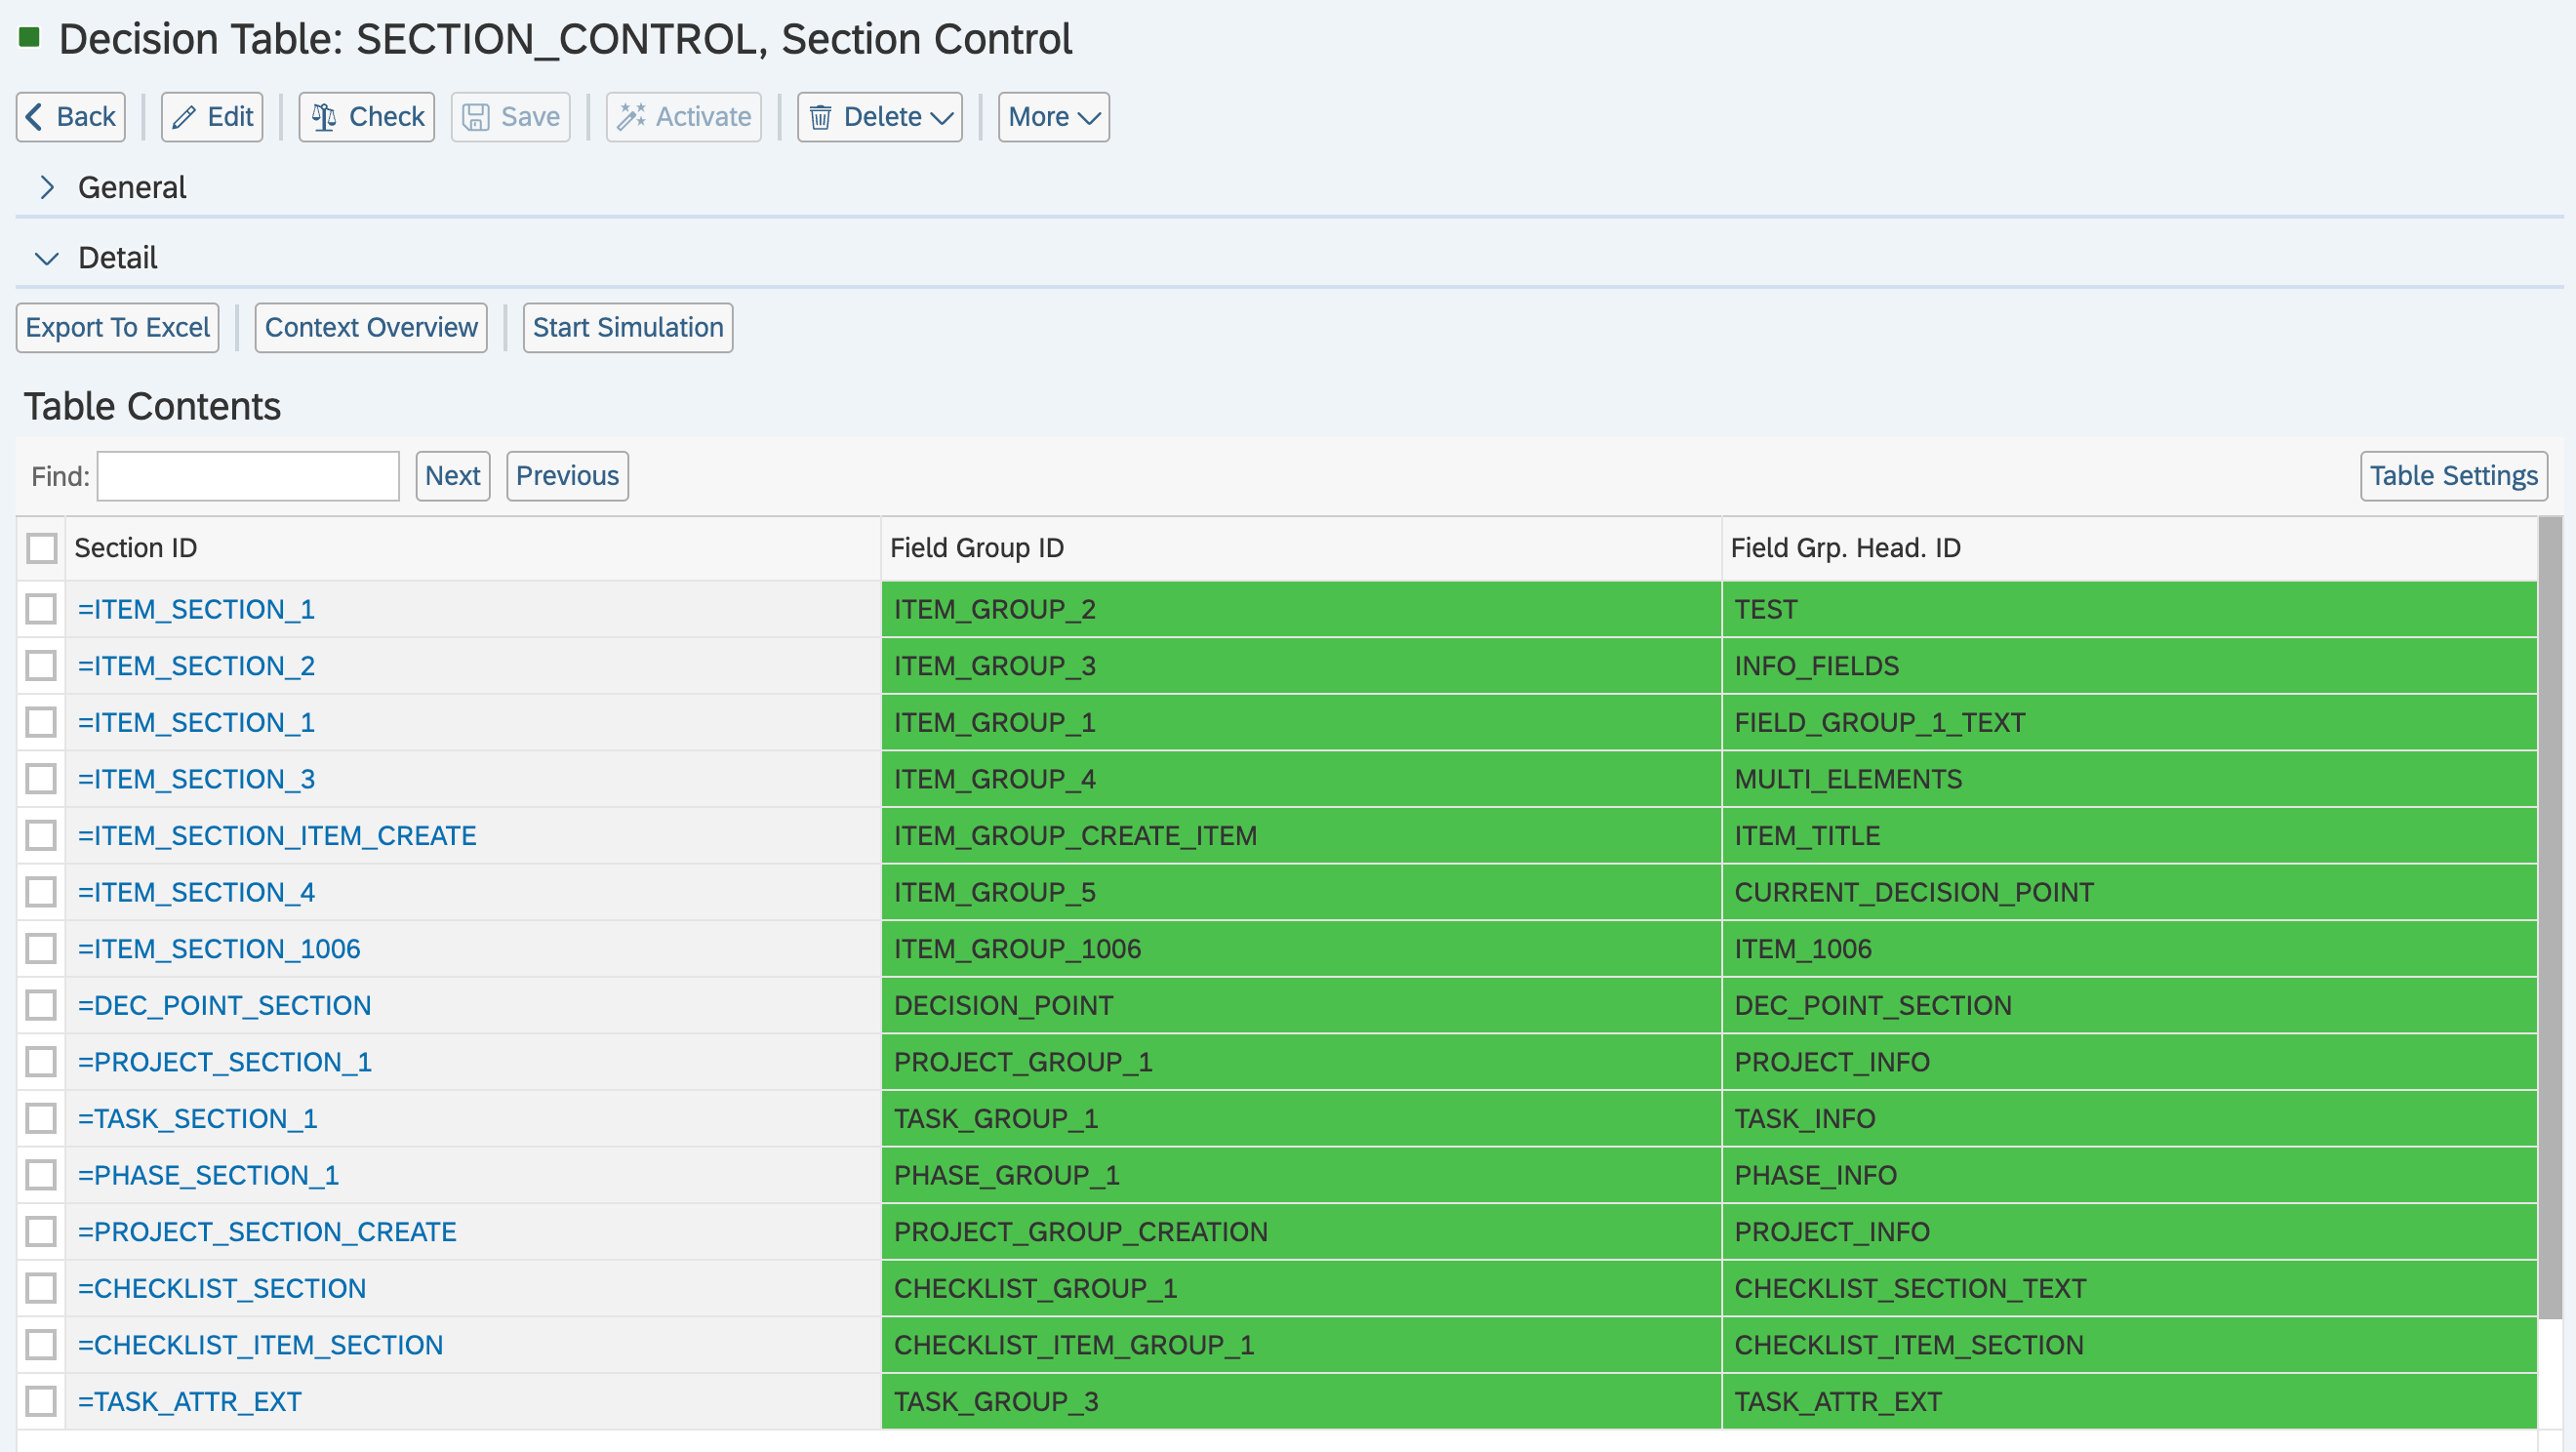
Open your BRF+ Application and navigate to the expression table “Section Control” (Technical Name: SECTION_CONTROL).
-
Section ID: Enter any ID for your Section. This ID is later used to assign Sections to Forms.
-
Field Group ID: Enter the FieldGroup ID of the FieldGroup you want to have inside the Field Group. This FieldGroup ID has to exist in the “Field Group Control” (Technical Name: FIELDGROUP_CONTROL) expression table.
-
Field Grp. Head. ID: Enter any Text ID (Used in “Translatable Texts”, Technical Name: TEXTS). The Text of the Text ID will be used as the Header of the Section.
An example of a “Section” customization:

Step 3: Assigning Sections to a Form
Open your BRF+ application and navigate to one of the following expression tables, depending on which entity the form belongs to.
| Entity Type | Expression Table | Technical Name |
| Item | Form Control Item | FORM_CONTROL_ITEM |
| Decision Point | Form Control DP | FORM_CONTROL_DECISION_POINT |
| Project | Form Control Project | FORM_CONTROL_PROJECT |
| Phase | Form Control Phase | FORM_CONTROL_PHASE |
| Task | Form Control Task | FORM_CONTROL_TASK |
| Checklist | Form Control Checklist | FORM_CONTROL_CHECKLIST |
| Checklist Item | Form Control Checklist Item | FORM_CONTROL_CHECKLIST_ITEM |
| Role | Form Control Role | FORM_CONTROL_ROLE |
Each of these expression tables has its own unique input columns according to fields of that entity. The output remains the same for all of the FormControl Expression tables:
-
Section ID: Enter any ID for your Section. This Section ID has to exist in the “Section Control” (Technical Name: SECTION_CONTROL) expression table.
-
Section Headline Text ID: Enter any Text ID (Used in “Translatable Texts”, Technical Name: TEXTS). The Text of the Text ID will be used as the Header of the Form.
An example of a “Form Control Task” customization:

See Also
Keywords
brf+, add, form, section, fieldgroup, fields