Configure Change Record Status Net
Overview
The status of a change record shows where it currently stands in the overall change process.
As a change record progresses, it goes through multiple statuses. You can customize these stages based on your business needs to define the lifecycle and phases of the change process.
Status management for change records includes:
- Record Status (user statuses and user status actions).
- Change Execution Status (current state of the change implementation).
- Processing Status (on item level, information of the state of each change item).
When a change record is created under a particular record type, it must follow the defined statuses and actions to complete each phase of the process.
Customization Steps
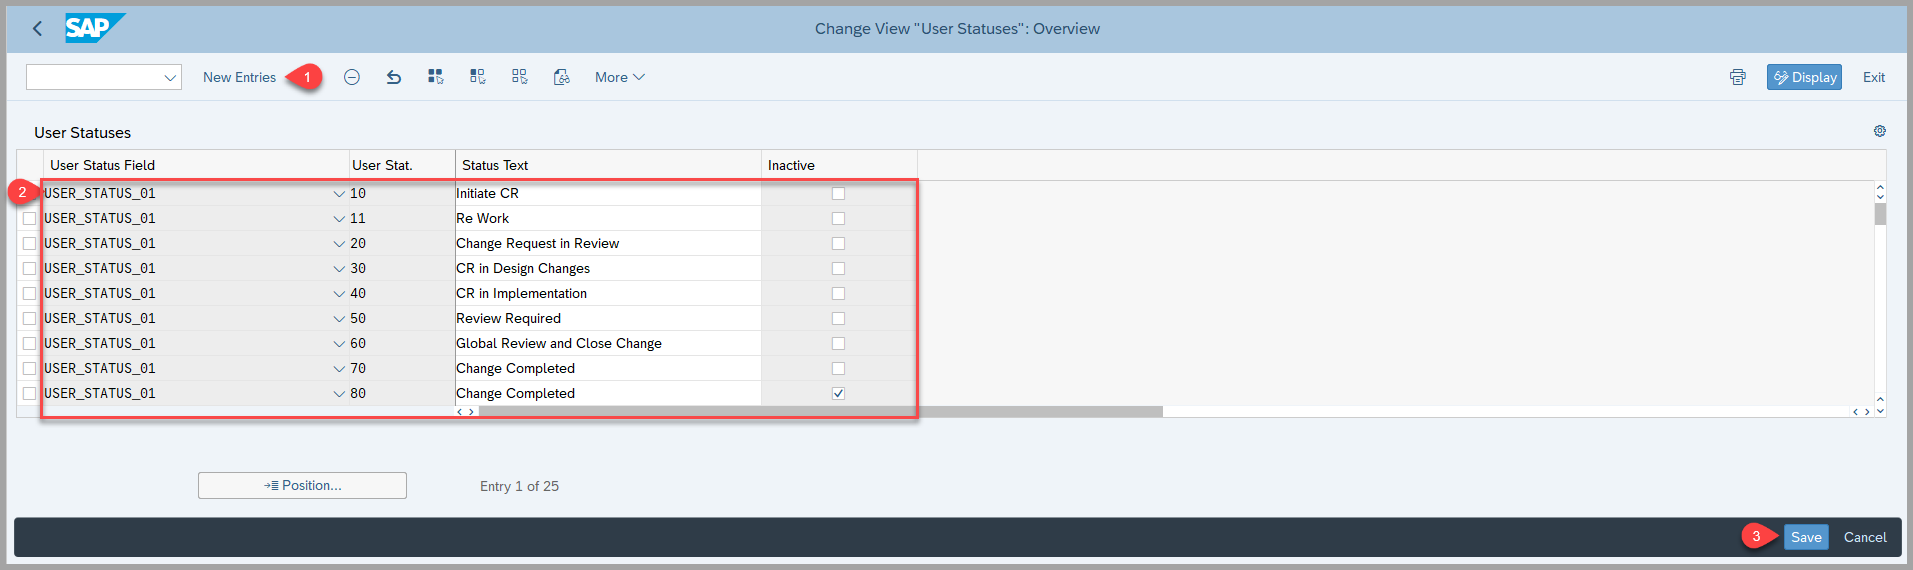
Define User Statuses:
-
You can set up different user statuses and actions in the system by configuring them under the IMG Path: Logistics – General > Product Lifecycle Management (PLM) > Change Records > User Statuses > Define User Statuses.
-
Use this Customizing activity to define user status values and descriptions, such as 10 (Initiate CR), 11 (Re Work), and 20 (Change Request in Review) for example**.** The selected status appears as the Record Status in the application.
- The following progress chart is a visual representation of your status transitions and shows the progress within the entire process.

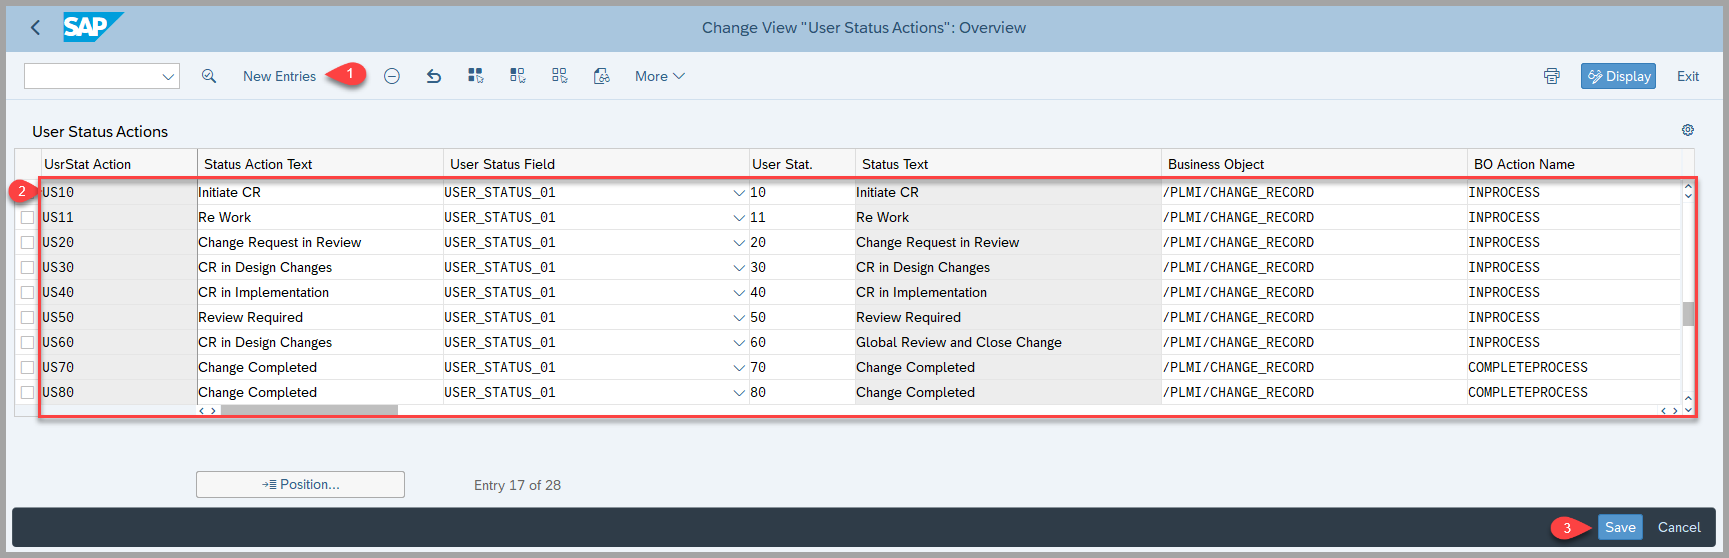
Define User Status Actions:
- You can link user status and execution status using the Customizing activity through IMG Path: Logistics – General > Product Lifecycle Management (PLM) > Change Records > User Statuses >Define User Status Actions.
- When you assign a business object (BO) and its action to a user status, the system automatically triggers the BO action when the user status changes.
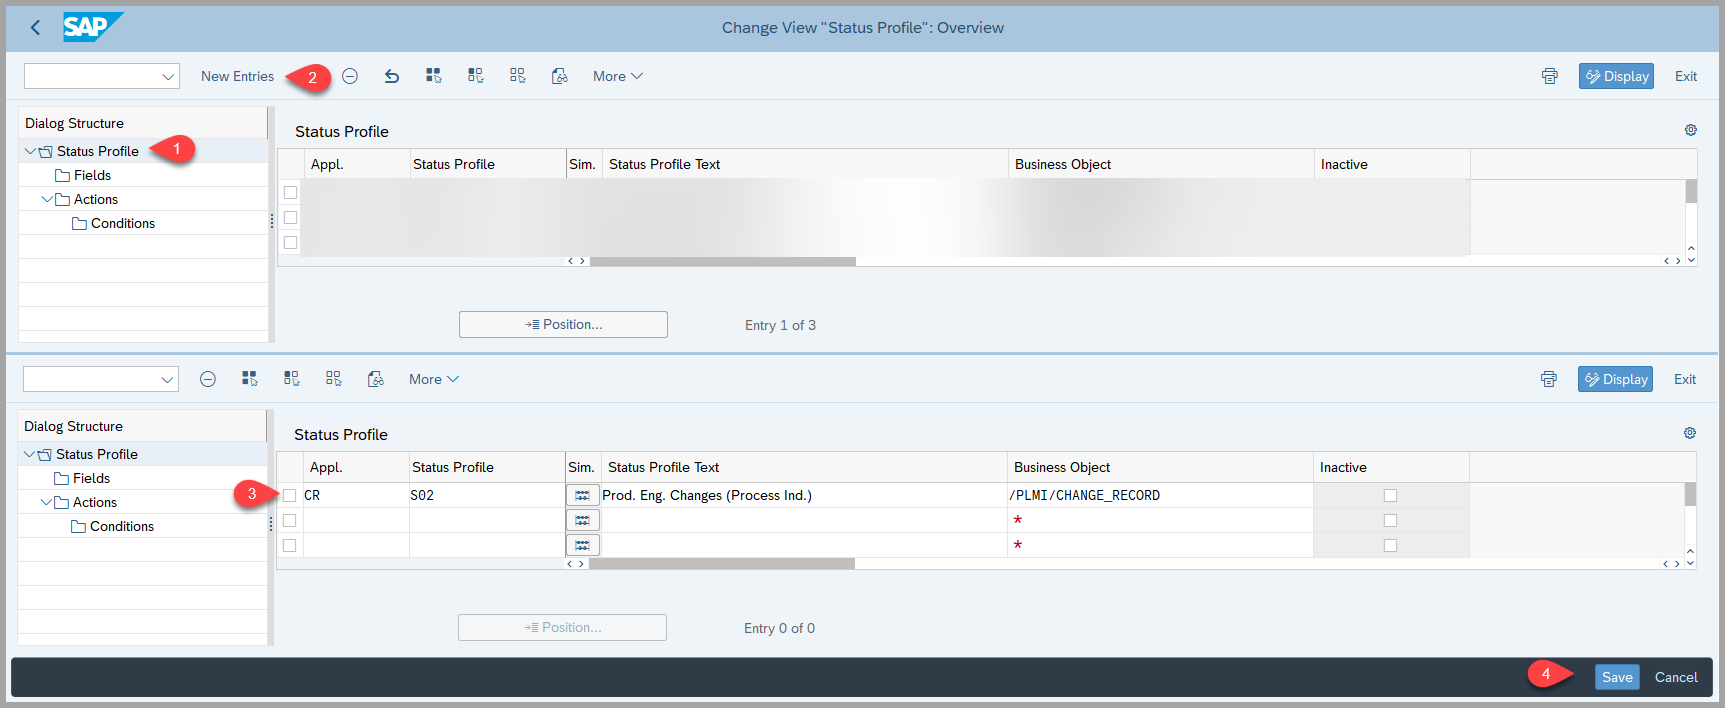
Define User Status Profiles:
- To be able to use the user status actions, you must first add them to a status profile in the Customizing activity in the IMG Path: Logistics – General > Product Lifecycle Management (PLM) > Change Records > User Statuses > Define User Status Profiles.
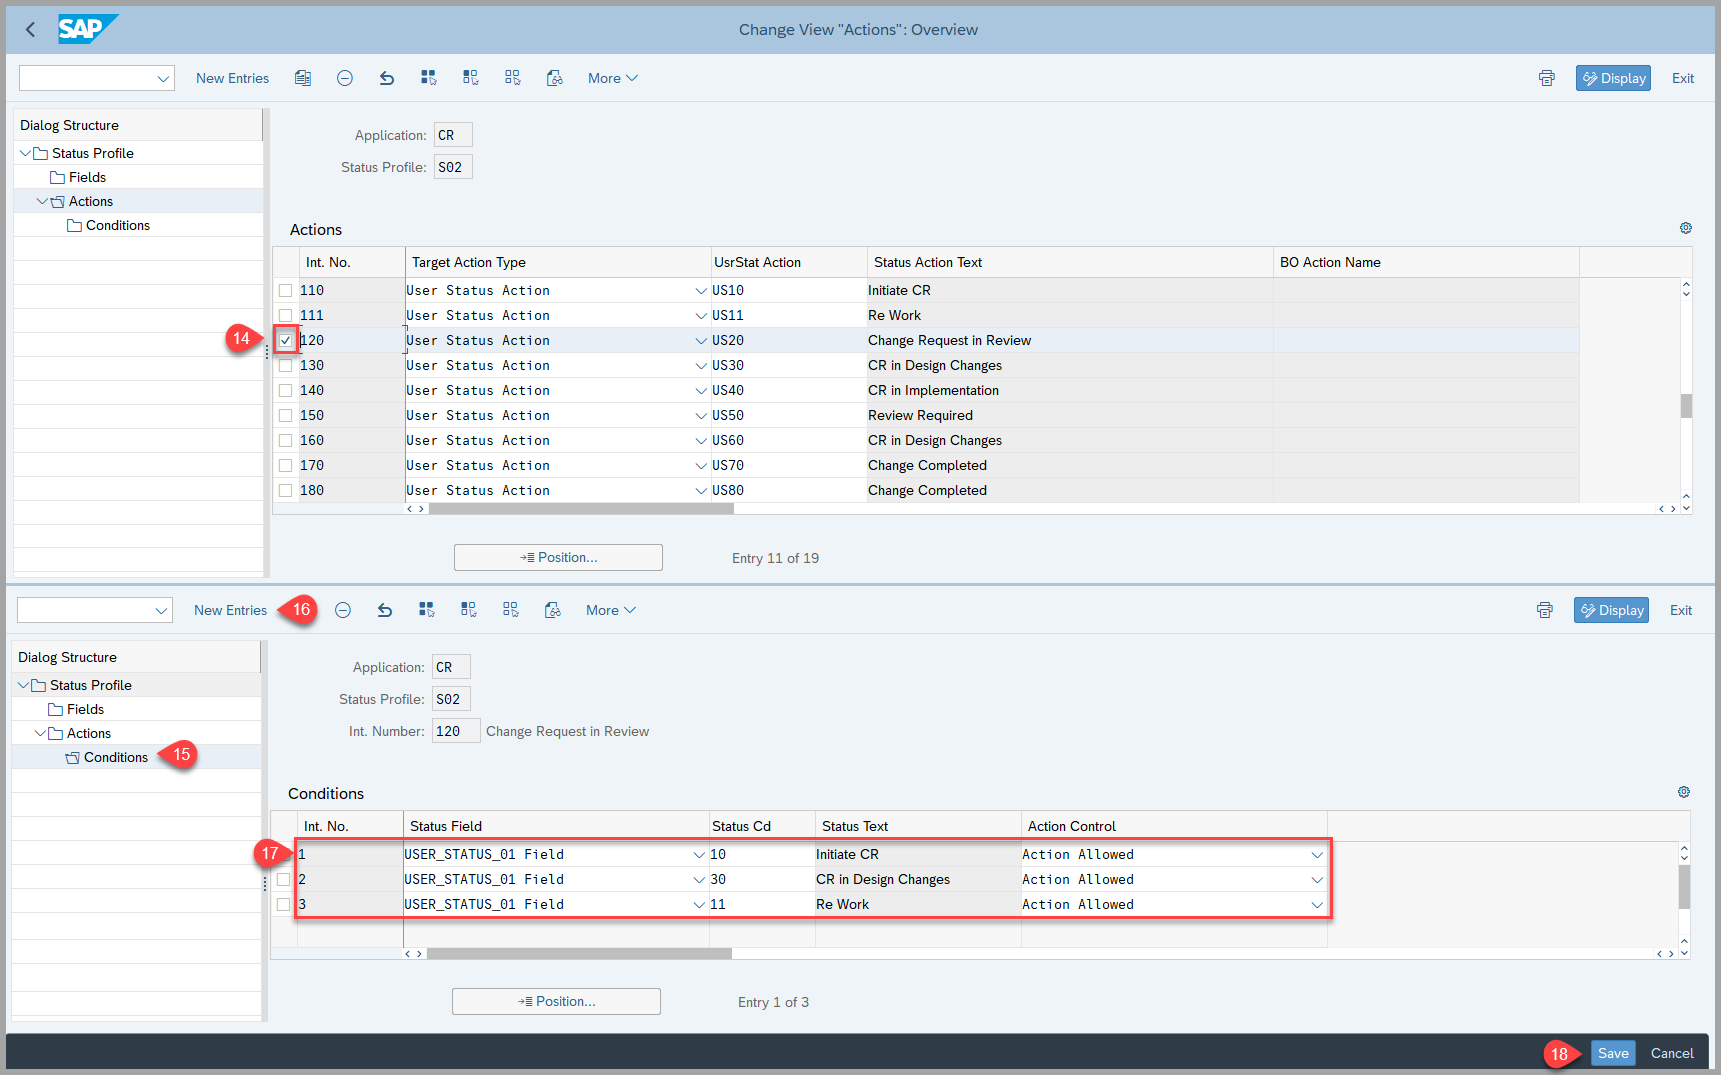
- You now create the user status profile in which you can specify conditions that trigger a user status.
- For example, if the current status is 20, transitions from statuses 10, 30 and 11 can happen either manually or through a background task based on the defined conditions.
- The prerequisite for this activity is that you have completed step 2 above and have created all the necessary user status actions.
Step 1 - Create a Status Profile
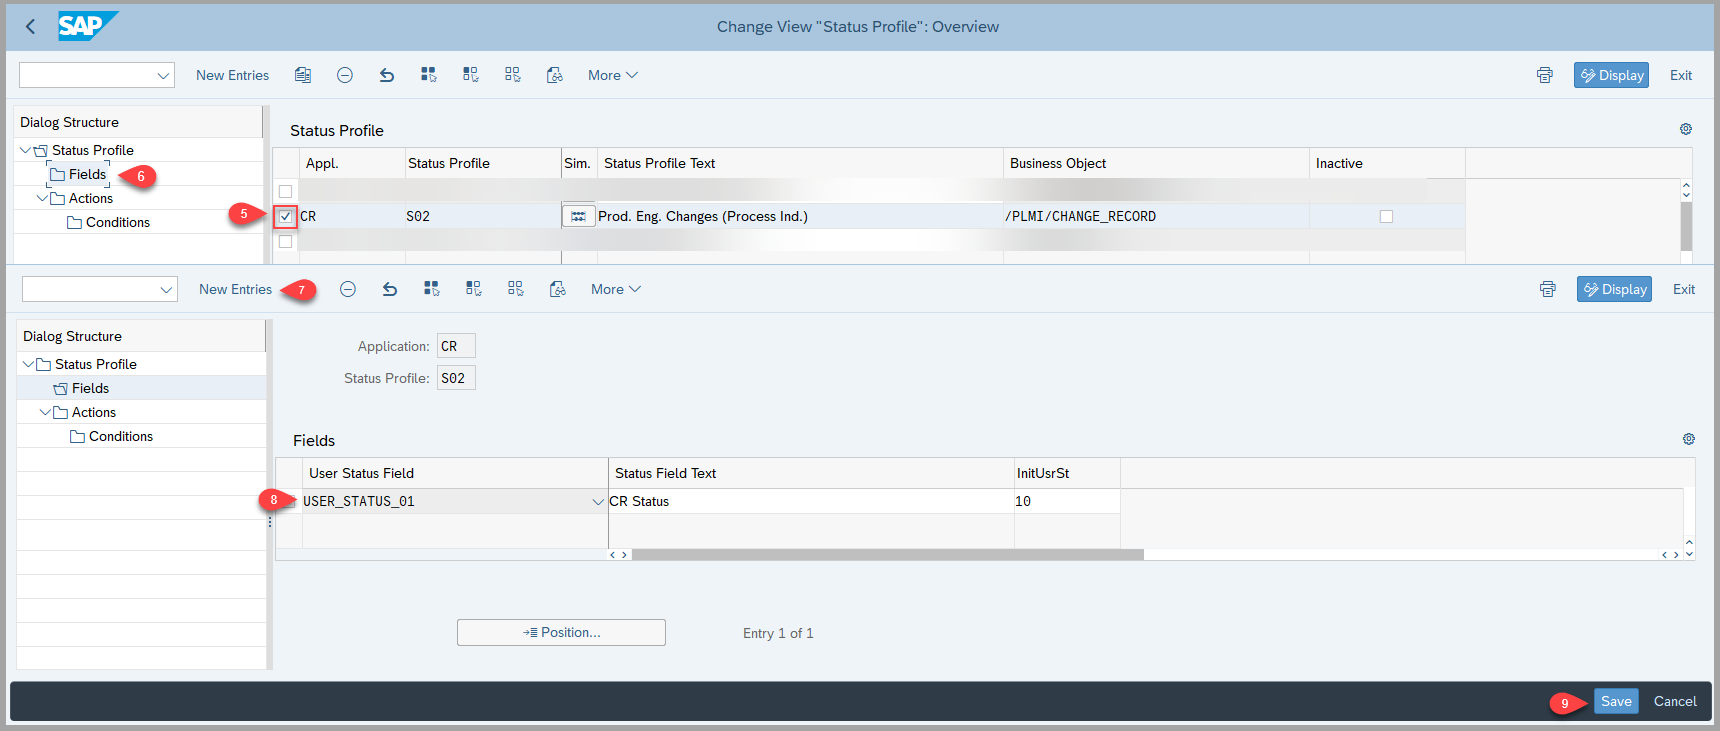
Step 2 - Under Fields, choose the status fields that you want this profile to include
Step 3 - Under Actions, define under which conditions an action is to be executed:
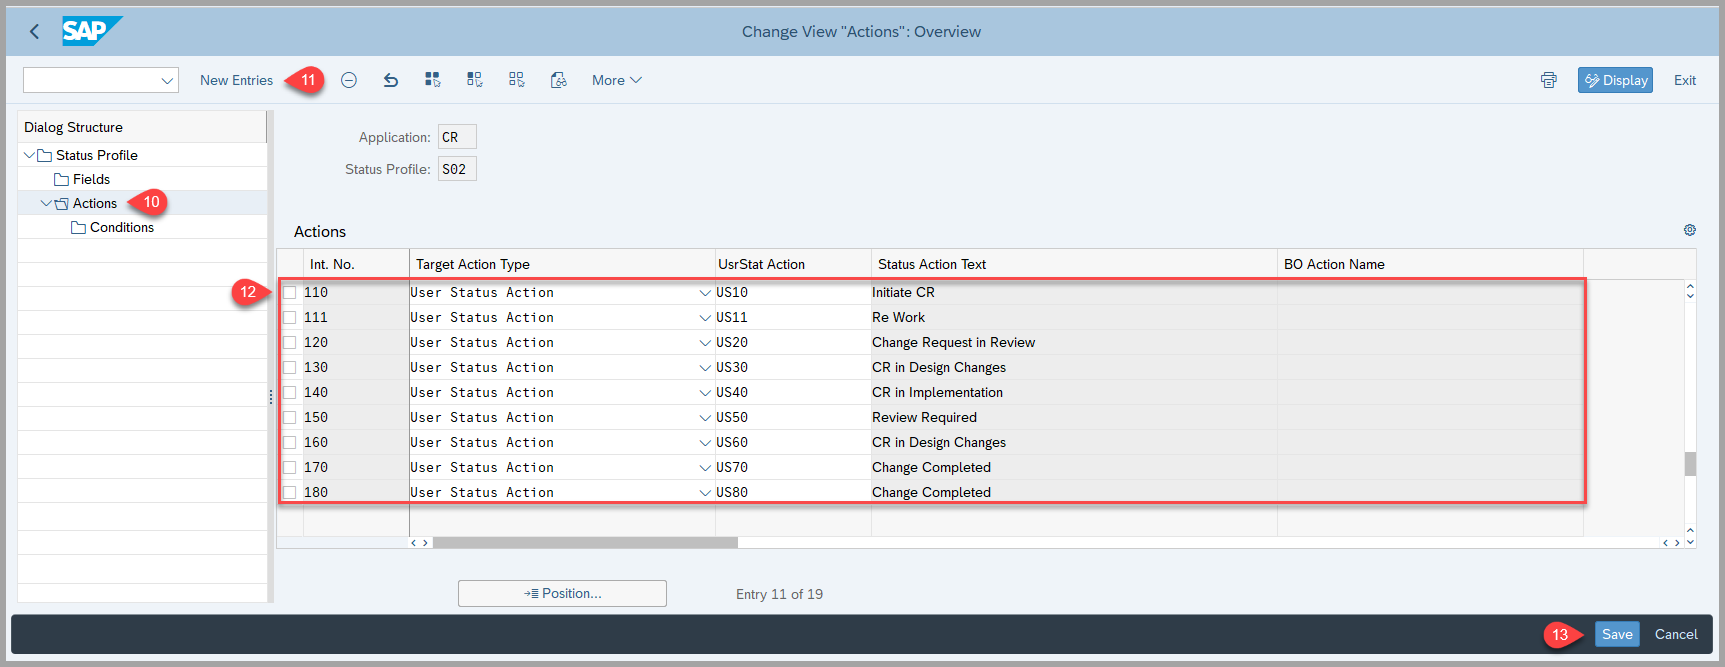 Step 4 - Under Conditions, you need to define conditions for each action.
Prerequisites
To be able to use the user status actions, you must first include them in a status profile Customizing activity.
Customization Steps - BRF+
General Information
BRF+ Decision tables are used to store new settings for your change Management without any need for code. Here’s how they work:
- Switch to edit mode;
- Add lines to the table and fill in the required columns;
- Save changes;
- Activate your changes;
- Before proceeding to further steps in customizing, you must create the BRF+ application following steps in BRF+ Generation - Process Control.
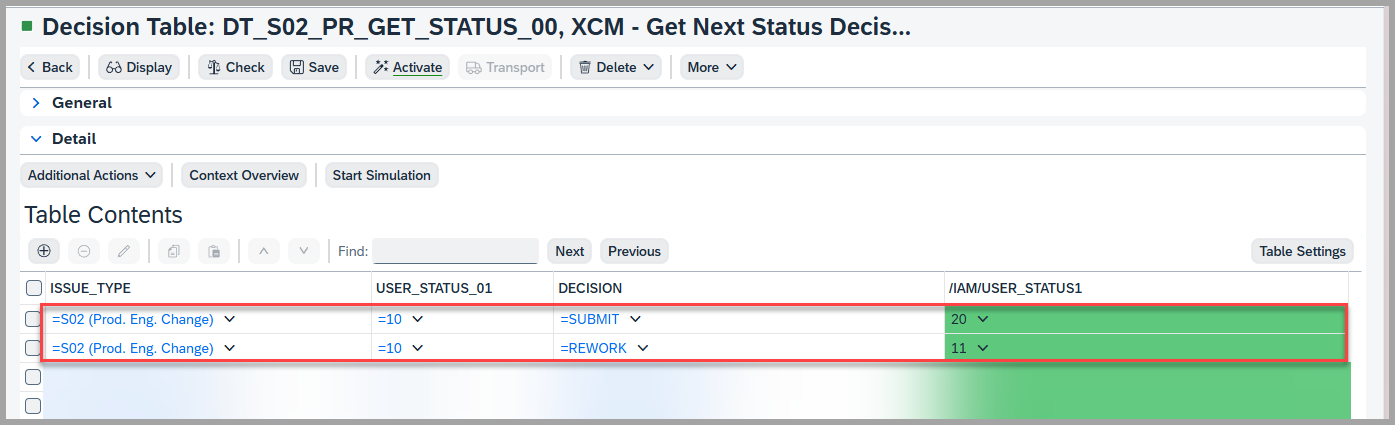
- You can define what will be the target user status after a certain task in the process route was approved or rejected by maintaining rules in BRF+
- Additionally, you can specify, which combination of Issue Type (change record type), User Status, and Decision a change record will be pushed to a different User Status and so on.
- You can also add any of the change record header fields as conditional columns to define the target status considering various conditions in BRF+
Keywords
User Statuses, Profiles, Actions, decision tables, condition columns, result columns.