IMG Customization
Overview
The status of a change record represents the current state of the change process with respect to the entire process flow. The change record goes through multiple statuses from the beginning of the change process, through its execution, till the end. Based on your business process, you can define the stages and the life cycle phases of the change process using Customizing steps mentioned below.
Customization Steps
1. Define User Statuses:
- You can configure different user statuses and corresponding actions in the system by navigating to IMG Path: Logistics – General > Product Lifecycle Management (PLM) > Change Records > User Statuses > Define User Statuses.
- Use this Customizing activity to define user status values and descriptions—for example, 10 (Initiate CR), 11 (Rework), and 20 (Change Request in Review). The selected user status will be displayed as the Record Status in the system.

The following progress chart provides you a visual representation of your status transitions and shows the progress you made in the entire change process.

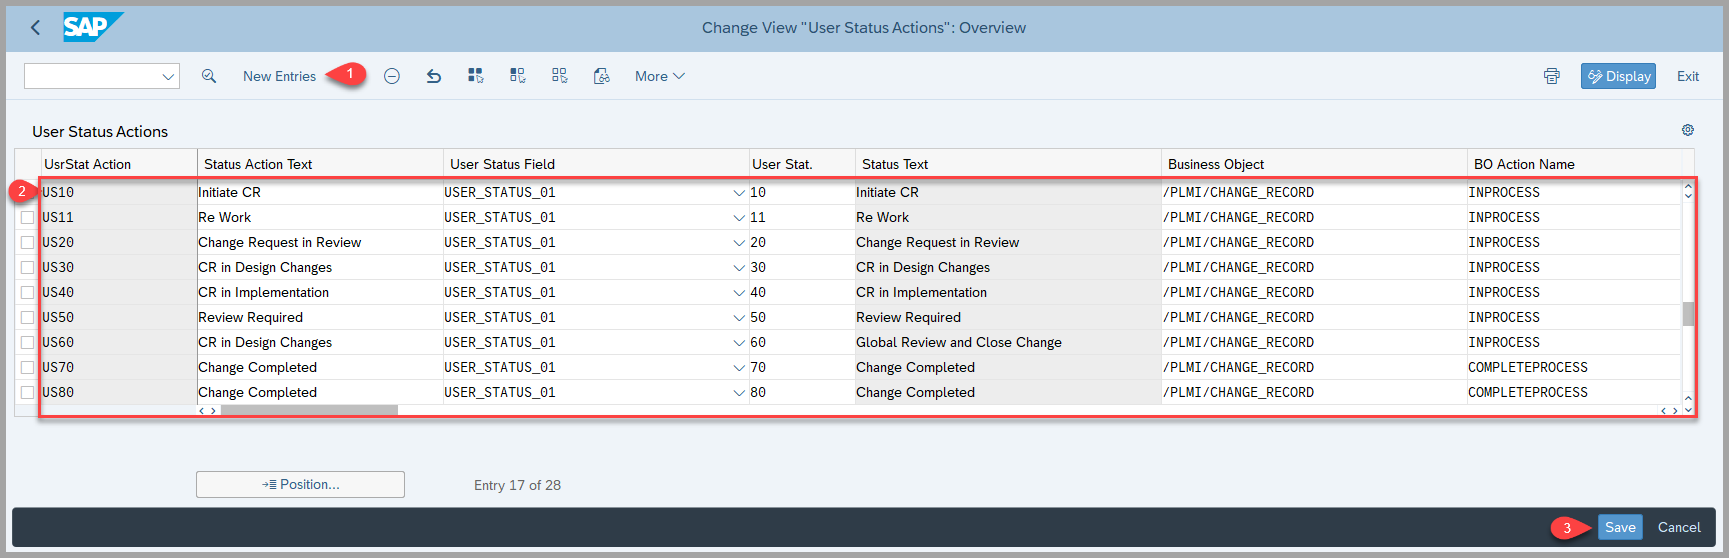
2. Define User Status Actions:
- You can link user status and execution status using the Customizing activity IMG Path: Logistics – General > Product Lifecycle Management (PLM) > Change Records > User Statuses >Define User Status Actions.
- When you assign a business object (BO) and its action to a user status, the system automatically triggers the BO action when the user status changes.
- You can link user status and execution status using the Define User Status Actions configuration (Logistics – General > PLM > Change Records > User Statuses).
- By assigning a business object (e.g., /PLMI/CHANGE_RECORD) and its action (e.g., IN PROCESS) to a user status (e.g., Change in Process), the system automatically triggers the BO action when the user status changes, updating the execution status accordingly.
3. Define User Status Profiles:
- To use user status actions, you must first add them to a status profile through the Customizing activity: Logistics – General > Product Lifecycle Management (PLM) > Change Records > User Statuses > Define User Status Profiles.
- In this profile, you can specify conditions that trigger a user status change. For example, if the current status is 120, transitions to statuses 10, 30, and 11 can occur either manually or via a background task, depending on the defined conditions.
- Note that the prerequisite for this step is completing step 2 above and creating the necessary user status actions.
Step 1 - Create a Status Profile

Step 2 - Under Fields, choose the status fields that you want this profile to include

Step 3 - Under Actions, define under which conditions an action is to be executed:

Step 4 - Under Conditions, you need to define conditions for each action.

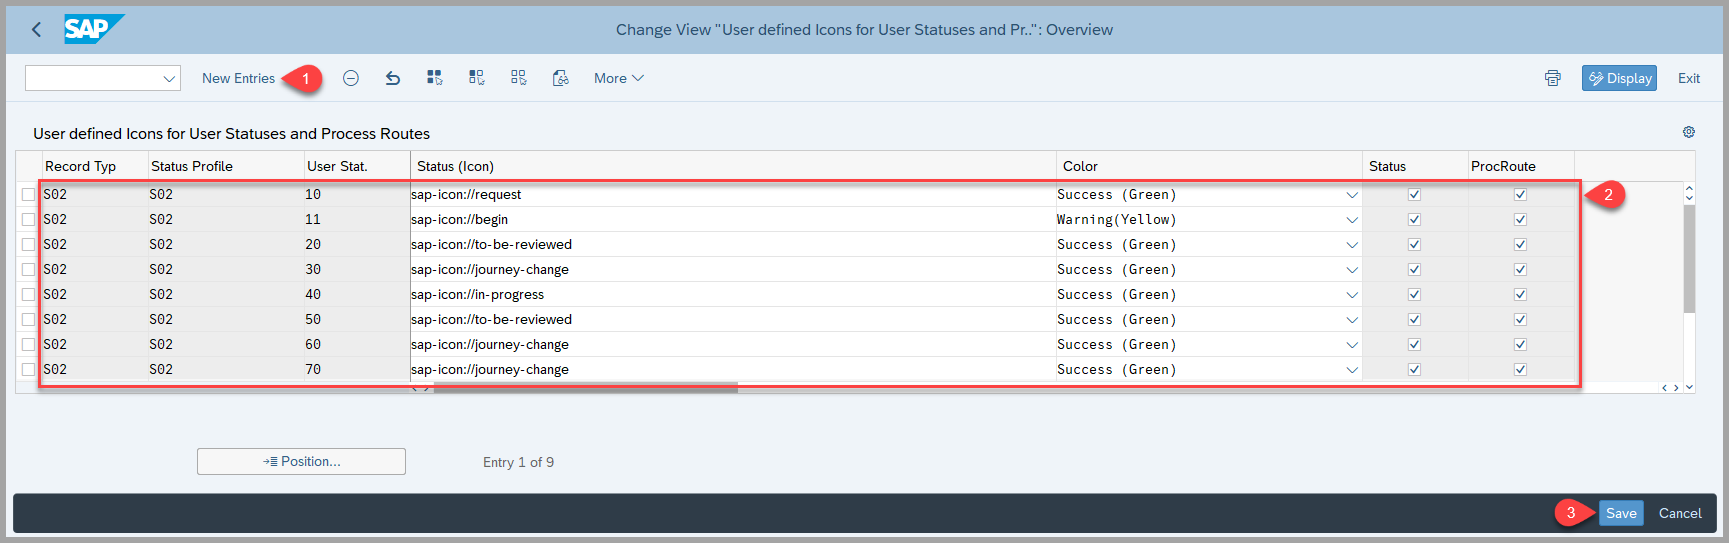
4. User Defined Icons for User Statuses and Process Routes
- This feature allows you to assign icons for the graphical representation of user-defined statuses and process route headers, providing a clear overview of the change process.
- You can also associate colors with these icons to indicate status progression—green for achieved and grey for not achieved.
- Additionally, colors can be assigned to status texts in the user status description to visually represent the current status of the change record.
- You can configure this under Logistics – General → Product Lifecycle Management (PLM) → Change Records → User Statuses → User Defined Icons for User Statuses and Process Routes.
Prerequisites
- To be able to use the user status actions, you must first include them in a status profile Customizing activity.
- You need to generate the BRF+ application. Please refer to the following link for the steps: BRF+ Generation -BRF+ Generation - Process Control
References:
Keywords
User Statuses, Profiles, Actions, decision tables, condition columns, result columns.